DIY Parts Tumbler Cleans Your Parts Good

Part tumbling is a method of deburring and cleaning relatively small objects. This is done by capturing the parts and media inside a rotating container. The agitation continually moves the media around all surfaces and corners of the part, smoothing them out resulting in a uniform finish. The media can be anything from specialty ceramic shapes to ball bearings to even sand. This process can be done in either a wet or dry condition. Think about the beach, the rocks there are smooth. This is due to the waves repetitively rubbing together the sand and stones which result in smooth round shapes.

[imp22b] recently got into ammo reloading and needed a way to clean his used shell casings. The casings are brass and after a little research online, [imp22b] found that a wet tumbling process with stainless steel pins for media was a DIY proven method for this casing material. He then went on to find a commercially available tumbler to model his build after, in this case a Thumler Model B. There is certainly no need to re-invent the wheel here.

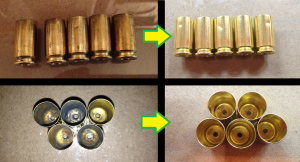
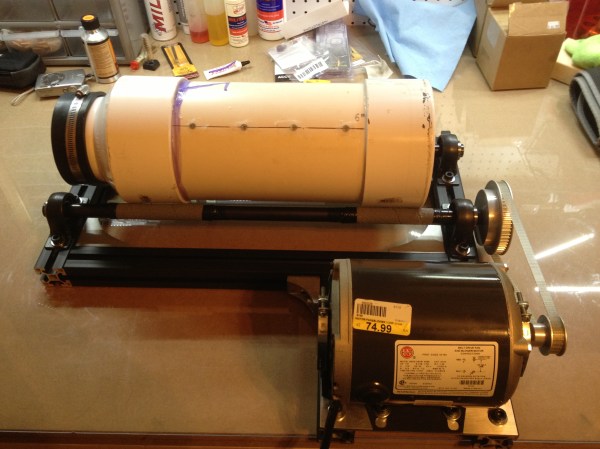
As you can see in the photo, aluminum extrusion was used as the frame. Mounted to the frame are 4 pillow block bearings with shafts between each pair. A motor drives one of the bearing-mounted rods which in turn rotates a container resting on the rods. [imp22b] started with a 1/15 hp motor that he had kicking around but that wasn’t powerful enough so he did have to step up to a 1/3 hp unit. The container is made from off the shelf PVC pipe pieces and holds the media and casings along with some water. A bit of Lemon Shine and Dawn detergents are also added and help clean the parts. After a few hours of tumbling, the casings look pretty darn good.
DIY Parts Tumbler

If you’re interested making your own simpler tumbler, check out this one that uses a hand drill or this one that uses a coffee can.

Temperature Data Logger

Temperature Data Logger Logs Temperature Over Time

Temperature Data Logger[Husham] not only likes his electronics projects but clearly enjoys documenting them as well. He’s written a nice Instructable on a Temperature Data Logger that he has built and thankfully makes his code available for others to use. The end product is cleanly designed and made for weather-proof outdoor applications.
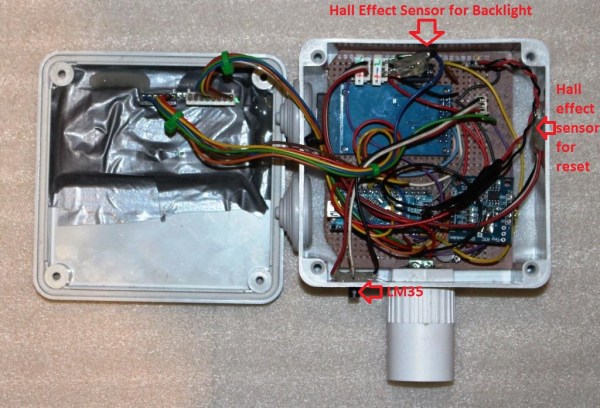
As you may expect, the brains behind this operation is an Arduino. It is coupled with a Real Time Clock to maintain accurate timing as well as an SD Card Module which is used to store the data collected. In this case, the temperature is read by a LM35 temperature sensor and that value, along with the time, is recorded to a .csv file on the SD card in one minute intervals.

There is also an LCD screen that displays the date, time and current temperature. To save battery life the LCD backlight is normally off. It can be turned on using a magnet that interacts with a hall effect sensor on the top of the case. This worked so well that [Husham] installed a second hall effect sensor on the side of the case that resets the Arduino. Speaking of the case, it is a weather proof PVC electrical box with a conduit adapter installed on the bottom side. A battery pack made up of two used laptop cells housed in a piece of conduit supplies 7.2 volts to the Arduino and other components. Unfortunately, there’s no word on how long the battery pack lasts. Once the data is logged, the SD card can be removed and the .csv file opened in spreadsheet software to make a graph showing temperature change over time.

DIY guitar mute pedal

Guitar Mute Pedal Made From Upcycled Parts

Rockin’ out on your fave guitar is pretty fun for sure but whether your on stage or jamming in your basement, it can be convenient to quickly mute those killer licks. [wozlaser] wanted a mute pedal for his guitar and instead of shelling out the tens of dollars for a commercial version, he decided to build one himself.

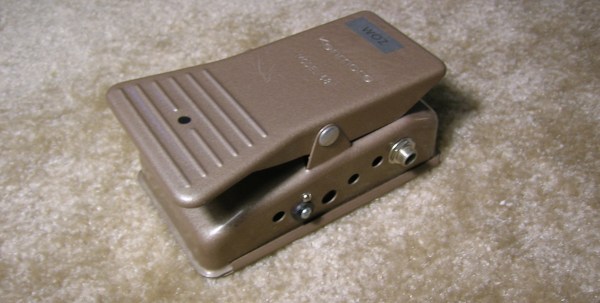
This pedal is heavy-duty and made out of metal. If the frame looks familiar, that is because in a prior life this was a control pedal for a sewing machine. [wozlaser] found it cheap at a thrift store. After the internals were taken out, he added a few key parts. First were the 1/4″ input and output jacks that were scavenged from an old stereo system. There is a momentary switch from a VCR and a standard guitar stomp pedal switch mounted all the way in the front of the frame. The wiring is as follows:

DIY guitar mute pedal

The wiring schematic is pretty darn simple, it just grounds and ungrounds the signal wire. As stated earlier, there are 2 switches, a momentary and a push-on/push-off switch. A normal mute pedal would only have one switch but [wozlaser] wanted something special. If you push the pedal all the way forward it will mute or unmute the signal until it is pushed again. When the pedal is in the spring-supported ‘up’ position a lever pushes on the momentary switch, a slight push on the pedal lifts the lever off of the momentary switch to mute or unmute the signal. The function of the momentary switch (mute or unmute) changes with the state of the other switch. This works exactly the same as a 3-way light switch circuit allows two switches to control one light in your house. With this setup [wozlaser] is able to not only mute and unmute his guitar but strum a chord with it off and pulse the chord on to the beat of the music or tap the pedal with some guitar feedback to make the sound cut in and out. All that only cost [wozlaser] a little time and spare parts… and there are no batteries to replace!

Arduino CNC Sewing Machine

Arduino Controlled Sewing Machine Increases Stitch Options

[Andrew] is bringing his old mechanical sewing machine into the 21st century by adding an Arduino control module. Originally, his Alfa sewing machine could only do a straight stitch or a zig-zag of varying widths. Since this was an old sewing machine, all of the controls were knobs and levers. RC car servos were installed in the sewing machine and now are solely responsible for controlling, in real time, the horizontal movement of the needle and the amount of stroke of the feed dogs (the metal components responsible for advancing the fabric through the sewing machine). There is also a switch on the needle bar that feeds back to the Arduino when the needle is in the full-up position.

With full control of the stitch width and fabric advance, it is possible to come up with some awesome stitch patterns that were not possible on this machine before. Each of the stitch patterns are pre-programmed in the Arduino. Right now it is possible to control the sewing machine over the Arduino’s serial USB connection but the workflow for such an operation is in its infancy. [Andrew] plans on making this sewing machine fully automatic so that he can embroider letters and numbers.

Although the project is still a work in progress, [Andrew] has made his preliminary Arduino code available for folks who want to further his accomplishments. To continue reading about hacked sewing machines, check out this one converted to an embroidering machine.

Continue reading “Arduino Controlled Sewing Machine Increases Stitch Options”

Dremel Light Ring

Light Ring Allows Precise Dremeling

Whether you are working at home, in the office or in the shop, proper lighting is pretty important. Not having proper lighting is a contributor to fatigue and visual discomforts. Prolonged straining of the eyes can result in headaches, eye twitching, blurred vision and even neck pain. [pinomelean] likes to make chemically etched PCB boards and he was having a hard time seeing while drilling those boards for the through-hole components. So, he did what any good hacker would do and came up with a solution: a light ring for his Dremel.

Yes, [pinomelean] does prefer to drill his PCB holes by hand with a Dremel. Since he was already a competent PCB board maker, he decided that it would be an appropriate method to make a light ring. The light ring itself is round with a center hole just over 0.750″ in diameter. This hole slides over the 3/4-12 threaded end that most Dremels have for attaching accessories. The stock Dremel decorative  ‘nut’ secures the light ring PCB to the tool. There are pads for 9 surface mount LEDs and through holes for a current-limiting resistor and pins to connect a power supply, which in this case is an old phone charger. In the end the project worked out great and [pinomelean] can clearly see where those holes are being drilled!

If you’re interested in making one of these light rings, [pinomelean] graciously made his board layout available in his Instructable. If you think one would go well with a soldering iron, check this out.

resourceful cnc router

Resourceful CNC Router Built From Hardware Store Parts

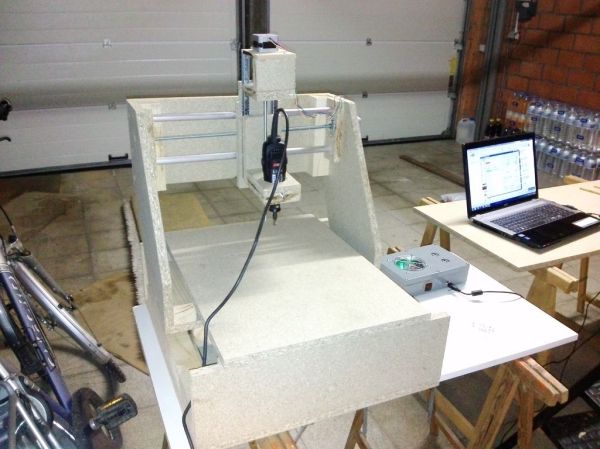
[siemen] has entered the wonderful world of Hobby CNC with his low-buck build of this gantry-style router. It embodies everything we here at HaD love: resourcefulness, perseverance and results. [siemen] has designed his frame using ideas he has found while surfing around the ‘net and is made entirely out of particle board. For linear movement, the Y and Z axes rely on ball bearing drawer slides while the X axis use a pipe and skate bearing arrangement. NEMA 17 stepper motors coupled to threaded rod move each axis.

The electronics are packaged in a nice little project box which houses an Arduino and 3 Sparkfun EasyStepper stepper motor drivers. [siemen] also cut a hole in the project box and installed a fan in order to keep those motor drivers cool. The Arduino is flashed with the CNC machine controller called GRBL. GRBL takes g-code sent from a PC to the Arduino and then in turn sends the required step and direction signals to the stepper motor drivers.

Overall, [siemen] did a great job with his first CNC project which came in at 200 Euro ($240). He’s currently working on version 2 and we are looking forward to covering it when it’s done. If you dig this project, you may also like this wooden wood router or this bolt-together one.

Continue reading “Resourceful CNC Router Built From Hardware Store Parts”

dremel base station

DIY Super Accessory For Your Dremel

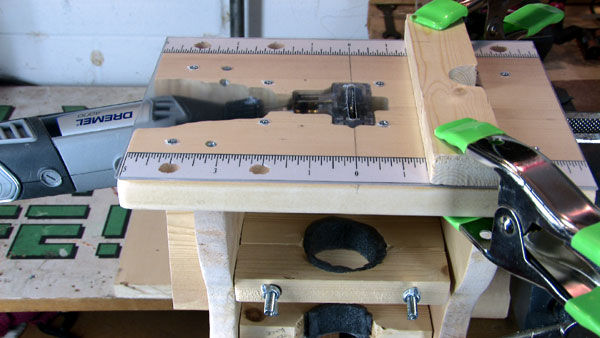
Little jobs require little tools and you can’t get much more littler than a Dremel. For his tiny tasks, [sdudley] has built a Dremel-powered base station that features a table saw, drum sander and router table. Overall, it is about one cubic foot in size and is almost entirely made from ‘1 by’ dimensional lumber. The Dremel power plant was actually used to make the base, specifically slowly removing material at the clamping points that hold the rotary tool secure to the base. The Dremel is held in an upright position and pokes out through the center of the table for both the drum sander and router configurations. To use this as a table saw, the Dremel is mounted almost horizontally on the base. A Mini Saw attachment has to be purchased for the table saw configuration but it does a great job at holding a vertically spinning saw blade.

After the break there’s a nice video of this tool’s use and assembly (it’s even worth watching just for the musical accompaniment that takes you on a wild ride through several genres of music). For those who want to make one for themselves, [sdudley] has made his part templates and assembly guide available in PDF format on his Instructables page. If you’re looking for something a little larger, check out this circular saw converted to a table saw.

Continue reading “DIY Super Accessory For Your Dremel”