Music in a CD Case

This CD Jewel Case Plays Music Without A Disc

We’ve all heard the terrible greeting cards that have soundbites of 2 bit jingles that usually make you want to tear the battery out… but Hallmark is finally catching up with technology and now including real music in their cards — it might only be about 10 seconds, but hey, it’s a step!

They’re still pretty corny though, and we’re not really sure what even dictates an ideal situation to give someone an audible greeting card — but regardless, [Dmitry Grinberg] thought he could do better than Hallmark — and we’d have to agree. He’s created a New Year’s Greeting card using a CD jewel case, and what he’s packed inside is pretty incredible.

The case, when opened, will play a full-length song in full fidelity. Next time you open it, it’ll play something new and at random, from its very own micro SD card 300-song library.

Continue reading “This CD Jewel Case Plays Music Without A Disc”

tweeter

Repairing Burnt Speakers With A Steady Hand

[Martin] seems to have a knack for locating lightly damaged second-hand audio gear. Over the years he’s collected various types of gear and made various repairs. His most recent project involved fixing two broken tweeter speakers.

He first he needed to test the tweeters. He had to remove them from the speaker cabinet in order to gain easier access to them. The multimeter showed them as an open-circuit, indicating that they had likely been burned. This is an issue he’s seen in the past with this brand of speaker. When too much power is pumped through the speaker, the tiny magnet wire inside over heats and burns out similar to a fuse.

The voice coil itself was bathing in an oily fluid. The idea is to help keep the coil cool so it doesn’t burn out. With that in mind, the thin wire would have likely burned somewhere outside of the cooling fluid. It turned out that it had become damaged just barely outside of the coil. [Martin] used a sharp blade to sever the connection to the coil. He then made a simple repair by soldering the magnet wire back in place using a very thin iron. We’ve seen similar work before with headphone cables.

He repeated this process on the second tweeter and put everything back together. It worked good as new. This may have ultimately been a very simple fix, but considering the amount of money [Martin] saved on these speakers, it was well worth the minimal effort.

A Scanning Electron Microscope For The Living Room

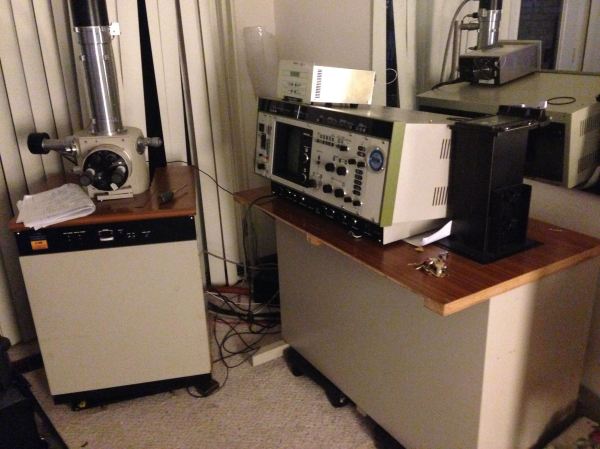
There are hackers who have soldering setups on the dining room table, and then there are hackers who have scanning electron microscopes in their living room. [Macona] is part of the latter group, with a Hitachi S-450 SEM he’s repaired and modified himself. [Macona] has documented the whole thing on Hackaday.io. The Hitachi came to him and a friend as a derelict. First it was broken, then stored for 10 years. It turned out the problem was a high voltage cable cut and spliced with electrical tape. The tape eventually broke down and shorted out the 500V supply. Thankfully the rectifier diodes were the only parts that needed to be replaced.

analog1
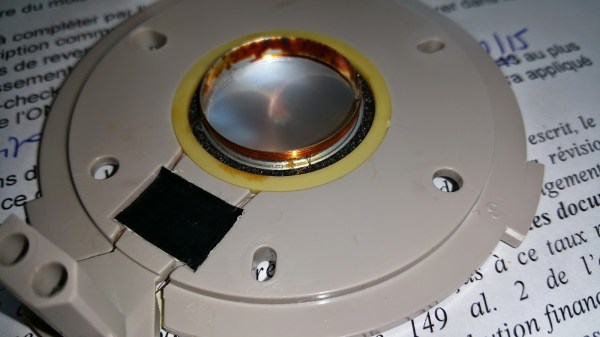
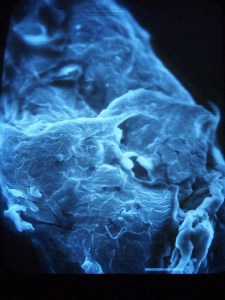
The SEM sprang to life and gave [Macona] and a friend their first images. However, SEMs are finicky beasts. Eventually the filament burned out and needed to be replaced. New filaments are $500 US for a box of 10, which is more than [Macona] wanted to spend. It turns out filaments can be built at home. A bit of .089mm tungsten wire and a spot welder were all it took to fix the issue. Next to go bad was the scan amplifier. While SEMs use many exotic parts, the Hitachi used relatively common Sanyo STK070 audio amplifiers for the purpose – an easy fix!

One thing that makes this SEM unique is the is Energy Dispersive X-Ray Spectroscopy (EDX) unit attached to it. The fragile liquid nitrogen cooled sensor was working, but the 1980’s era signal processing computer was a bit too old to bring up. A friend and fellow SEM hobbiest gave [Macona] a slightly newer Kevex Sigma Gold signal processor, which was nearly a plug and play upgrade for his machine. The new processor processor also gave him digital beam controls and a digital output which could be used to capture images with a PC.

Once all the connections were made, the EDX worked surprisingly well, even finding gold in a uranium ore sample placed in the microscope.

Now that old scanning electron microscopes being retired, it’s only a matter of time before more us get a chance to join the ranks of [Jeri Ellsworth], [Ben Krasnow] and [Macona] with our own personal SEMs!

Redundant Automated Water Filler For Your Coffee

We’ve always wondered why we have indoor plumbing if it isn’t hooked up to our coffee pots. We probably drink as much coffee as water anyway, so why not just hook up a water line to refill the pot? [Loose Cannon] aka [LC] has been working on just that problem, with a whole lot of extra features, creating a very robust automatically-filled, gravity-fed, vacuum-sealed water tank for whatever appliance you have that could use it, including your coffee pot.

[LC] tapped into the 1/4″ water line from the ice maker, which has the added bonus of being a common size for solenoid valves. He’s using an eTape sensor to measure the water level in the reservoir, but he ALSO is using a flow meter in the line itself to double-check that the reservoir won’t overflow. The flow meter allows a hard limit to be set for the maximum amount of water allowed into the tank. He’s used an Arduino Micro to tie the project together, which also handles a real-time clock so the tank can be filled on a schedule.

The tank that [LC] was trying to fill was vacuum-sealed as well, which made things a little trickier. Without a vacuum on the tank, the water would just run out of the overflow valve. This is an interesting project that goes way beyond the usual automatic water supplies for coffee pots we’ve seen before.

Tire assembly room of the Brunswick Tire Corporation

Retrotechtacular: Brunswick Shows A Bias For Tires

Somewhere between the early tires forged by wheelwrights and the modern steel-belted radial, everyone’s horseless carriage rode atop bias-ply tires. This week’s film is a dizzying tour of the Brunswick Tire Company’s factory circa 1934, where tires were built and tested by hand under what appear to be fairly dangerous conditions.

It opens on a scene that looks like something out of Brazil: the cords that form the ply stock are drawn from thousands of individual spools poking out from poles at jaunty angles. Some 1800 of these cords will converge and be coated with a rubber compound with high anti-friction properties. The resulting sheet is bias-cut into plies, each of which is placed on a drum to be whisked away to the tire room.

Continue reading “Retrotechtacular: Brunswick Shows A Bias For Tires”

Dremel Light Ring

Light Ring Allows Precise Dremeling

Whether you are working at home, in the office or in the shop, proper lighting is pretty important. Not having proper lighting is a contributor to fatigue and visual discomforts. Prolonged straining of the eyes can result in headaches, eye twitching, blurred vision and even neck pain. [pinomelean] likes to make chemically etched PCB boards and he was having a hard time seeing while drilling those boards for the through-hole components. So, he did what any good hacker would do and came up with a solution: a light ring for his Dremel.

Yes, [pinomelean] does prefer to drill his PCB holes by hand with a Dremel. Since he was already a competent PCB board maker, he decided that it would be an appropriate method to make a light ring. The light ring itself is round with a center hole just over 0.750″ in diameter. This hole slides over the 3/4-12 threaded end that most Dremels have for attaching accessories. The stock Dremel decorative  ‘nut’ secures the light ring PCB to the tool. There are pads for 9 surface mount LEDs and through holes for a current-limiting resistor and pins to connect a power supply, which in this case is an old phone charger. In the end the project worked out great and [pinomelean] can clearly see where those holes are being drilled!

If you’re interested in making one of these light rings, [pinomelean] graciously made his board layout available in his Instructable. If you think one would go well with a soldering iron, check this out.

3D Printing Circuits Gets Rid Of The Box Altogether

Many think that the next big step in 3D printing is when we’ll be able to print in metal, well, at an affordable rate. But what about printing in metal and plastic at the same time?

The thing is, most electronics are typically two-dimensional. Layers upon layers of relatively flat PCBs make up the brains of every bit of technology we know and love. The funny thing is, we live in a three-dimensional world, and we like to shove these flat circuits into three-dimensional boxes. Well, what if we didn’t have to? What if the circuit could be embedded directly into whatever shape we want? It’d be pretty awesome — minus the whole servicing aspect of the product…

Anyway we’ve seen some great hacks over the years attempting this, like adding a copper wire strand into your 3D print, embedding components into your print by pausing the job, or even going old school and using the point-to-point Manhattan style circuit construction to add some electronic features to your part. But what if your printer could do it for you?

That’s exactly what Optomec is attempting with the Voxel8 3D printing electronics platform. It is your standard run of the mill FDM style 3D printer, but it has a 2nd extruder that is capable of squeezing out liquid silver ink that dries at room temperature. Just take a look at this quadrotor they were able to make.

Continue reading “3D Printing Circuits Gets Rid Of The Box Altogether”