Rock Tumbler Doubles As Ice Cream Maker

When working with limited space or even with limited funding, finding a tool that can do many things for less space or cost than its separate counterparts is a tempting option. The most common downside is that these tools often can’t perform as well as the single-purpose tools they replace, with the obvious example being a pocket-sized multitool or Swiss Army knife. Even things like combination drill and driver tools, adjustable crescent wrenches, or even a kitchen stand mixer can’t quite perform as well as their dedicated counterparts. So when we find a tool that can do two things equally well, like this rock tumbler that can also make a delicious bowl of ice cream, it’s definitely noteworthy.

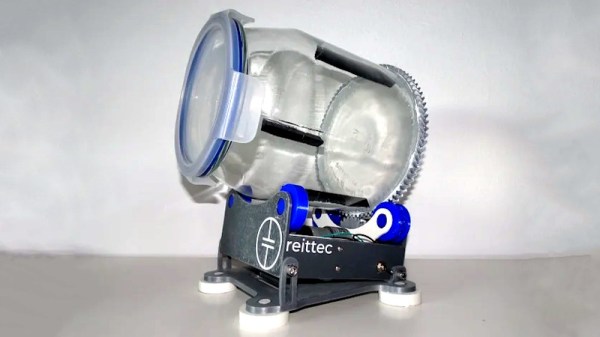
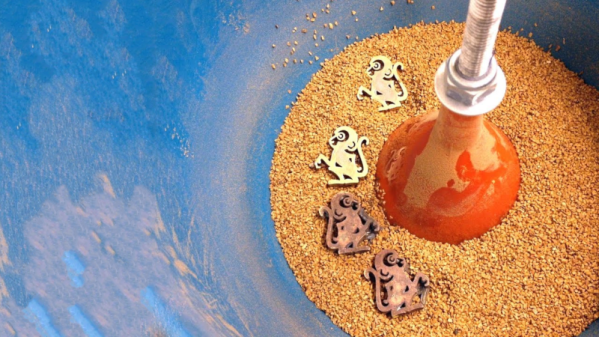
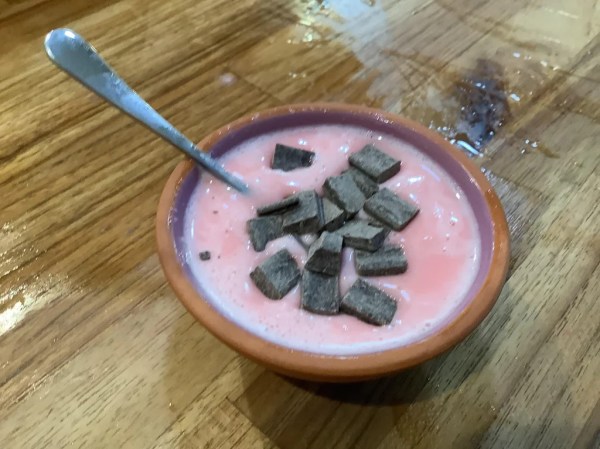
The project comes to us by way of [North_Stordeur] whose main goal was to create a delicious bowl of ice cream but was deterred by the cost of purpose-built ice cream makers. Making ice cream isn’t a particularly complex process, though, and [North_Stordeur ] realized that grinding down ice for ice cream shares similarities with tumbling and polishing rocks. Normally, the rocks to be polished are placed in a drum with grit and a liquid, then the drum is placed on the tumbler and spun, which causes the rocks to bounce around inside the drum with the grit and smooth out relatively quickly. Replacing sugar for grit, ice for rocks, and milk for the liquid, the ice eventually is worn all the way down, creating an excellent bowl of ice cream.

Truly, the only downside we could see with a build like this is that the drum in the National Geographic rock tumbler that [North_Stordeur] chose for this project looks like it would only make a single serving at a time. However, with picky eaters around who like their own additions to ice cream, this might be a perk as everyone can make exactly the style they like with their own choice of flavors. It’s an excellent discovery for anyone already grinding and polishing rocks or someone who has already built a DIY ball mill for any number of other uses.

Tube Tumbler Provides The Perfect Culture

We’ve all had to shake jars of nail polish, model paint, or cell cultures. Mixing paint is easy – but bacteria and cells need to be agitated for hours.  Happily, laboratory tube tumblers automate this for us. The swishing action is handled with rotation. The vials are mounted at angles around a wheel. The angular offset means the tubes are inclined as they rise, and declined as they fall. This causes the liquid in the tube to slosh from one side to the other as the wheel rotates.  [Sebastian S. Cocioba] aka [ATinyGreenCell] released his plans through Tinkercad and GitHub, and with a name like Sir Tumbalot, we know he must be cultured indeed.

Grab your monocles. Version 2 features a driven wheel lined with magnets to attach tube adapters, and he’s modeled 50mL and twin 15mL tube holders. The attachment points look like a simple beveled rectangle with a magnet pocket, so if you’re feeling vigorous for vials, you can whip up custom sockets and tumble any darn thing. A Trinamic StealthChop chip on a custom PCB controls the pancake stepper, and the whole shebang should cost less than $50USD. We’re wondering what other purposes this modular design could have, like the smallest rock tumbler or resin print rinser.

Making lab equipment is phenomenal for saving money for things that just spin up to a biotech lab.

Continue reading “Tube Tumbler Provides The Perfect Culture”

Tumble Polisher Smooths Parts With Ease

When you’re 3D printing parts, it’s easy to create pieces with all manner of complex geometry. However, you’re often stuck dealing with unsightly layer lines and other surface imperfections. [reitter_m] chooses to get around this through the use of a tumble polisher of his own design.

The polisher uses a drum made out of a glass jar sourced from IKEA. A 3D printed gear is printed to size, and then fitted around the outside. This allows the drum to be turned by a motor fitted into the base of a 3D printed cradle. A simple gear motor is used to spin the drum nice and slowly, powered by a 12 V, 500 mA supply.

It’s a build that uses readily available parts, and should be a cinch to recreate by anyone with a 3D printer. The later revision uses an even more common IKEA jar, making it even easier to copy the build no matter where you are in the world. It even uses herringbone gears which gives it a very offbeat look. We’ve seen other hacked tumbler projects too, like this one built around an old case fan. Video after the break.

Building A Vibration Tumbler On The Cheap

There are few tasks quite as laborious as sanding and polishing. Any job that takes a lot of time and elbow grease is a prime candidate for mechanical help, and this one is no exception. At the suggestion of friends, [VegOilGuy] decided it was time to invest in a vibration tumbler. Naturally, building it rather than buying it was the order of the day.

If you’ve ever used an electric sander, you’ll know they’re an excellent source of vibration. Initially, the intention was to build a tumbler with the sander being removable and still usable for its original purpose. A clamping base was constructed with cable ties, wood, and Bondo, but sadly to no avail. The Velcro connection to the plastic tumbler bowl was simply not robust enough to hold up to repeated use.

Instead, the sander was permanently bolted to the tumbler bowl, yielding more positive results. A funnel was then also added to the bowl, to improve media circulation and reduce the amount required. Initial tests were positive, with the tumbler successfully polishing some cast brass parts using crushed walnut shells. [VegOilGuy] is still looking for a more abrasive media to use for initial patina removal, however.

Sometimes the best tools are the ones you build yourself. In this case, it’s a cheap and easy way to get a vibration tumbler and the results are great. If sanders aren’t your speed, why not check out this fan based build instead? Video after the break.

Continue reading “Building A Vibration Tumbler On The Cheap”

DIY Parts Tumbler Cleans Your Parts Good

Part tumbling is a method of deburring and cleaning relatively small objects. This is done by capturing the parts and media inside a rotating container. The agitation continually moves the media around all surfaces and corners of the part, smoothing them out resulting in a uniform finish. The media can be anything from specialty ceramic shapes to ball bearings to even sand. This process can be done in either a wet or dry condition. Think about the beach, the rocks there are smooth. This is due to the waves repetitively rubbing together the sand and stones which result in smooth round shapes.

[imp22b] recently got into ammo reloading and needed a way to clean his used shell casings. The casings are brass and after a little research online, [imp22b] found that a wet tumbling process with stainless steel pins for media was a DIY proven method for this casing material. He then went on to find a commercially available tumbler to model his build after, in this case a Thumler Model B. There is certainly no need to re-invent the wheel here.

As you can see in the photo, aluminum extrusion was used as the frame. Mounted to the frame are 4 pillow block bearings with shafts between each pair. A motor drives one of the bearing-mounted rods which in turn rotates a container resting on the rods. [imp22b] started with a 1/15 hp motor that he had kicking around but that wasn’t powerful enough so he did have to step up to a 1/3 hp unit. The container is made from off the shelf PVC pipe pieces and holds the media and casings along with some water. A bit of Lemon Shine and Dawn detergents are also added and help clean the parts. After a few hours of tumbling, the casings look pretty darn good.

DIY Parts Tumbler

If you’re interested making your own simpler tumbler, check out this one that uses a hand drill or this one that uses a coffee can.

A Peach Of A Homemade Parts Tumbler

[Chris] finds the average price of rock tumblers insulting. Almost as insulting, in fact, as prepackaged fruit salad made with Chinese peaches. While there may be little he can do about the peaches, he has given the finger to lapidary pricing by making his own tumbler on the very cheap.

Simply put, he drilled a hole in bottom of the peach vessel and then stuck a threaded rod through it. He held the rod in place with a nut and a washer. After securing the proper permits to source sand and water from his property, he put both in the jar along with some old nails that had paint and crud on them. [Chris] put the rod in the chuck of his drill and clamped the drill in his bench vise. Half an hour later, he had some nice, shiny nails. Make the jump to be amazed and entertained. If you prefer using balls, check out this homemade mill.

Continue reading “A Peach Of A Homemade Parts Tumbler”

Case Feeder Makes Your Ammo Reloading More Efficient

case-feed-ammo-reloader

For those that are into reloading their own ammo you know that getting an efficient assembly line process figured out will make your sessions much more enjoyable and productive. [Msoejacobsk] knew that he could buy a case feeder for his system, but didn’t want to shell out two hundred bucks for it. After a bit of thought he was able to build this case feeder for around ten dollars.

The purpose of the rig is to orient each empty casing correctly and feed it to the reloading hardware. This is accomplished by first separating one casing at a time using this angled tumbler. The disc that makes up the floor has slots cut in it which are the size of one casing. When that slot gets to the highest point of its rotation there is an opening through which the casing falls. To ensure proper orientation a V-shaped piece of heavy wire has been place in the middle of the opening. This acts as a fulcrum, letting the heavier base pull the casing in that direction. You can see this happen in the clip after the break.

Continue reading “Case Feeder Makes Your Ammo Reloading More Efficient”