The Flight Of The Dremel

A few months ago we featured a model aircraft whose power plant came courtesy of an angle grinder. It was the work of [Peter Sripol], and it seems he was beseiged by suggestions afterwards that he might follow it up with a helicopter built using a Dremel rotary tool. Which he duly did, and the results can be seen in the video below the break.

The Dremel itself requires a gearing to drive the balsa-bladed rotor, and a tail rotor is mounted with its own motor at the end of a boom. The video has many entertaining failures which see him arrive at a set of balancing arms and a tailplane for stability. The result is a helicopter that flies after a fashion, and is even able to stay aloft for a few seconds rather than crashing to earth.

The machine lacks the full rotor pitch control of its commercial bretheren, indeed the only control is directional via the tail rotor. Still it deserves top marks for entertainment alone, and we wouldn’t mind a go ourselves. The original angle grinder craft can be seen here.

Continue reading “The Flight Of The Dremel”

Blender? No, Grinder

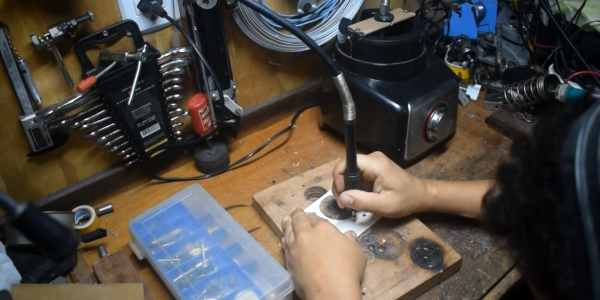
[Leandro Felipe] is no stranger to the dirty hack, and this video of his conversion of a blender into a handheld rotary grinding tool is no exception. (Embedded below.) But the end result is something pretty useful — a lighter and more maneuverable rotary grinder that’s got a lot more grunt to boot.

(The video is in Portuguese, but the captions work pretty well, once you get over the fact that the robots translate “grinding tool” as “rectifier” a lot of the time. And anyway, you’re here for the hacks.)

The highlights are a handmade coupling that mates the blender motor with the flexible shaft and chuck, purchased separately. And the flattened-out PVC pipe used as a mounting bracket. And him using the motor itself against a file to “lathe” down the drive shaft. And…

The tip of the day comes when he holds the blender motor in a metal vise to test it out. Metal and spinning magnets — what’s the worst that could happen?  Sparks, smoke, and a trip to the thrift store for another used blender.

If you just want to see the finished piece, you can jump ahead to the end. But it’s basically, get yourself a speed-adjustable blender, couple it to the shaft of an off-the shelf grinder, and you’re set.

It’s an idea so conceptually easy, you might wonder if Hackaday has ever showcased a blender dr3mel before. We have. What else can you power with a blender motor?

Thanks [Danjovic] for the tip!

Continue reading “Blender? No, Grinder”

Small low-cost CNC mill with rotary tool

Minimal Mill: The Minamil

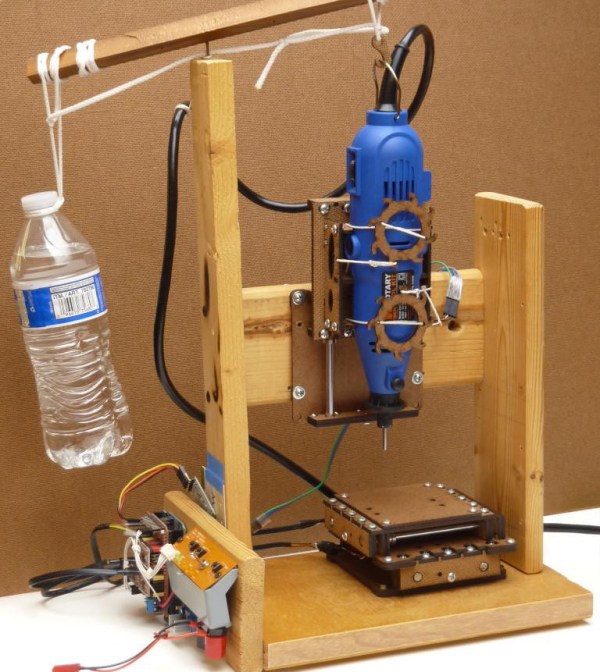
Having a few machine tools at one’s disposal is a luxury that not many of us are afforded, and often an expensive one at that. It is something that a large percentage of us may dream about, though, and with some commonly available tools and inexpensive electronics a few people have put together some very inexpensive CNC machines. The latest is the Minamil, which uses a rotary tool and straps it to an economical frame in order to get a functional CNC mill setup working.

This project boasts impressively low costs at around $15 per axis. Each axis uses readily available parts such as bearings and threaded rods that are readily installed in the mill, and for a cutting head the build is based on a Dremel-like rotary tool that has a similarly low price tag. Let’s not ignore the essentially free counterweight that is used.

For control, an Arduino with a CNC shield powers the three-axis device which is likely the bulk of the cost of this project. [Paul McClay] also points out that a lot of the material he needed for this build can be salvaged from things like old printers, so the $45 price tag is a ceiling, not a floor.

The Minamil has been demonstrated milling a wide variety of materials with excellent precision. Both acrylic and aluminum are able to be worked with this machine, but [Paul] also demonstrates it in its capacity to mill PCBs. It does have some limitations but for the price it seems that this mill can’t be beat, even compared to his previous CNC build which repurposed old CD drives.

Syringes Put The Squeeze On This Mini Drill Press

If you’re making your own PCBs for through-hole projects at home, getting the board etched is only half the battle; you’ve still got to drill all those little holes. It’s a tedious process, and if you’ve got a lot of them, doing them freehand with a drill just isn’t going to cut it. Which is why [Ruchir Chauhan] built this tiny 3D printed drill press.

This design is actually interesting for a number of reasons. The fact that it’s primarily 3D printed is a big one, though of course it’s not the first time we’ve seen that. We also like the minimal part count and low-cost, which is sure to appeal to those looking to produce PCBs on a budget. But the most impressive feature has to the hydraulic system [Ruchir] has come up with to actually do the drilling.

Rather than pulling an arm to lower the bit towards the work piece, a system utilizing four syringes, some water, and a bit of tubing is used to pull the tool down. This might seem extravagant, but if you’ve got a lot of holes to drill, this design is really going to save your arms. This method should also give you more consistent and accurate results, as you won’t be putting any torque on the structure as you would with a manually operated press.

[Ruchir] doesn’t offer much in the way of instructions on the project’s Hackaday.io page, but once you print out all of the provided STLs and get your syringes ready to go, the rest should be fairly self explanatory. Personally we might have added a smooth steel rod in there to make sure the movement is nice and straight, but we can see the appeal of doing it with a printed part to keep things cheap.

Looking for more ideas? If you’re after something a bit larger we might suggest this one made from PVC pipes, and this 3D printed desktop press would look good on anyone’s bench. Just don’t blame us if your arms get tired.

Continue reading “Syringes Put The Squeeze On This Mini Drill Press”

Solving Buyer’s Remorse With A Rotary Tool And Soldering Iron

At this point, it’s pretty clear that USB-C has become the new standard connector for an increasing amount of applications, but predominantly charging. Even Apple is on board this time, and thanks to backwards compatibility, you don’t have to abandon devices using the older standards you may prefer for their simplicity or superior lint-resilience either. For [Mat] on the other hand, it’s USB-C all the way nowadays. Yet back in the day when he bought his laptop, he had the price tag convince him otherwise, and has come to regret it, as all the convenience of a slim design is cancelled out by dragging a bulky charger for the laptop’s proprietary charging port along.

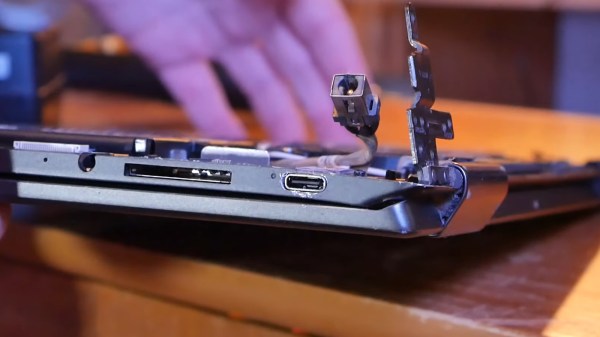
Well, as the saying goes for situations like this: love it, leave it, or get out the tools and rework that sucker. Lucky enough, the original charger provides 20 V, which matches nicely the USB power delivery (PD) specification, and after opening up the laptop, [Mat] was happy to see that the interior provided enough room to fit the USB-C module he was planning to use. Even better, the charging port itself was a standalone component attached to a cable, so no modifications to the mainboard were necessary. Once the USB-C module was soldered to that same cable, the only thing left to do was carving a bigger hole on the laptop case, and saying good bye to the obsoleted charger.

The downside is of course the lack of actual USB functionality with that shiny new charging port, but that was never the goal here anyway. With more and more USB-C devices popping up, it’s also no surprise that we’ve seen modifications like this before, and not only with laptops. In case you’re thinking of upgrading one of your own devices to USB-C, and do wish for actual USB functionality, don’t worry, we got you covered as well.

Continue reading “Solving Buyer’s Remorse With A Rotary Tool And Soldering Iron”

Old School Rotary Tools That Weren’t Made By Dremel

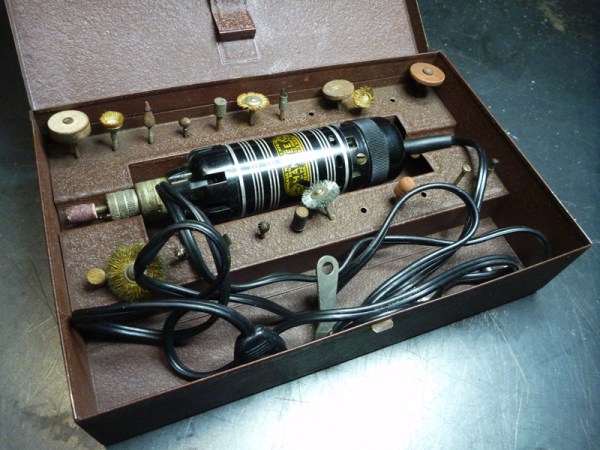
Albert Dremel developed the now famous rotary tool and started the company in 1932 to make blade sharpeners. It would be 1935 before the company produced the Moto-Tool which is mostly recognizable as an ancestor of the modern Dremel.

Dremel achieved such dominance that today the name is synonymous with rotary tools in the same way Xerox means photocopy and Crock-Pot is any slow cooker. Sure, there are knock offs you can get from the usual cheap tool outlets, but generally, people reach for a Dremel even when it isn’t really one. Today that tool might really be a Black and Decker or a Dewalt or even a cheap brand like Wen or Chicago Electric. But in the first half of the 20th century, you might have reached for a Handee.

A Whole Shop Full of Tools

The Handee was a product of the Chicago Wheel and Manufacturing Company who, in 1937, billed it as “a whole shop full of tools in one,” as you can see in this ad. While $10.75 might sound like a price for a Harbor Freight cheapie tool, adjusted for inflation that’s around $200 in 2020 money. At least for that price you got three free accessories out of the over 200 available.

I didn’t remember the Handee and I wanted to see if I could figure out what happened to it and the company who made it. After all, with the Internet at your disposal, how hard could it be? Turns out, I did learn a lot, but in the end, tracing down a company like this from the old days isn’t always as easy as you might think.

Continue reading “Old School Rotary Tools That Weren’t Made By Dremel”

A Drop-In Upgrade Module For Cheap Rotary Tools

We’ve all seen them, the rotary tools that look almost, but not quite exactly, like a Dremel. They cost just a fraction of the real thing, and even use the same bits as the official Bosch-owned version. At first glance, they might seem like a perfect solution for the hacker who’s trying to kit out their workshop on a tight budget. There’s only one problem: the similarities between the two are only skin deep.

Recovering components from the original controller

As [Vitaly Puzrin] explains, one of the big problems with these clones are the simplistic electronics which have a tendency to stall out the motor at low RPM. So he’s developed a drop-in replacement speed controller for his particular Dremel clone that solves this problem. While the module design probably won’t work on every clone out there in its current form, he feels confident that with help from the community it could be adapted to other models.

Of course, the first step to replacing the speed controller in your not-a-Dremel is removing the crusty old one. But before you chuck it, you’ll need to recover a few key components. Specifically the potentiometer, filter capacitor, and the motor terminals. You could possibly source the latter components from the parts bin, but the potentiometer is likely going to be designed to match the tool so you’ll want that at least.

The microprocessor controlled upgrade board uses back EMF to detect the motor’s current speed without the need for any additional sensors; important for a retrofit module like this. [Vitaly] says that conceptually this should work on any AC brushed motor, and the source code for the firmware is open if you need to make any tweaks. But hacker beware, the current version of the PCB doesn’t have any AC isolation; you’ll need to take special care if you want to hook it up to your computer’s USB port.

On the other hand, if you’re willing to buy a cheap rotary tool just to crack it open and replace the electronics, you might as well just build your own. If you’re feeling particularly adventurous, you can always abandon the electric motor and spin it up with a tiny turbine. Continue reading “A Drop-In Upgrade Module For Cheap Rotary Tools”