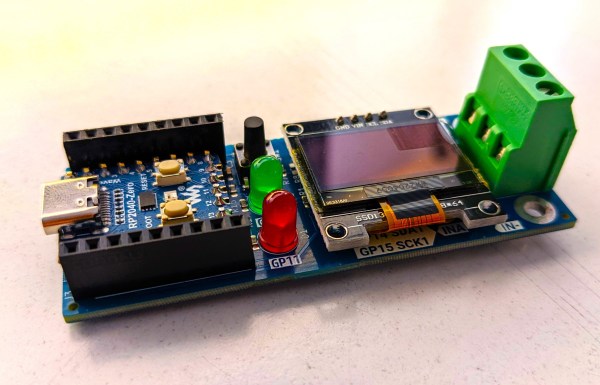
A PCB with an OLED display, a screw terminal block and a Raspberry Pi Zero board

Hackaday Prize 2023: Pi Pico Measures Volts, Amps And Watts

Measuring a voltage is pretty easy: just place your multimeter’s probes across the relevant pins and read the value. Probing currents is a bit trickier, since you need to open up the circuit and place your probes in series. Checking a circuit’s power consumption is the hardest, since you need to measure both voltage and current as well as multiply them at each moment in time. Fed up with having to hook up two multimeters and running a bunch of synchronized measurements, [Per-Simon Saal] built himself an automatic digital power meter.

The heart of this instrument is an INA219 chip, which can measure and digitize voltage and current simultaneously. It outputs the results through an I2C bus, which [Per-Simon] hooked up to a miniaturized version of the Raspberry Pi Pico called an RP2040-Zero. A screw terminal block is provided to connect the system to the device under test, while a 0.96″ OLED display shows the measured voltage, current and power.
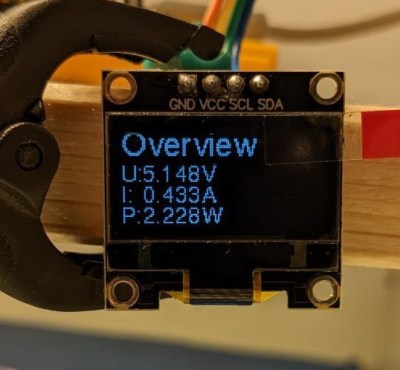
A small OLED display showing voltage, current and power measurementsThe maximum voltage that can be measured is 26 V, while the current range is determined by the shunt resistor mounted on the board. The default shunt is 0.1 Ω, resulting in a 3.2 A maximum current range, but you can get pretty much any range you want by simply mounting a different resistor and changing the software configuration. In addition to displaying the instantaneous values, the power meter can also keep a log of its measurements – very useful for debugging circuits that use more energy than expected or for measuring things like the capacity of a battery.

There are lots of ways to measure electric power, but they all boil down to multiplying current and voltage in some way. The multiplication was done magnetically in the old days, but modern meters like [Per-Simon]’s of course use digital systems. Some can even plug directly into a USB port. If you want to measure mains power, transformers are an essential component for safety reasons.

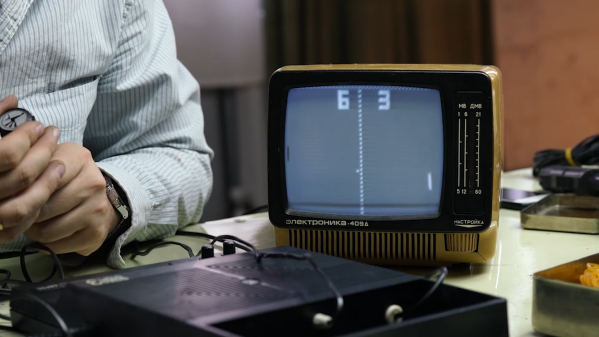
A small B/W TV showing a Pong-like game being played on a Soviet-era game console

Soviet-Era Pong Console Is Easy To Repair

Many early home video game consoles were developed by American and Japanese companies: think Nintendo, Commodore, and Atari. But on the other side of the Iron Curtain, which was still very much in place in the 1980s, an entirely separate industry was built on names like Tesla and Elektronika. As a resident of the republic of Georgia, [Thomas] over at Workshop Nation has built up a sizeable collection of such Soviet-era hardware. A while back, he stumbled upon an Elektronika Video Sport 3, a 1990-vintage Pong-like video game console made in the USSR, and made a delightful video that shows him bringing it back to life.

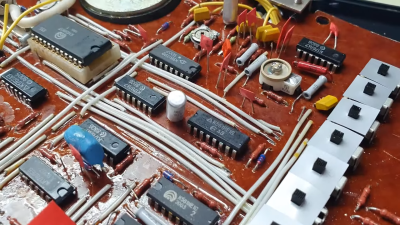
A circuit board from an Elektronika game consoleLike its Western counterparts, the Video Sport 3 is built around a dedicated chip, in this case a K145IK17. This is a Soviet clone of the GI AY-3-8500 that powered nearly every TV Pong console in the West, allowing it to run several variations of Pong as well as a simple target shooting game. Interestingly, the Video Sport 3 also has a “test” mode in which it outputs a test signal to help you adjust your TV settings — quite useful in the days of analog CRTs. It also came with a comprehensive user manual, as well as full schematics to help you repair it in case anything breaks.

[Thomas]’s device didn’t immediately work, which is why he opened it up and tried to find any errors. The main board he found inside was a beautifully hand-made, single-layer board with around a dozen chips and lots of discrete components. Nothing seemed obviously broken, but [Thomas] decided to replace a few electrolytic capacitors as a precaution. This turned out to be enough to get the console working again — dodgy caps truly are a universal problem with older hardware.

A small Elektronika black-and-white TV that [Thomas] found earlier forms a perfect complement to the Video Sport 3. Together, they give us a glimpse into what a typical video game setup may have looked like in an early 1990s Soviet home. In fact, the Eastern Bloc supplied a reasonably wide selection of home computers, although not many people could actually buy them. Some truly bizarre machines were also produced for professional users.

Continue reading “Soviet-Era Pong Console Is Easy To Repair”

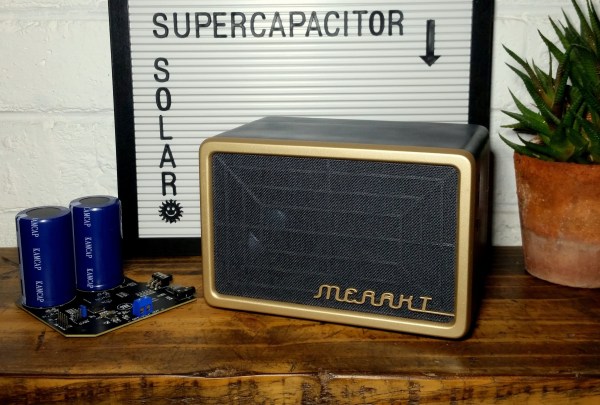
A loudspeaker with a supercapacitor PCB next to it

Hackaday Prize 2023: Supercapacitors Let Solar Speaker Work In Darkness

Solar panels are a great way to generate clean electricity, but require some energy storage mechanism if you also want to use their power at night. This can be a bit tricky for large solar farms that feed into the grid, which require enormous battery banks or pumped storage systems to capture a reasonable amount of energy. It’s much easier for small, handheld solar gadgets, which work just fine with a small rechargeable battery or even a big capacitor. [Jamie Matthews], for instance, built a loudspeaker that runs on solar power but can also work in the dark thanks to two supercapacitors.

The speaker’s 3D-printed case has a 60 x 90 mm2 solar panel mounted at the front, which charges a pair of 400 Farad supercaps. Audio input is either through a classic 3.5 mm socket or through the analog audio feature of a USB-C socket. That same USB port can also be used to directly charge the supercaps when no sunlight is available, or to attach a Bluetooth audio receiver, which in that case will be powered by the speaker.

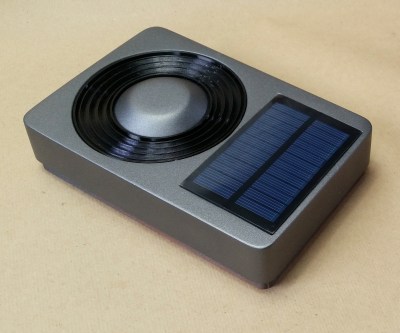
A speaker's passive radiator next to a solar panel
The solar panel sits right next to the passive radiator before both are covered with speaker fabric.

The speaker’s outer shell, the front bezel, and even the passive radiator are 3D-printed and spray-painted. The radiator is made of a center cap that is weighed down by a couple of M4 screws and suspended in a flexible membrane. [Jamie] used glue on all openings to ensure the box remains nearly airtight, which is required for the passive radiator to work properly. Speaker fabric is used to cover the front, including the solar panel – it’s apparently transparent enough to let a few watts of solar power through.

A salvaged three-inch Bose driver is the actual audio source. It’s driven by a TI TPA2013D1 chip, which is a 2.7 W class-D amplifier with an integrated boost converter. This enables the chip to keep a constant output power level across a wide supply voltage range – ideal for supercapacitor operation since supercaps don’t keep a constant voltage like lithium batteries do.

[Jamie] has used the speaker for more than nine months so far and has only had to charge it twice manually. It probably helps that he lives in sunny South Africa, but we’ve seen similar solar audio projects work just fine in places like Denmark. If you’re taking your boombox to the beach, a sunscreen reminder feature might also come in handy.

A man next to a robot with animatronic eyes and a CRT display showing an audio waveform

Animatronic Alexa Gives Amazon’s Echo A Face

Today, we’re surrounded by talking computers and clever AI systems that a few decades ago only existed in science fiction. But they definitely looked different back then: instead of a disembodied voice like ChatGPT, classic sci-fi movies typically featured robots that had something resembling a human body, with an actual face you could talk to. [Thomas] over at Workshop Nation thought this human touch was missing from his Amazon Echo, and therefore set out to give Alexa a face in a project he christened Alexatron.

The basic idea was to design a device that would somehow make the Echo’s voice visible and, at the same time, provide a pair of eyes that move in a lifelike manner. For the voice, [Thomas] decided to use the CRT from a small black-and-white TV. By hooking up the Echo’s audio signal to the TV’s vertical deflection circuitry, he turned it into a rudimentary oscilloscope that shows Alexa’s waveform in real time. An acrylic enclosure shields the CRT’s high voltage while keeping everything inside clearly visible.

To complete the face, [Thomas] made a pair of animatronic eyes according to a design by [Will Cogley]. Consisting of just a handful of 3D-printed parts and six servos, it forms a pair of eyes that can move in all directions and blink just like a real person. Thanks to a “person sensor,” which is basically a smart camera that detects faces, the eyes will automatically follow anyone standing in front of the system. The eyes are closed when the system is dormant, but they will open and start looking for faces nearby when the Echo hears its wake word, just like a human or animal responds to its name.

The end result absolutely looks the part: we especially like the eye tracking feature, which gives it that human-like appearance that [Thomas] was aiming for. He isn’t the first person trying to give Alexa a face, though: there are already cute Furbys and creepy bunnies powered by Amazon’s AI, and we’ve even seen Alexa hooked up to an animatronic fish.

Continue reading “Animatronic Alexa Gives Amazon’s Echo A Face”

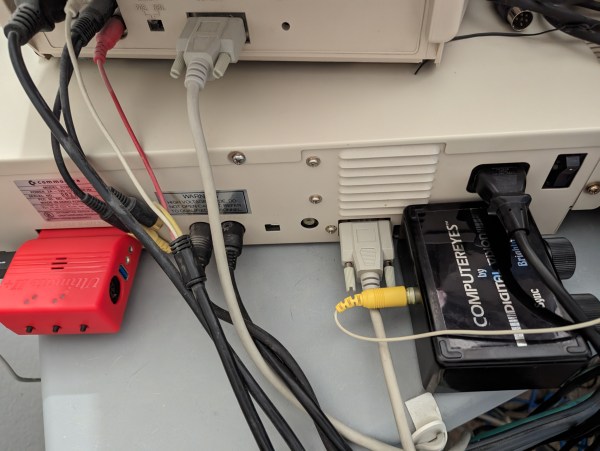
A Commodore 128 with a video capture device attached

Hacking The Commodore 128 To Capture Almost Real-Time Video

Although watching and editing videos may be among the primary tasks of many PCs today, it wasn’t that long ago that working with video required powerful processors and expensive video capture hardware. Even in the 1980s, home computer users were looking for ways to connect video sources to their Commodores and Ataris despite their hardware limitations. [Cameron Kaiser] has a mid-1980s consumer-grade video capture device, which he has managed to turn into an almost real-time video capture system.

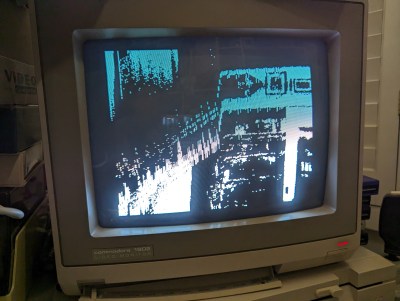
A distorted video image on a C128's monitor
Allowing the graphics chip to interrupt the CPU mid-capture results in a severely distorted image

His work revolves around a device called “ComputerEyes”, a 1984-vintage hardware interface that made it possible to connect a composite video source to a home computer. The limitations of mid-1980s CPUs meant that it took around six seconds for the computer to do a quick scan of a single video frame, or a multiple of that if you wanted a higher-quality image. Another limitation, at least on Commodore machines, was that the screen had to be turned off during video capture – otherwise, the video chip would interrupt the CPU halfway through the process, causing it to lose its synchronization with the video source.

[Cameron] however, plugged his ComputerEyes into a Commodore 128. This machine, largely designed by Hackaday contributor [Bil Herd], has an unusual hardware architecture consisting of two different CPUs and, crucially, two separate video chips. The primary 8564 “VIC-II” graphics chip is used to keep compatibility with existing Commodore 64 programs, while the secondary 8563 “VDC” is mainly aimed at newer high-resolution text-based software. The VDC is also much more independent from the main system bus than the VIC-II, allowing it to display an image without disturbing the CPU.

More after the break.

Continue reading “Hacking The Commodore 128 To Capture Almost Real-Time Video”

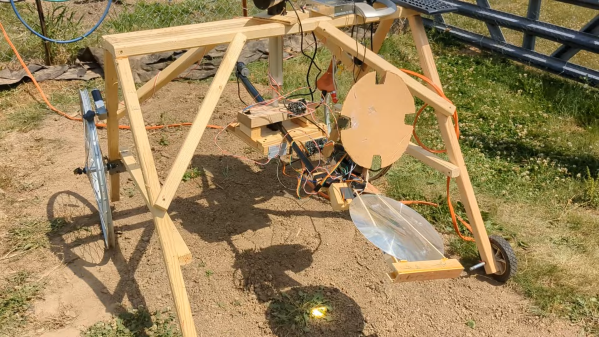
A wooden robot with a large fresnel lens in a sunny garden

Gardening Robot Uses Sunlight To Incinerate Weeds

Removing weeds is a chore few gardeners enjoy, as it typically involves long sessions of kneeling in the dirt and digging around for anything you don’t remember planting. Herbicides also work, but spraying poison all over your garden comes with its own problems. Luckily, there’s now a third option: [NathanBuildsDIY] designed and built a robot to help him get rid of unwanted plants without getting his hands dirty.

Constructed mostly from scrap pieces of wood and riding on a pair of old bicycle wheels, the robot has a pretty low-tech look to it. But it is in fact a very advanced piece of engineering that uses multiple sensors and actuators while running on a sophisticated software platform. The heart of the system is a Raspberry Pi, which drives a pair of DC motors to move the whole system along [Nathan]’s garden while scanning the ground below through a camera.

Machine vision software identifying a weed in a picture of garden soilThe Pi runs the camera’s pictures through a TensorFlow Lite model that can identify weeds. [Nathan] built this model himself by taking hundreds of pictures of his garden and manually sorting them into categories like “soil”, “plant” and “weed”. Once a weed has been detected, the robot proceeds to destroy it by concentrating sunlight onto it through a large Fresnel lens. The lens is mounted in a frame that can be moved in three dimensions through a set of servos. A movable lens cover turns the incinerator beam on or off.

Sunlight is focused onto the weed through a simple but clever two-step procedure. First, the rough position of the lens relative to the sun is adjusted with the help of a sun tracker made from four light sensors arranged around a cross-shaped cardboard structure. Then, the shadow cast by the lens cover onto the ground is observed by the Pi’s camera and the lens is focused by adjusting its position in such a way that the image formed by four holes in the lens cover ends up right on top of the target.

Once the focus is correct, the lens cover is removed and the weed is burned to a crisp by the concentrated sunlight. It’s pretty neat to see how well this works, although [Nathan] recommends you keep an eye on the robot while it’s working and don’t let it near any flammable materials. He describes the build process in full detail in his video (embedded below), hopefully enabling other gardeners to make their own, improved weed burner robots. Agricultural engineers have long been working on automatic weed removal, often using similar machine vision systems with various extermination methods like lasers or flamethrowers.

Continue reading “Gardening Robot Uses Sunlight To Incinerate Weeds”

An HP9863C partially disassembled on a workbench

Repairing A $25,000 HP Workstation To Run Pac-Man

The microcomputer revolution of the 1970s and 1980s turned computers from expensive machines aimed at professionals into consumer products found in the average household. But there always remained a market for professional users, who bought equipment that was so far ahead of consumer gear it seemed to belong in a different decade. While a home computer enthusiast in 1981 might fork out a few hundred dollars for an 8-bit machine with 64 KB of memory, a professional could already buy a 32-bit workstation with 2.8 megabytes of RAM for the price of a brand-new sports car. [Tech Tangents] got his hands on one of those machines, an HP Series 200 9863C from 1981, and managed to get it up and running.

The machine came in more-or-less working condition. The display cable turned out to be dodgy, but since it was just a straight-through sub-D cable it was easily replaced. Similarly, the two 5.25″ floppy drives were standard Tandon TM100-2As which [Tech Tangents] had some experience in repairing, although these specific units merely needed a thorough cleaning to remove forty years’ worth of dust. Continue reading “Repairing A $25,000 HP Workstation To Run Pac-Man