Too often we find ourselves featuring projects on these pages without giving much thought behind the people who made them. Nevertheless, behind the LED panels, github pages, and PCBs that make the hardware magic happen, there’s a person. And not just one person but an entire culture of people who let their conscious hours bleed late into the night over software bugs and bad solder joints. Noah Feehan is one of these veterans, and at this year’s Hackaday SuperConference, he reached out to this culture. Noah comes armed not with projects but with design tips and an infectious enthusiasm that will make you rethink how you use your time and space in the land of DIY. Armed with ten years of experience in art and engineering design, Noah delivers his best tips for fellow hackers. Spare yourself hours of confusion during future builds; kick back, and treat yourself to a few tips from a pro on keeping things together.
Software hackathons are an old hat these days. They’re a great scouting opportunity for talented candidates looking for a job, and they provide the battleground for coding enthusiasts to prove themselves by developing a project from start to finish overnight, albeit, with a few kinks. Hardware hackathons are an entirely different beast. By trading APIs for components and Python libraries for soldering irons, they pull the excitement out of the text editor and onto the workbench for everyone to see.
This article was written for the Omnibus vol #02 Order yours now
While hardware hackathons might be “the next big thing” with you and your four best DIY-pals, the broad range of physical components, from Arduinos to CNC milling time, makes rule-establishment, safety enforcement, and winning criteria far more difficult to constrain within a single night. Enter Muddhacks. This past October, three students from Harvey Mudd College set out to deliver a hardware hackathon that would open their student community’s mind to the thought of tinkering-for-fun in their spare time outside the lab and beyond their homework.
Students [Benjamin Chasnov], [Apoorva Sharma], and [Akhil Bagaria] had just finished their experimental engineering class: E80. Along the way, they designed a custom sensor payload into a meter-long rocket and launched both rocket and payload to measure the rocket’s fundamental frequencies in flight. With a victory behind them, they were ready for their next big project.
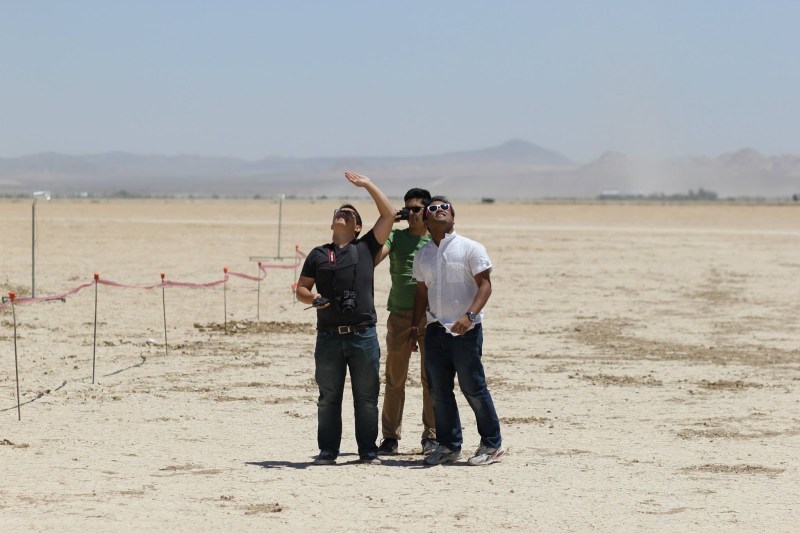
(Left to right) [Ben], [Apoorva], and [Akhil] stare skyward as their rocket launch sets them hungry for future projects.As the next semester waned onwards, however, they realized that any big project–no matter how modular–would be a serious time commitment. After some thought, they refactored their idea entirely. Tinkering was a passion shared by each of them; why not spread the love school-wide and bring together a community of engineers-by-night? To resolve their craving for after-hours engineering and to inspire a culture of collaborative tinkering, they set out to bootstrap a hardware hackathon; an event where many projects could be realized by many students in a single night.
Everyone Says Hardware is Hard
For the unitiated, hardware looks hard. Breadboards, LEDs, r`esistors? To those who have never put together a simple circuit before, taking that first leap is a challenge set by a box of components that almost seems to glare back menacingly. The three teammates took this first-timer roadblock as a challenge unto themselves to break down that barrier. Thus, HackWeek was born.
HackWeek was the MuddHacks teams’ answer to get students comfortable gluing modules together to produce a functional project in a short time. How do I make things move? How do I connect things to the internet? What parts do I choose? All of these questions-worth-answering became topics of the three-day event before the hackathon. The idea behind HackWeek was simple: give eager students enough theory and a functional demo that they could probe, tweak, and recompile so that they could feel more comfortable developing their own ideas into projects. On day one, the MuddHacks team brought functional demos of various motors into the hands of eager students. By day two, the three teammates actually assembled a functional hack of their own before the eyes of their listeners: an internet-enabled microwave that could remotely start warming up that cup of ramen on your way back from class.
[Akhil], [Ben], and [Apoorva] bring the Phone-Microwave to life at HackWeek while users try to fire it up remotely.Unlike software hackathons, a successful hardware hackathon involves parts, and the MuddHacks team was well-prepared to bring the participants the parts that they wanted. With ten days to go before the event, [Ben] took orders from each team’s desired list of parts. With a day to go, all parts arrived before the event and made it to their respective user’s hands in “goodie bags” on the last day of HackWeek. On this last day, teams opened their bags and explored the parts given to them and to other teams while taking advice from the mentors present to offer tips for using various components. This time for “open-exploration” ensured that the following night spent hacking would be more fruitful, now that teams had cleared the starting questions for various parts on the previous day.
On the night of MuddHacks, [Ben], [Apoorva], and [Akhil] had completely turned their original aim to build their own project into a night spent mentoring the projects of others. Throughout the night, they became the “ground crew,” bringing advice to debugging teams and keeping the night culture alive with two waves of snacks. “We felt that if students were going to come to our event, it was our responsibility to keep them both awake and happy,” Apoorva mentioned. Classrooms refilled for the night with students eager to bring their robots, LEDs, and gantries to life, but other parts of the school came to life as well. The machine shops reopened, and old oscilloscopes and test equipment emerged from the engineering stock room for loan to any teams that needed them. Even a few professors happened to wander into classrooms and offer advice.
For [Ben], [Apoorva], and [Akhil], fostering a sense of community in tinkering became their top priority. As they wandered between teams, they encouraged stellar performers to take a brief break and help out another team through a bug. At the night’s end, a number of early-rising professors joined the crowd of students to judge the winners. Oddly enough, the MuddHacks team didn’t spend any money on the prizes–but no one seemed to notice or care. For the eighth of the entire undergraduate student body that attended, these students weren’t coming for the prizes. They came to join that culture of tinkerers–to be a fellow hardware-hacker-by-night–eager to do their part to make the world blink.
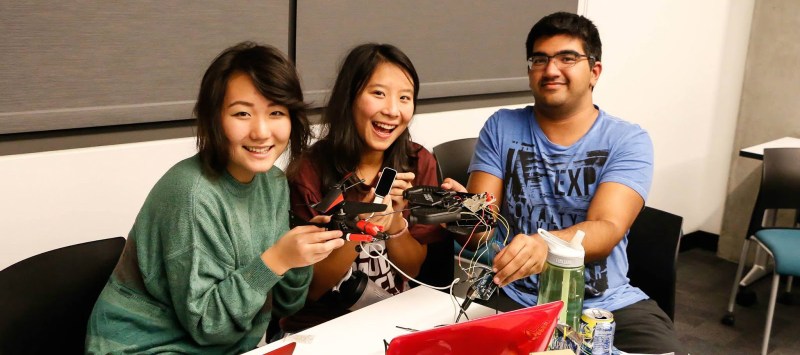
(Left to right) Erin Paeng, Cherie Ho, and Shaan Gareeb take first place by rewiring an rc helicopter for hand-control with a Leap Motion
How to Deliver a Hardware Hackathon
When was the last time you burned yourself downloading someone else’s API? Probably never. With a hardware hackathon, comes a new wave of challenges not seen before in the software variant. With one successful hackathon under their belt, we asked the MuddHacks Team to share some insights for other teams looking to assemble their own hardware hackathon. Here’s what they came up with.
Getting Funding
Charging participants an entrance fee may solve the problem of funding, but for the thrifty, starving student, entrance fees may also weed out people who had a slight curiosity but weren’t eager to throw a few bucks down to support it. The solution? Bring participants in for free and support the hackathon with external funding. The MuddHacks team reached out to a number of companies and encouraged them to take a sincere look at their website and cause.
Administrivia
The Muddhacks team handled most of their administrative work online. Among the tools they chose were
Google Forms for parts orders and feedback
Slack and email lists for real-time updates during the event
Google Spreadsheets for keeping track of order requests
Bootstrap for deploying a website
Assembling Teams
The Muddhacks team mandated that students form teams to enter the hackathon, mostly to foster community and collaboration. They reasoned: “If you already build things for fun on your own, you don’t need a hackathon to get you excited about hardware for the first time.” Most teams self-assembled, but the Muddhacks team also suggests a submission form for stragglers to pair up.
Getting Parts
Ten days before the hackathon, [Ben] put out a call to order parts in a $100 budget range. Each team made part requests, and [Ben] then ordered each of these parts in time for the hackathon. In addition, the Muddhacks team also ordered a collection of additional stock hardware (think: Arduinos and shields).
Setting the Stage
The Muddhacks team received permission to host the night event on the third floor of one of their buildings filled with classrooms. Among points to consider for the setting are:
reliable Wi-Fi connectivity
power outlet access
Safety
Soldering irons and sleep-deprivation don’t mix well. Among the points to consider for safety are tools that will keep users safe (safetly glasses and ventilation in this case). The MuddHacks team also recommends a safety waiver.
Advertising and Swag
Getting people excited is key. Logos, T-shirts, and Mugs all add to the authenticity of the one-night event. The Muddhacks Team brought in each of these to its participants. In addition, they printed posters, deployed a website and facebook page, and pitched to students directly in their computer science and engineering classes.
Keeping the Night Moving
Feed the masses. The MuddHacks team reminds us that, as the hosts and organizers of the event, it’s your responsibility to make sure that attendees are both awake and enjoying their time. Not only did the team provide two rounds of food, they also walked around and engaged participants that needed some help debugging, effectively becoming an extra set of eyes to track down bugs as mentors throughout the night.
Judging
The MuddHacks team brought in their favorite professors to judge teams’ projects. At this event, the MuddHacks team stresses that all participants deserve to see all projects. Not only can they witness something awesome, they can also engage their peers with questions, effectively learning a few extra tricks that they didn’t discover while working on their own project.
Priming for Next Year
From the MuddHacks Team: “Take pictures!” While the first website and facebook page were filled with images of the tools and the setting, next years website and advertisements could be filled with pictorial proof of the promise to participants of a genuine experience. As the first hackathon closes, they also stress that you, the organizers and founders, learn too; and the best way to do so is to collect feedback with some manner of online form. At the same time, this form could also recruit additional hands for assembling next year’s hackathon.
We hope these tips from a stellar hackathon serve as a starting point for developing one of your own. To learn more about MuddHacks, take a quick visit to their website: MuddHacks.com, or follow them on their Facebook page.
This article was specifically written for the Hackaday Omnibus vol #02. Order your copy of this limited edition print version of Hackaday.
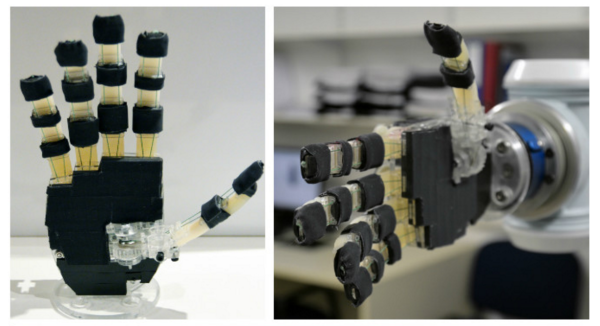
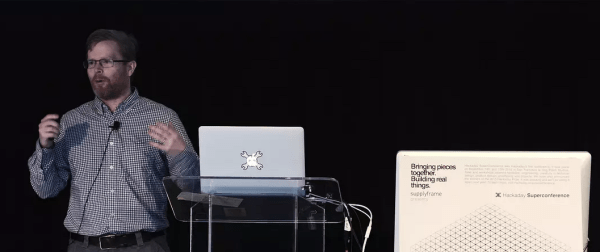
Humans may all have the same overall form, but when we need to find a suitable replacement for a missing limb, it’s clear that between the variety of finger-lengths and hand-breadths, a one-size-fits-all prosthetic just wont cut it. OpenBionics puts a spin on today’s approach to prosthetics, putting forth a framework of tools that’s flexible enough to fit the spectrum of hand shapes and enables us to create our own prosthetic at home that can meet the challenge of most everyday tasks.
Minas Liarokapis of the OpenBionics team gave a talk at this year’s Hackaday SuperConference which covered the design considerations and unique features of the project. This incredible work was recognized with 2nd Prize in the 2015 Hackaday Prize. Watch Minas’ talk below, then join us after the break as we cover more details that went into developing this prosthesis.
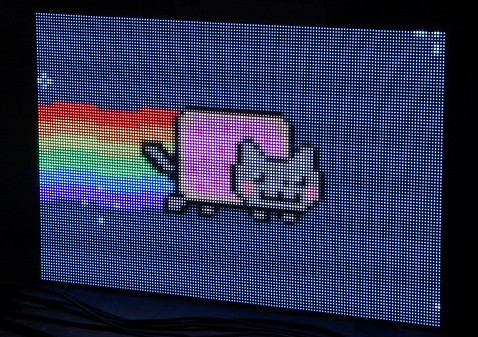
Quick–in a pinch, let’s have ourselves a giant RGB LED Matrix! As marvelous as it sounds, it’s pretty easy to forget that there’s a battle to be won against picking the right parts, debugging drivers, and sorting out our spaghetti wiring. Rest assured, [Hzeller] has done all of the heavy-lifting for us with a Raspberry Pi RGB LED Matrix Implementation that scales to multiple panels and runs on any Pi model to date!
Offering 24-bit color at about 100 Hz for up to a grand total of 36 panels, [Hzeller’s] library is no slouch. The library enables customization of your panel arrangements, and a separate project (also [Hzeller’s] handiwork) makes this setup compatible with the pixel-pusher protocol as a network device.
It’s certainly true that many of ushaveathing for these displays, so you might ask: “have we seen this before? What’s all the fuss?” Like the others, the final product is a sight to behold, but [hzeller] and his implementation stands strong because of his phenomenal response to answering the question: how? In fact, almost more impressive is his comprehensive online documentation. Inside, [hzeller] details various hardware configurations for a custom number of panels or a particular flavor of Pi that drives them. He also provides references for pinout quirks and provides out-of-the-box software demos to ensure that anyone can bring this project to life. If a poorly-written or non-existent READMEs have made you shy away from building on an open-source project, fear not. From pinout quirks and out-of-the-box software demos, [hzeller] has covered all the bases and given us a project that folks of all levels of hacking.
Perhaps the best part of this project is the span of the audience that can take something away from it. If you’re a seasoned Linux junkie, dive into the source code to get a good feel of mechanics of how [hzeller] pushes this project onto a single core in a Raspi-2 configuration. If you’re new to digital electronics, let this project be your moment to pick up a Pi, a panel (or four), and run, knowing that [hzeller’s] README is the only tome you’ll need to light up the night.
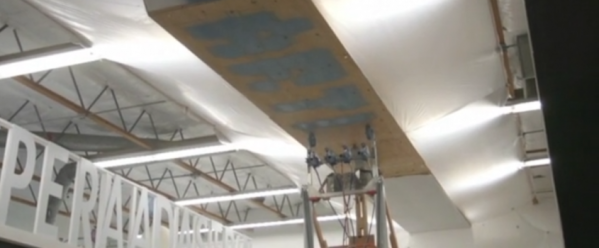
It’s not a day too late to switch your career from engineering to art or vice-versa! While some of us tend far towards one end or the other, some like [Chris] show us just how cool it is to walk the line… er, ceiling in this case. [Chris] took a cue from his fiancée’s latest mural project to create an automated painting jig he calls ARTbOT.
Spraying the ceiling with ARTbOT sounds like fun, but it’s a dream [Chris] needed to realize with only his spare time and small budget. Constraints aside, he’s pulled it off elegantly with a cluster of extruded aluminum tubing, a few paint sprayers, and a LabView-driven Fet triggered by encoder ticks on the drop wheel. To pain the image, it’s first binarized and scaled to accommodate ARTbOT’s 8-inch pixel size. ARTbOT then gets a boost from a scissor-lift where it can then track it’s linear position with the drop wheel to spray the pixel-pattern correctly.
[Chris] pulled this rig together to help his fiancée and her art company tackle huge canvases, in this case, large freeway underpasses. With preliminary studio tests running smoothly with ARTbOT proudly printing its name, we can’t wait to see the final piece. In the meantime, have a look at this edgy handheld alternative. Watch out mural artists! There’s an 8-bit contender in the ring these days.
We’ve seen them before. The pixel-perfect Portal 2 replica, the Iron Man Arc Reactor, the Jedi Lightsaber. With the rise of shared knowledge via the internet, we can finally take a peek into a world hidden behind garage doors, basements, and commandeered coffee tables strewn with nuts, bolts, and other scraps. That world is prop-making. As fab equipment like 3D printers and laser cutters start to spill into the hands of more people, fellow DIY enthusiasts have developed effective workflows and corresponding software tools to lighten their loads. I figured I’d take a brief look at a few software tools that can open the possibilities for folks at home to don the respirator and goggles and start churning out props.
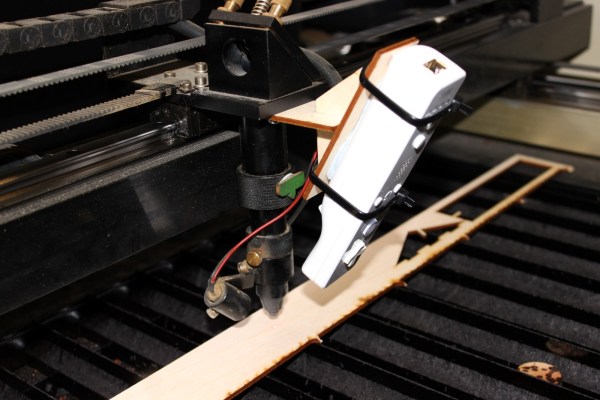
Still laser cutting all of your parts in 2D? Not the folks over at [Just Add Sharks]. With a few lines of code and an in-tact Wii-Mote, they’ve managed to rig their laser cutter to dynamically refocus based on the height of the material.
The hack is cleanly executed by placing the Wii-Mote both at a known fixed distance-and-angle and within line-of-sight of the focused beam. Thankfully, the image-processing is already done onboard by the Wii-Mote’s image sensor, which simply returns the (x,y) coordinates of the four brightest IR points in view. As the beam moves over the material, the dot moves up or down in the camera’s field-of-view, triggering a refocus of the laser as it cuts. Given that the z-axis table needs to readjust with the contour, the folks at [Just Add Sharks] have slowed down the cutting speed. Finally, it’s worth noting that the Wii-Mote was designed to detect IR LEDs, not a 10600-nanometer laser beam, but we suspect that the Wii-Mote is receiving colors produced by the fluorescing material itself, not the beam. Nevertheless, the result is exactly the same–a dynamically refocusing laser!
Now that [Glowforge] has released a continuously-refocusing laser cutter implemented with stereoscopic cameras, it’s great to see the community following in their footsteps with a DIY endeavor. See the whole system in action after the break!
![[Akhil], [Ben], and [Apoorva] bring the Phone-Microwave to life at HackWeek while users try to fire it up remotely.](https://hackaday.com/wp-content/uploads/2015/12/1498733_865206590158431_3338528161191372467_o.jpg?w=800)