Tiny 3x3x3 SMD LED Cube

led cube

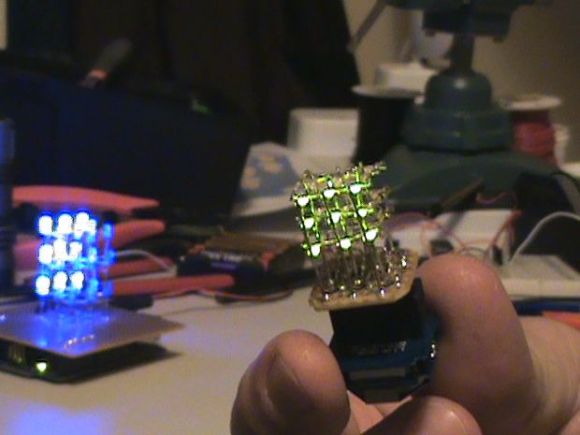
LED cubes are cool, but they’re usually pretty big and clunky. [One49th] set out to make one of the smallest LED cubes we’ve seen yet, and he’s shared how he did it in his Instructable!

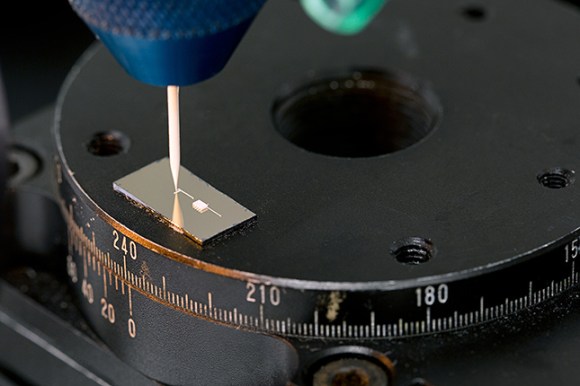
His first LED cube was the traditional kind, and it turned out pretty nice. But he wanted to go smaller — what about using SMD’s? What he did next was no simple feat — in fact, we’d be willing to call him an artist with a soldering iron. The array is just over one centimeter across.

Using a combination of vices and pliers he soldering each SMD onto his structure one by one. Each LED anode is tied together on each horizontal layer. Each cathode is tied together on each vertical column. This allows the TinyDuino to control any one LED by knowing which of the 9 columns and 3 layers the LED is on. Send a high signal to chosen layer, and a low signal to the column to light the LED. Doing this quickly allows you to create the illusion of different LEDs being on at the same time. Take a look through his image gallery to see just how tight the soldering quarters were, it’s definitely not something we’re planning on doing anytime soon!

Looking for a bigger cube? Check out this gorgeous 7x7x7 one that is capable of 142 frames per second!

Cellphone Charging Inductive Purse

projects_cell-phone-charging-purse-00

For whatever reason, cell phone companies really don’t seem to care about giving you a good battery for your phone. Here’s a great hack if you happen to have a purse — turn it into an inductive charger! Manpurses count too, we’re not judging.

[Becky] from Adafruit came up with a great idea for this wearable hack. If your phone is sitting in your purse for long periods of time, why not charge it? It’s a pretty simple hack that makes use of a pair of inductive charging loops. One is hidden inside the bottom of your bag of choice, and the other mounted to a fixture at work or home. She’s using magnets to snap her purse into place on a shelf at work — this ensures the coils line up so the full rated charge can be transmitted.

Another option is to put the entire inductive charging circuit inside your purse, then use a battery pack with a special pocket for you phone — that way the phone is always charging while it’s safely put away!

Stick around after the break to see the complete how-to video.

Continue reading “Cellphone Charging Inductive Purse”

Energy Harvesting Peltier Ring

[Sean] is by no means an electrical engineer, but when he discovered the magic of Peltier plates he knew he had to make a project with them. This is his Energy Harvesting Peltier Ring.

The effect he is harnessing is called the SeeBeck Effect — the process of generating electricity through temperature differentials. He has shown how peltier plates work to many people, and, as you can guess, most people think they are amazing (free energy wow!). Unfortunately, most peltier plates are rather large and bulky, so [Sean] decided he wanted to try to design something small enough that could fit on a ring. Just a proof of concept, to light a tiny SMD LED.

The tiny Peltier plate he found generates about 0.3V with a temperature differential of about 20C — not bad, but it won’t light up any standard LEDs at that voltage! He started looking into voltage steppers and discovered Linear Technology’s 3108 Ultralow Voltage Step-up converter and Power Manager — a surface mount chip capable of scaling 0.3V to 5V. The only problem? [Sean’s] never done surface mount soldering.

His first circuit was built on a prototyping board, and after it worked successfully, he designed a PCB using Fritzing. Another success! Prototyping complete, it was now time to try to downsize the PCB even more to fit on a ring. Realizing there was no way he was going to fit it on a single ring, he decided to make a double ring out of CNC machined aluminum. He made use of his school’s CNC shop and the ring came out great. It works too! The room has to be fairly cool for the LED to light, but [Sean] definitely proved his concept. Now to make it even smaller!

An Engineer’s Emergency Business Card

breakout_3

We’ve seen lots of circuit board business cards before, but none quite like this. [Saar] calls it the Engineer’s Emergency Business Card.

Since he actually makes a living from making circuit boards, it made sense for him to make a truly functional card. But unlike some of the fancier cards we’ve seen, you can’t plug it into your computer, or even open a beer with it! In fact, all it does is light up when a voltage is applied across the main pins.

But wait — why are all the components in through holes? Well, according to [Saar], that’s because it’s designed to be the electrical engineers emergency kit!

When all hope is lost, the MacGuyver engineer could snap out one of the components and save the day. Recall the countless times you desperately needed a 1 KOhm resistor to fix an amplifier at a party, only to see the girl you were trying to impress slip away with an OCaml programmer? Never again with this little kit. You even have 2 cm of solder in there to make sure the connection’s electrically solid!

We love it. Whether or not anyone will ever successfully use it in an emergency situation such as [Saar’s] hypothetical one is another question altogether. But we do have to give him creativity points for it, the artistic traces look awesome!

3D Printing Lithium Ion Cells

demo.web_.8x645_0

[Jennifer Lewis] is a Harvard Materials Scientist, and she’s recently come up with a type of Lithium Ion “Ink” that allows her to 3D print battery cells.

You might remember our recent 3D Printering article on Pastestruders, but this research certainly takes it up a few notches. The ink is made up of nano-particles of Lithium Titanium in a solution of de-ionized water and ethylene glycol. When producing the ink, small ceramic balls are added to the mixture to help break up microscopic clumps of said particles. The mixture is then spun for 24 hours, after which the larger particles and ceramic balls are removed using a series of filters. The resulting ink is a solid when unperturbed, but flows under extreme pressures!

This means a conventional 3D printer can be used, with only the addition of a high pressure dispenser unit. We guess we can’t call it a hot-end any more…  The ink is forced out of a syringe tip as small as 1 micrometer across, allowing for extremely precise patterning. In her applications she uses a set up with many nozzles, allowing for the mass printing of the anodes and cathodes in a huge array. While still in the research phase, her micro-scale battery architectures can be as small as a square millimeter, but apparently compete with industry batteries that are much larger.

And here’s the exciting part:

Although she says the initial plan is to provide tools for manufacturers, she may eventually produce a low-end printer for hobbyists.

3D Printable electronics. The future is coming!

[Thanks Keith!]

Arduino Christmas Lights

Here’s a cool hack to get you in the December holiday mood! Arduino controlled Christmas lights!

It all started because [Anx2k] had some leftover LED’s from one of his other projects, so he decided to make use of them as permanently mounted Christmas lights. He’s installed them underneath his tiled roof, and run all the wires into his attic where he has an electrical box serving as the main control hub. He uses an Arduino Uno to control them, and a 460W computer power supply to provide the juice. The LED modules themselves are Adafruit RGB pixel strings. There’s actually three of the LED modules per tile — two shining up to illuminate the tile, and one shining out.

He’s set up a ton of different patterns to run, and they are pretty awesome! Check out the video after the break.

Continue reading “Arduino Christmas Lights”

Levitating Wireless LED Ring

magnetic levitation

Here’s an impressive example of a completely home built magnetic levitation setup… with wireless power transmission to boot!

[Samer] built this from scratch and it features two main sub-systems, a electromagnet with feedback electronics and a wireless power transfer setup.

The ring of LEDs has a stack of neodymium magnets which are levitated in place by a varying magnetic field. This levitation is achieved by using a Hall effect sensor and a PID controller using a KA7500 SMPS controller.

The wireless power transmission uses a Class E DC/AC inverter that operates at 800KHz. Two coils of wire pass the current between the stand and the LEDs.

It’s very similar to a build we featured last year, but it’s a great hack, so we had to share it! Check out the video after the break.

Continue reading “Levitating Wireless LED Ring”