Now, we wouldn’t necessarily call ourselves connoisseurs of fine art here at Hackaday. But we do enjoy watching [Julian Baumgartner]’s YouTube channel, where he documents the projects that he takes on as a professional conservator. Folks send in their dirty or damaged paintings, [Julian] works his magic, and the end result often looks like a completely different piece. Spoilers: if you’ve ever looked at an old painting and wondered why the artist made it so dark and dreary — it probably just needs to be cleaned.
Anyway, in his most recent video, [Julian] pulled out a piece of gear that we didn’t expect to see unleashed against a painting of one of America’s Founding Fathers: a Er:YAG laser. Even better, instead of some fancy-pants fine art restoration laser, he apparently picked up second hand unit designed for cosmetic applications. The model appears to be a Laserscope Venus from the early 2000s, which goes for about $5K these days.
Now, to explain why he raided an esthetician’s closet to fix up this particular painting, we’ve got to rewind a bit. As we’ve learned from [Julian]’s previous videos, the problem with an old dirty painting is rarely the paining itself, it’s the varnish that has been applied to it. These varnishes, especially older ones, have a tendency to yellow and crack with age. Now stack a few decades worth of smoke and dirt on top of it, and you’ve all but completely obscured the original painting underneath. But there’s good news — if you know what you’re doing, you can remove the varnish without damaging the painting itself.
 In most cases, this can be done with various solvents that [Julian] mixes up after testing them out on some inconspicuous corner of the painting. But in this particular case, the varnish wasn’t reacting well to anything in his inventory. Even his weakest solvents were going right through it and damaging the paint underneath.
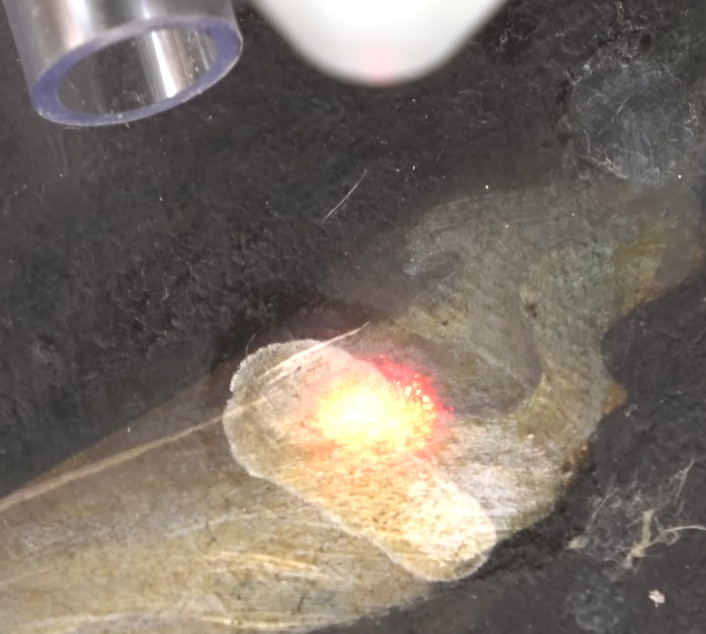
Because of this, [Julian] had to break out the big guns. After experimenting with the power level and pulse duration of the 2940 nm laser, he found the settings necessary to break down the varnish while stopping short of cooking the paint it was covering. After hitting it with a few pulses, he could then come in with a cotton swab and wipe the residue away. It was still slow going, but it turns out most things are in the art conservation world.
This isn’t the first time we’ve covered [Julian]’s resourceful conservation methods. Back in 2019, we took at look the surprisingly in-depth video he created about the design and construction of his custom heat table for flattening out large canvases.
Continue reading “George Washington Gets Cleaned Up With A Laser” →