Twelve Days Of Christmas As Performed By 1980s Speech Chip

In a curious historical twist, the “Twelve days of Christmas” are actually the days of revelry that followed the 25th. The preceding period, Advent, was traditionally a fast, not unlike Lent. When and why a fast became an excuse for chocolate calendars we cannot say, but this historical information is presented to explain that this great hack by [Kevin], making a vintage speech synthesizer chip sing the classic carol will remain relevant at least until January 5th — or perhaps even the 19th, for the Orthodox amongst us.

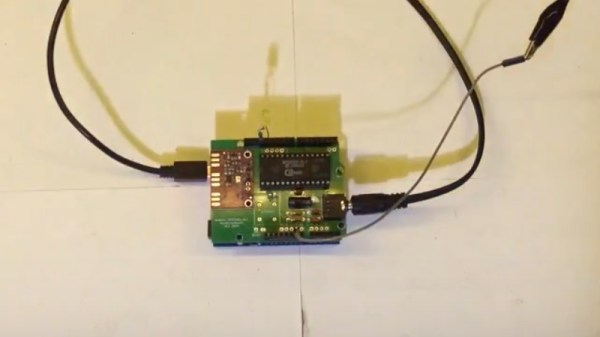
The chip in question is an SP0256A-AL2, which you may remember from various speech projects for 8-bit computers back in the day. It can talk, after a fashion, by reproducing 56 “allophones” — the sounds that make up English speech — from ROM. Singing, though? We cannot recall much of that back in the day, but then, a talking computer was impressive enough.

As it turns out this is building on an earlier hack [Kevin] did in which he used an Arduino to make the venerable speech chip MIDI controllable. In that project’s write-up it is revealed that a Si5351 programmable clock module is used to give a variable pitch signal to the speech synthesizer. In this way he’s able to get about an octave an a half, which is good enough when the carol in question only spans one octave.

Of course the pitch signal needs to be varied by something and for that the venerable Arduino once again takes the place of an 8-bit computer. In this case it’s pre-programmed, but can also be set up for MIDI control.Of course nothing says you can’t use true retro hardware or a more-capable RP2040 instead of the Amtel chip.

It’s sad to think how much compute power has been wasted this year on AI-generated novelty carols when a little bit of 1980s silicon and some ingenuity can do nearly as good — or better, depending on your tastes. Continue reading “Twelve Days Of Christmas As Performed By 1980s Speech Chip” →
Nixie Tube Dashboard Is Period-Appropriate Hack To Vintage Volvo

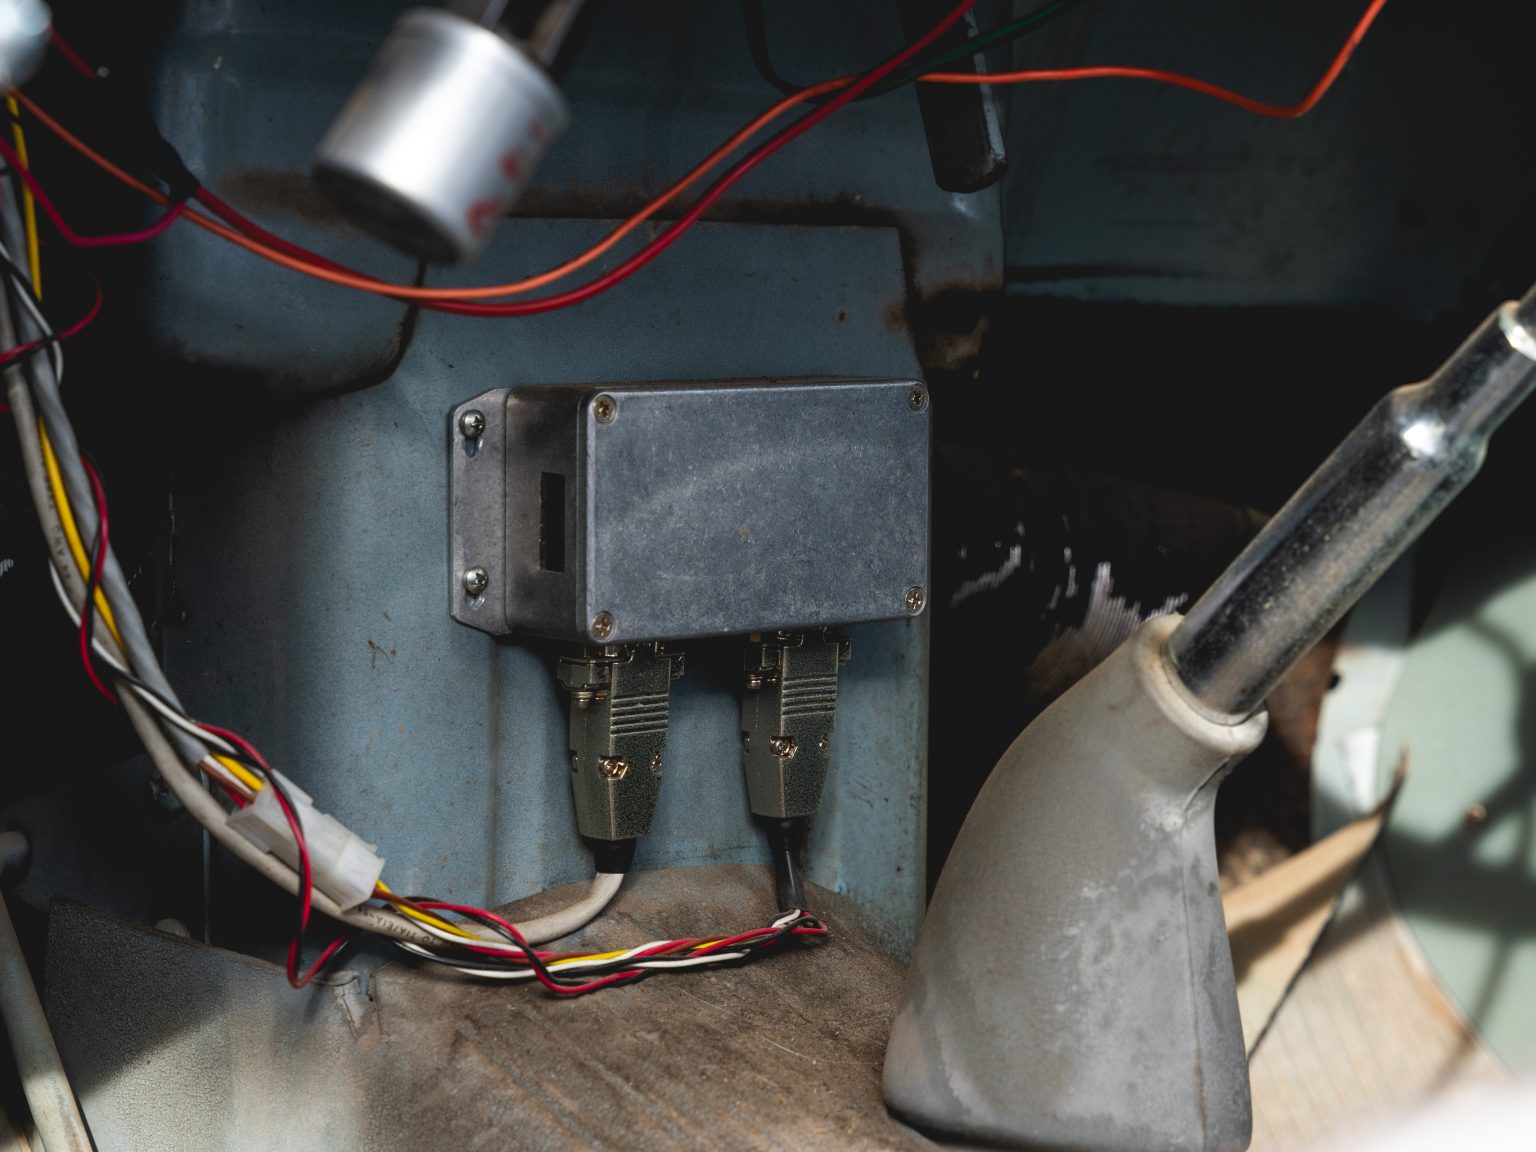
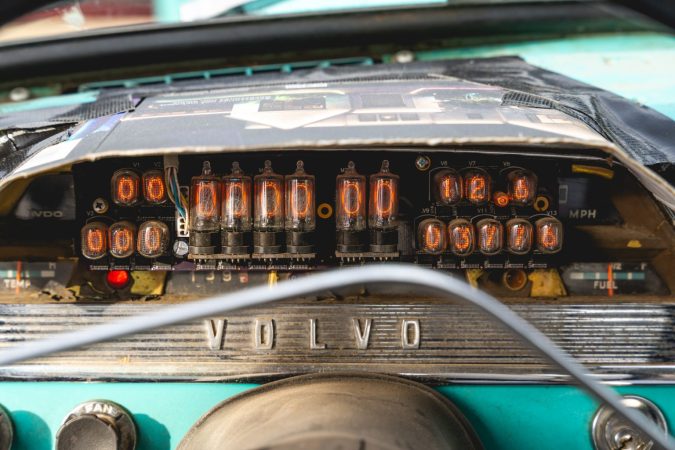
There’s no accounting for taste, but it’s hard to argue with The Autopian when they declare that this Nixie tube dash by [David Forbes] is “the coolest speedometer of all time” — well, except to quibble that it’s also the coolest tachometer, temperature gauge, oil pressure indicator, and voltmeter. Yeah, the whole instrument cluster is on [David]’s Volvo PV544 is nixified, and we’re here for it.

He’s using a mixture of tubes here– the big ones in the middle are the speedo and tachometer, while the ovals on either side handle the rest. There’s a microcontroller on the front of the firewall that acts a bit like a modern engine control unit (ECU) — at least for the gauges; it sounds like the Volvo’s engine is stock, and that means carbureted for a car of that vintage.

The idea that this hack could have been done back in the 50s when the car was new just tickles us pink. Though you’d have probably needed enough valves to fill up the boot, as our British friends would say. Translate that to “enough vacuum tubes to fill the trunk” if you’re in one of the rebellious colonies.

We’ve featured [David]’s projects previously, in the form of his wearable video coat. But his best known work is arguably the Nixie Watch, famously the timepiece of choice for Steve Wozniak.

Thanks to [JohnU] for the tip!


All images by Griffin Riley via The Autopian

Breathe Easy While Printing With This VOC Calculator

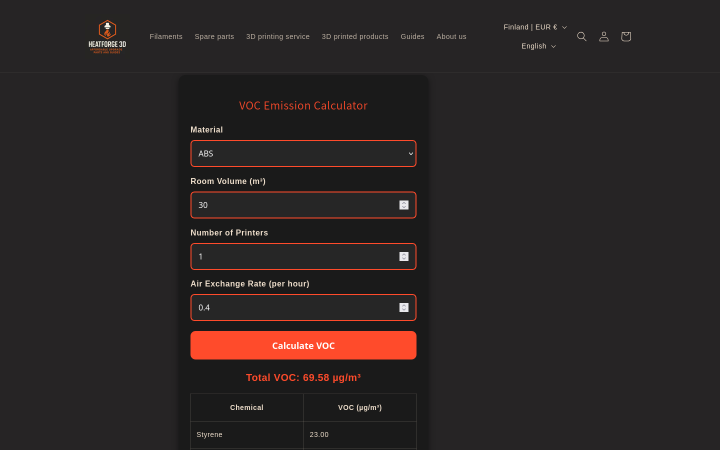
We love 3D printing here, but we also love clean air, which produces a certain tension. There’s no way around the fact that printing produces various volatile organic compounds (VOCs), and that we don’t want to breathe those any more than necessary. Which VOCs, and how much? Well, [Jere Saikkonen] has created a handy-dandy calculator to help you guesstimate your exposure, or size your ventilation system, at least for FDM printing.

The emissions of most common FDM filaments are well-known by this point, so [Jere] was able to go through the literature and pull out values for different VOCs of concern like styrene and formaldehyde for ABS, PLA, Nylon, HIPS and PVA. We’re a bit disappointed not to see PETG or TPU on there, as those are common hobbyist materials, but this is still a great resource.

If you don’t like the numbers the calculator is spitting out, you can play with the air exchange rate setting to find out just how much extra ventilation you need. The one limitation here is that this assumes equilibrium conditions, which won’t be met save for very large prints. That’s arguably a good thing, since it errs on the side of over- rather than underestimating your exposure.

If you want to ground-truth this calculator, we’ve featured VOC-sensing projects before. If you’re convinced the solution to pollution is dilution, check out some ventilated enclosures. If you don’t want to share chemistry with the neighborhood, perhaps filtration is in order. 

Thanks to [Jere] for the tip!

Lichtenberg Lightning In A Bottle, Thanks To The Magic Of Particle Accelerators

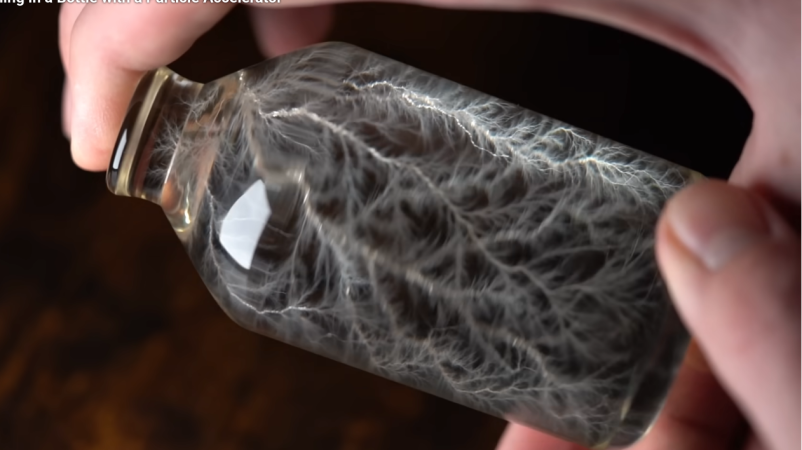
You’ve probably seen Lichtenberg figures before, those lightning-like traces left by high-voltage discharge. The safe way to create them is using an electron beam to embed charge inside an acrylic block, and then shake them loose with a short, sharp tap. The usual technique makes for a great, flat splay of “lightning” that looks great in a rectangular prism or cube on your desk. [Electron Impressions] was getting bored with that, though, and wanted to do something unique — they wanted to capture lightning in a bottle, with a cylindrical-shaped Lichtenberg figure.

They’re still using the kill-you-in-milliseconds linear accelerator that makes for such lovely flat figures, but they need to rotate the cylinder to uniformly deposit charge around its axis. That sounds easy, but remember this is a high-energy electron beam that’s not going to play nice with any electrical components that are put through to drive the spinning.

Continue reading “Lichtenberg Lightning In A Bottle, Thanks To The Magic Of Particle Accelerators” →

Pause Print, Add Hardware, And Enjoy Strength

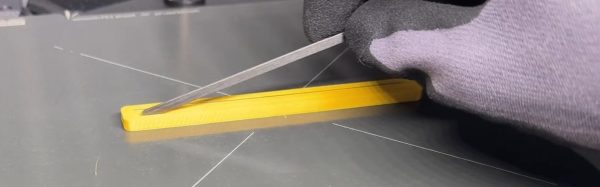
3D Printing is great, but it is pretty much the worst way to make any given part– except that every other technique you could use to make that part is too slow and/or expensive, making the 3D print the best option. If only the prints were stiffer, stronger, more durable! [JanTech Engineering] feels your plight and has been hacking away with the M601 command to try embedding different sorts of hardware into his prints for up to 10x greater strength, as seen in the video embedded below.

It’s kind of a no-brainer, isn’t it? If the plastic is the weak point, maybe we could reinforce the plastic. Most concrete you see these days has rebar in it, and fiber-reinforced plastic is the only way most people will use resin for structural applications. So, how about FDM? Our printers have that handy M601 “pause print” command built in. By creatively building voids into your parts that you can add stronger materials, you get the best of all possible worlds: the exact 3D printed shape you wanted, plus the stiffness of, say, a pulltruded carbon-fiber rod.

[JanTech] examines several possible inserts, including the aforementioned carbon rods. He takes a second look at urethane foam, which we recently examined, and compares it with less-crushable sand, which might be a good choice when strength-to-weight isn’t an issue. He doesn’t try concrete mix, but we’ve seen that before, too. Various metal shapes are suggested — there are all sorts of brackets and bolts and baubles that can fit into your prints depending on their size — but the carbon rods do come out ahead on strength-to-weight, to nobody’s surprise.

You could do a forged carbon part with a printed mold to get that carbon stiffness, sure, but that’s more work, and you’ve got to handle epoxy resins that some of us have become sensitized to. Carbon rods and tubes are cheap and safer to work with, though be careful cutting them.

Finally, he tries machining custom metal insets with his CNC machine. It’s an interesting technique that’s hugely customizable, but it does require you to have a decent CNC available, and, at that point, you might want to just machine the part. Still, it’s an interesting hybrid technique we haven’t seen before.

Shoving stuff into 3D-printed plastic to make it a better composite object is a great idea and a time-honored tradition. What do you put into your prints? We’d love to know, and so would [Jan]. Leave a comment and let us know.

Continue reading “Pause Print, Add Hardware, And Enjoy Strength” →

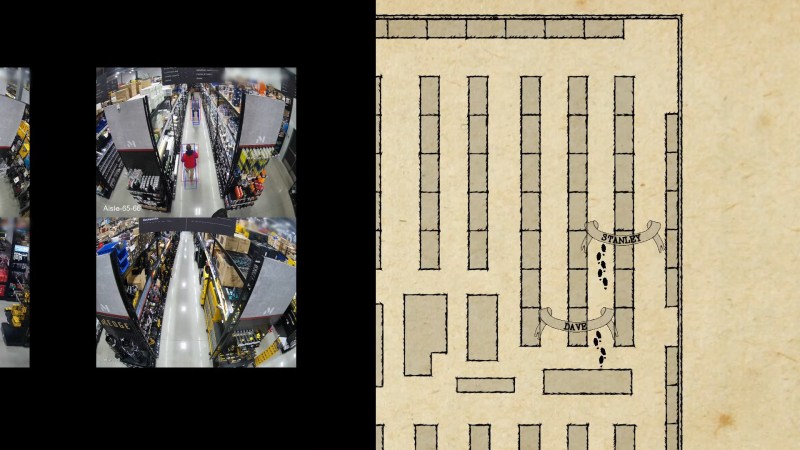
The map in action, along with a sample of the video feeds.

Hardware Store Marauder’s Map Is Clarkian Magic

The “Marauder’s Map” is a magical artifact from the Harry Potter franchise. That sort of magic isn’t real, but as Arthur C. Clarke famously pointed out, it doesn’t need to be — we have technology, and we can make our own magic now. Or, rather, [Dave] on the YouTube Channel Dave’s Armoury can make it.

[Dave]’s hardware store might be in a rough neighborhood, since it has 50 cameras’ worth of CCTV coverage. In this case, the stockman’s loss is the hacker’s gain, as [Dave] has talked his way into accessing all of those various camera feeds and is using machine vision to track every single human in the store.

Of course, locating individuals in a video feed is easy — to locate them in space from that feed, one first needs an accurate map. To do that, [Dave] first 3D scans the entire store with a rover. The scan is in full 3D, and it’s no small amount of data. On the rover, a Jetson AGX is required to handle it; on the bench, a beefy HP Z8 Fury workstation crunches the point cloud into a map. Luckily it came with 500 GB of RAM, since just opening the mesh file generated from that point cloud needs 126 GB. That is processed into a simple 2D floor plan. While the workflow is impressive, we can’t help but wonder if there was an easier way. (Maybe a tape measure?)

Once an accurate map has been generated, it turns out NVIDIA already has a turnkey solution for mapping video feeds to a 2D spatial map. When processing so much data — remember, there are 50 camera feeds in the store — it’s not ideal to be passing the image data from RAM to GPU and back again, but luckily NVIDIA’s “Deep Stream” pipeline will do object detection and tracking (including between different video streams) all on the GPU. There’s also pose estimation right in there for more accurate tracking of where a person is standing than just “inside this red box”. With 50 cameras, it’s all a bit much for one card, but luckily [Dave]’s workstation has two GPUs.

Once the coordinates are spat out of the neural networks, it’s relatively simple to put footprints on the map in true Harry Potter fashion. It really is magic, in the Clarkian sense, what you can do if you throw enough computing power at it.

Unfortunately for show-accuracy (or fortunately, if you prefer to avoid gross privacy violations), it doesn’t track every individual by name, but it does demonstrate the possibility with [Dave] and his robot. If you want a map of something… else… maybe check out this backyard project.

Continue reading “Hardware Store Marauder’s Map Is Clarkian Magic” →

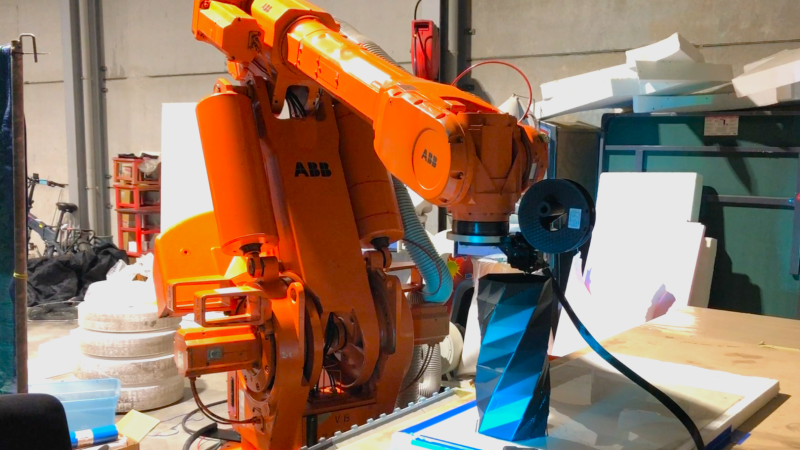
ABB arm printing a vase

Surplus Industrial Robot Becomes Two-ton 3D Printer

As the saying goes — when life gives you lemons, you make lemonade. When life gives you a two-ton surplus industrial robot arm, if you’re [Brian Brocken], you apparently make a massive 3D printer.

The arm in question is an ABB IRB6400, a serious machine that can sling 100 to 200 kilograms depending on configuration. Compared to that, the beefiest 3D printhead is effectively weightless, and the Creality Sprite unit he’s using isn’t all that beefy. Getting the new hardware attached uses (ironically) a 3D printed mount, which is an easy enough hack. The hard work, as you might imagine, is in software.

As it turns out, there’s no profile in Klipper for this bad boy. It’s 26-year-old controller doesn’t even speak G-code, requiring [Brian] to feed the arm controller the “ABB RAPID” dialect it expects line-by-line, while simultaneously feeding G-code to the RAMPS board controlling the extruder. If you happen to have the same arm, he’s selling the software that does this. Getting that synchronized reliably was the biggest challenge [Brian] faced. Unfortunately that means things are slowed down compared to what the arm would otherwise be able to do, with a lot of stop-and-start on complex models, which compromises print quality. Check the build page above for more pictures, or the video embedded below.

[Brian] hopes to fix that by making better use of the ABB arm’s controller, since it does have enough memory for a small buffer, if not a full print. Still, even if it’s rough right now, it does print, which is not something the engineers at ABB probably ever planned for back before Y2K. [Brian]’s last use of the arm, carving a DeLorean out of styrofoam, might be closer to the original design brief.

Usually we see people using 3D printers to build robot arms, so this is a nice inversion, though not the first.

Continue reading “Surplus Industrial Robot Becomes Two-ton 3D Printer” →