Decorative Clock Uses LED Strips To Beautiful Effect

Clocks used to be dowdy old things with mechanical hands and sometimes even little cuckoo birds that would pop out to chime the hour. [David] built something altogether more modern that uses shifting colors on LED strips to tell the time.

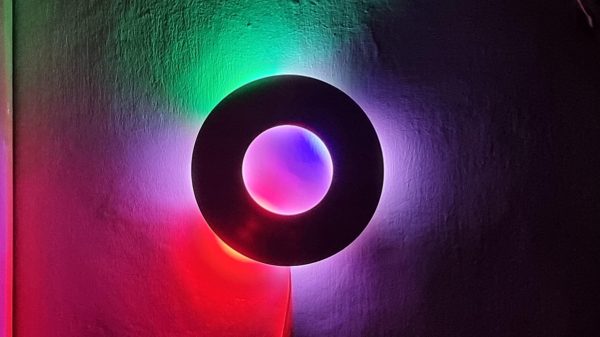
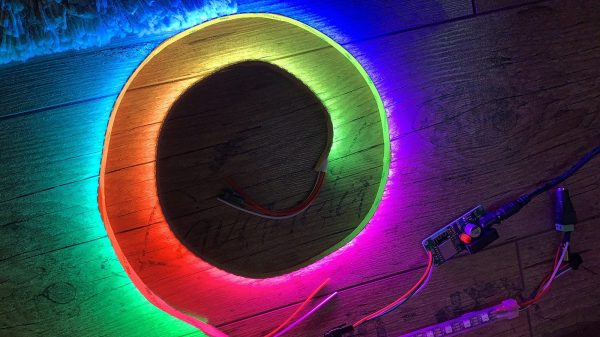
The core of the build is an ESP8266, which queries an NTP time server to keep itself synced up with the current time as accurately as possible. It then controls a WS2812B LED strip to display the time. The strip itself is hidden in a 3D-printed housing behind an opaque wooden ring, with the light from the LEDs diffusing out nicely on to the wall upon which the clock is mounted.

The display shows three “hands” in the colors it projects on the wall. The red second hand is projected inside and outside the ring. The minute hand is green, and projects outside the ring. Meanwhile, the hour hand is blue, and projects inside the ring. Without any numerical markings, you won’t get an exact reading of the time, but you can figure it out closely enough. As a bonus, the clock looks like a stylish light-based wall sculpture and your guests may not even realizes it tells the time.

We’ve featured [David’s] work before too, in the form of the handy ESP8266 breadboard socket. Video after the break.

Continue reading “Decorative Clock Uses LED Strips To Beautiful Effect”

Homebrew LED Strips That Are HomeKit-Compatible

Google, Amazon and Apple are all duking it out for supremacy in the smart home space. As you’ve probably noticed, cheaper smart lights and the like typically don’t offer connectivity with Apple’s HomeKit system. However, if you want some smart lighting that works in that ecosystem without breaking the bank, you can always build your own!

This simple build uses an ESP8266-01S as the brains of the operation. It’s a cut-down board that only has two GPIO pins available, but for this job, that’s enough. It’s paired with a simple relay for switching a single-color LED strip on and off, and an MP2307 buck converter for power. The code loaded onto the ESP8266 is simple, and allows it to connect to Wi-Fi and link up with Apple HomeKit for control.

Let’s say you’re a real fancy-pants, though, and you want RGB-addressable LEDs for your HomeKit setup. No problem, you can do that too! It’s as straightforward as hooking up an ESP8266 to some WS2812B LED strip and flashing the right firmware that emulates an Elgato EVE LED strip. You can even activate special lighting effects on the via the EVE app if you so desire, to take advantage of the fully-addressable nature of the strip.

There are plenty of off-the-shelf solutions in this space, but many of them are quite expensive for what you actually get in the box. Sometimes building your own is more fun, too. Alternatively, if you don’t like Apple’s smart home solutions, you can always try a more open alternative. Video after the break.

Continue reading “Homebrew LED Strips That Are HomeKit-Compatible”

TWANG32 Brings LED Strip Gaming To The ESP32

Under the Hackaday TV is a modern game console, it’s a well-known model that many of you also probably have, and its main feature is a 3D accelerator which allows it to create the beautifully rendered worlds we’ve all come to know and love. [Mircemk] eschews such fripperies with the Twang project, because it’s a game that’s not 3D, nor 2D, but 1D. The display, indeed the entire gaming surface, is a single strip of addressable LEDs which can be seen int he video below the break.

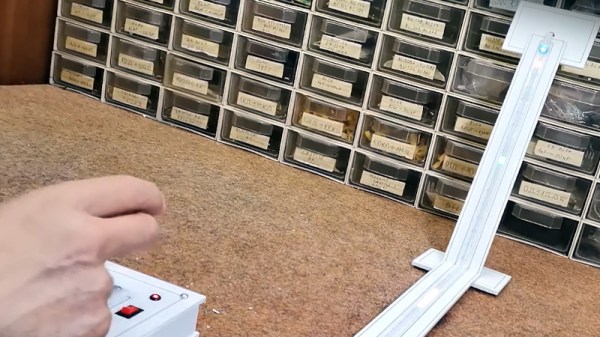
Behind it all is an ESP32, and a unique one-dimensional joystick using an accelerometer. There’s an audio channel with a little piezoelectric speaker too, and the LED strip is a particularly high-density one from DFRobot. Because this is an ESP32-driven device it has WiFi, upon which is exposed an access point for a network over which is served the game stats as a web page. It may not displace that modern console, but it’s certainly inventive.

Long-time Hackaday readers will be aware that this is only the latest of a long line of one-dimensional games, including a 1D take on the famous PONG.

Continue reading TWANG32 Brings LED Strip Gaming To The ESP32″

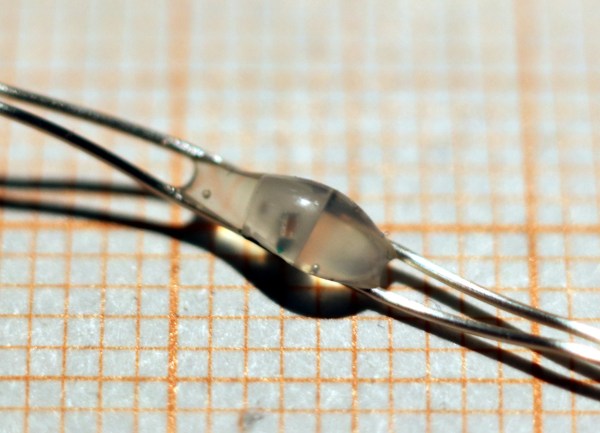
An LED bulb with integrated controller chip

Reverse-Engineering A Two-Wire LED Strip Protocol

Although Christmas may be several weeks behind us, various colorful LED contraptions can nowadays be found in our houses at any time of year. [Tim] got his hands on an LED curtain that came with a remote control that allows the user to set not only the color of the LEDs as a whole but also to run simple animations. But these were not your standard WS2812B strips with data lines: all the LEDs were simply connected in parallel with just two wires, so how was this even possible?

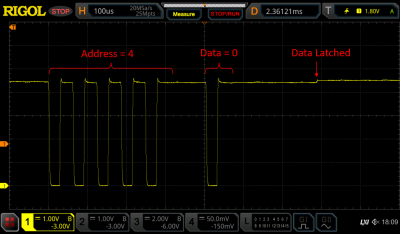
An oscilloscope screenshot showing the data protocol used in an LED string
The LED string protocol is very simple, with one address field and one data field.

[Tim] hooked up his oscilloscope to the LED strings to find out how they worked, detailing the results in a comprehensive blog post. As it turns out, the controller briefly shorts the LED strip’s supply voltage to generate data bits, similar to the way old pulse-dialing phones worked. A tiny chip integrated into each LED picks up these pulses, but retains its internal state thanks to a capacitor that keeps the chip powered when the supply line goes low.

After reverse-engineering the protocol, [Tim] went on to implement a similar design using an ATMega328P as a controller and an ATtiny10 as the LED driver. With just a few lines of code and a 100 nF buffer capacitor across the ATtiny’s power pins, [Tim] was able to turn an LED on and off by sending pulses through the supply lines. Some work still needs to be done to fully implement a protocol as used in the LED strings, but as a proof-of-concept it shows that this kind of power-line communication is possible with standard components.

We’ve seen projects that send signals down a two-wire LED chain before, although as an add-on to a more ordinary LED strip. [Tim] is not the first to reverse-engineer poorly documented LED strip protocols, but probably won’t be the last either.

Hackaday Podcast 148: Pokemon Trades, Anniversary IPod Prototype, Stupid Satellite Tricks, And LED Strip Sensors

Hackaday editors Elliot Williams and Mike Szczys get caught up on the week that was. People go to great lengths for video game saves, but this Pokemon hack that does hardware-based trade conversion between the Game Boy’s Pokemon 2 and Pokemon 3 is something else. Why do we still use batteries when super capacitors exist? They’re different components, silly, and work best at different things. Turns out you can study the atmosphere by sending radio waves through it, and that’s exactly what the ESA is doing… around Mars! And will machined parts become as easy to custom order as PCBs have become? This week we take a closer look at prototyping as a service.

Take a look at the links below if you want to follow along, and as always, tell us what you think about this episode in the comments!

Direct download (55 MB)

Continue reading “Hackaday Podcast 148: Pokemon Trades, Anniversary IPod Prototype, Stupid Satellite Tricks, And LED Strip Sensors”

Two Wire Sensors On LED Strips

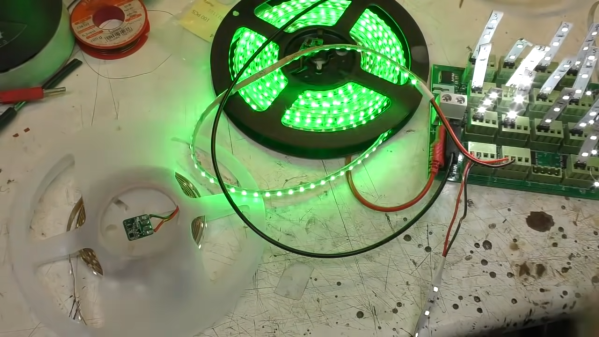
While addressable LED strips are all the rage, [Mike] from [mikeselectricstuff] has been working on an installation using the more basic two-wire strips that are simply controlled via PWM dimming. He’s recently figured out a tidy way to send sensor signals down these strips without adding any additional cabling.

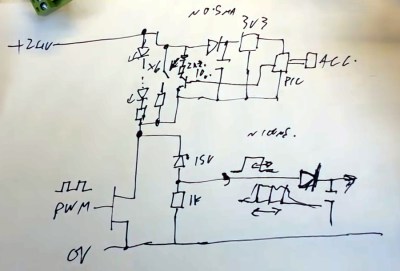
Schematic for hooking up a sensor
The circuit in question.

The build uses 24 V LED tape, which consists of gangs of 6 LEDs in series with a forward voltage of 3V. Thus, these strips don’t even begin to light until approximately 18V is across them.

By adding a 15 V Zener diode and a resistor across the MOSFET which dims the LEDs, a voltage of around 9 V can be put across the LEDs without lighting them up when the MOSFET PWM dimmer is in its off phase. A PIC10F322 microcontroller and an accelerometer can then be run from this voltage, with the aid of a 3.3 V regulator wired in parallel with the LEDs. The regulator must also be able to handle the full 24 V when the LEDs are switched on.

A transistor is also wired up, switching a 2.2 K resistor in parallel with the LEDs. When turned on by the PIC, this transistor causes roughly a 10 mA current to flow through the Zener diode and its series resistor. The voltage developed across that series resistor can be measured as the transistor is turned on and off. In this case, the pulse width used to turn that transistor on is relative to motion detected by the accelerometer on the end of the LED strip.

Turning the LEDs on at 100% duty cycle prevents the system working, as the pulse widths generated by the sensor circuit can’t be detected when the LED line is held high all the time. However, in practice, it matters not — running the LEDs at a maximum 98% duty cycle eliminates the issue.

It’s an ingenious way to send sensor signals down a two-wire LED strip, even if it does take a second to wrap one’s head around it. It also seems to do a great job of adding motion-reactive effects to the LED strips in question. It’s not the first LED project we’ve seen from [Mike], either. Video after the break.

Continue reading “Two Wire Sensors On LED Strips”

Smart Power Delivery For Long LED Strips

Addressable LED strips, most commonly using the WS2812B, have revolutionized the pursuit of the glowiest and flashiest of builds. No longer does a maker have to compromise on full RGB color or number of LEDs due to the limitations of their chosen microcontroller, or fuss around with multiplexing schemes. However, the long strips of bright LEDs do have an issue with voltage drop on long runs, leading to dimming and color irregularities. Thankfully, [Jan Mrázek] has come up with a useful solution in the form of the Neopixel Booster.

The device consists of a small PCB which packs a 5 volt regulator capable of putting out up to 4 amps. It’s designed with pads that match typical Neopixel strips, such that it can be neatly soldered in every 50cm or every 60 LEDs or so. Each booster PCB is fed with a set of fat power wires, at between 6-18 volts. This allows electricity to be fed to the full length of the strip at higher voltage, and thus lower current, greatly reducing resistive power losses. By having several regulators along the length of the strip, it helps guarantee that the whole length of a long run is receiving plenty of voltage and current and can light up the correct color as desired.

It’s a well thought out solution to a frustrating problem, and [Jan’s] efforts on the design front mean that a 5 meter long waterproof strip can be converted in around about an hour. We can imagine this could be manufactured into strips in future, too. If you’re wondering what to do with all those LEDs, consider making yourself a custom display.