Homebrew LED Strips That Are HomeKit-Compatible

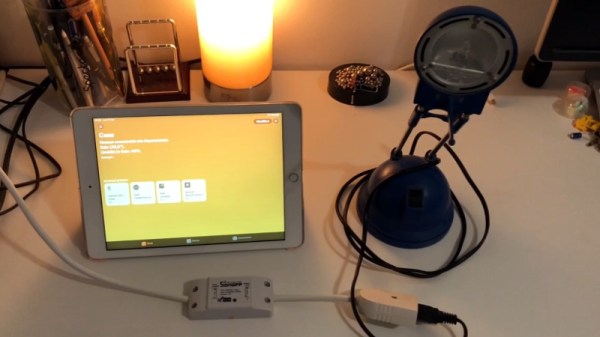
Google, Amazon and Apple are all duking it out for supremacy in the smart home space. As you’ve probably noticed, cheaper smart lights and the like typically don’t offer connectivity with Apple’s HomeKit system. However, if you want some smart lighting that works in that ecosystem without breaking the bank, you can always build your own!

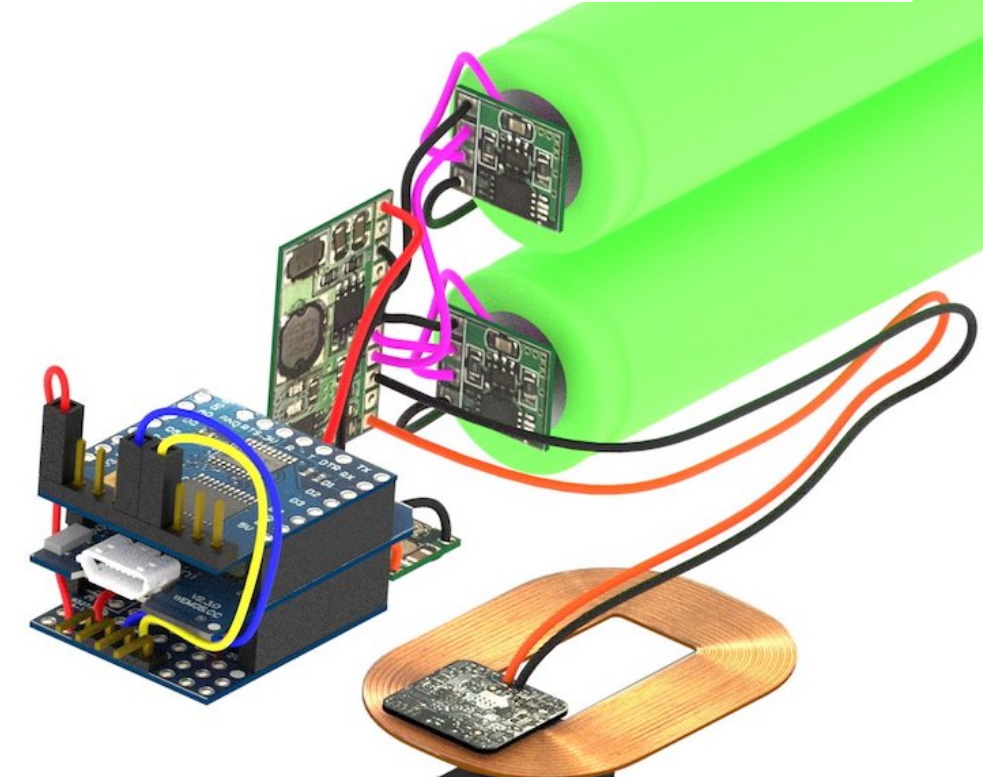
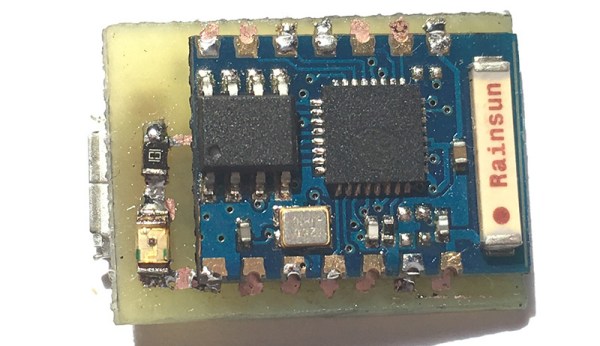
This simple build uses an ESP8266-01S as the brains of the operation. It’s a cut-down board that only has two GPIO pins available, but for this job, that’s enough. It’s paired with a simple relay for switching a single-color LED strip on and off, and an MP2307 buck converter for power. The code loaded onto the ESP8266 is simple, and allows it to connect to Wi-Fi and link up with Apple HomeKit for control.

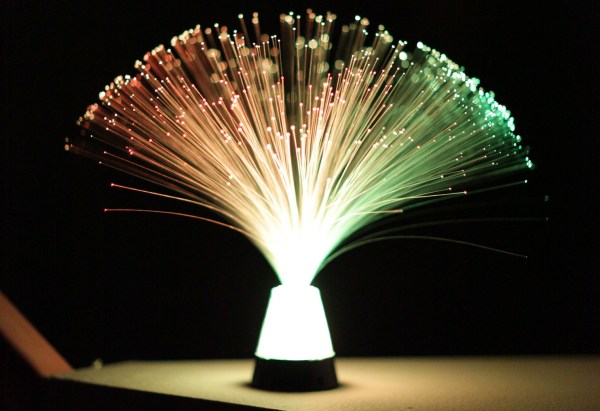
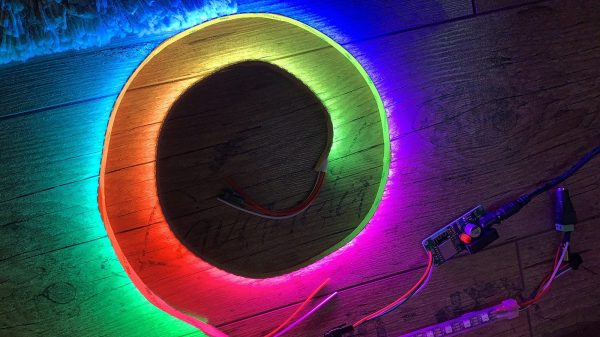
Let’s say you’re a real fancy-pants, though, and you want RGB-addressable LEDs for your HomeKit setup. No problem, you can do that too! It’s as straightforward as hooking up an ESP8266 to some WS2812B LED strip and flashing the right firmware that emulates an Elgato EVE LED strip. You can even activate special lighting effects on the via the EVE app if you so desire, to take advantage of the fully-addressable nature of the strip.

There are plenty of off-the-shelf solutions in this space, but many of them are quite expensive for what you actually get in the box. Sometimes building your own is more fun, too. Alternatively, if you don’t like Apple’s smart home solutions, you can always try a more open alternative. Video after the break.

Continue reading “Homebrew LED Strips That Are HomeKit-Compatible”

Motorized LEGO Train Gets Qi Charging In The Track

This project started, as many do, with a simple idea. [Ben Hoad] just wanted to take a static LEGO Hogwarts Express train kit and make it motorized. It was compatible with standard LEGO track pieces, so all he should have to do was figure out how to shoehorn a motor in there and be done with it. Right?

Well, you already know how things like this go. It started with adding the motor, which ended up being relatively straightforward once [Ben] used some community LEGO CAD tools to figure out which kits had the specific parts he needed to redesign the train in such a way that he’d have enough space inside for the motor without ruining the way it looked. But then the feature creep kicked in, and he found himself falling down that familiar rabbit hole.

A 3D representation of the train’s internal components.

The first problem was how to reliably power the train. It turns out the rear car was more or less empty already, so that became home for two 18650 batteries (the project details say “16850” but we believe that is merely a typo). [Ben] didn’t want to have to take the thing apart every time it ran down, so he wondered if it would be possible to add wireless charging.

A Qi coil in the bottom of the train car and one in a specially designed section of track got the power flowing, but getting them lined up proved a bit finicky. So he added a Hall effect sensor to the car and a strong magnet to the track, so the train would know when the coils were lined up and automatically pump the brakes.

So now he had a motorized train that could recharge itself, but how should he turn it on and off? Well, with an ESP8266 along for the ride, he figured it would be easy to add WiFi control. With a bit of code and the Homebridge project, he was able to get the train to appear as a smart switch to Apple’s HomeKit. That allows him to start and stop the train from his smartphone, complete with a routine that returns the train to the charging station once it’s finished making the rounds. [Ben] says the next steps are to put some sanity checks in, such as shutting the motors down if the train hasn’t passed the charging station in a few minutes; a sure sign that it’s not actually moving.

All [Ben] needs to do now is implement automatic LEGO train decoupling before the plastic Hogwarts students come back from spring break.

Apple HomeKit Accessory Development Kit Gets More Accessible

Every tech monopoly has their own proprietary smart home standard; how better to lock in your customers than to literally build a particular solution into their homes? Among the these players Apple is traditionally regarded as the most secretive, a title it has earned with decades of closed standards and proprietary solutions. This reputation is becoming progressively less deserved when it comes to HomeKit, their smart home gadget connectivity solution. In 2017 they took a big step forward and removed the need for a separate authentication chip in order to interact with HomeKit. Last week they took another and released a big chunk of their HomeKit Accessory Development Kit (ADK) as well. If you’re surprised not to have heard sooner, that might be because it was combined the the even bigger news about Apple, Amazon, the Zigbee Alliance, and more working together on more open, interoperable home IoT standards. Check back in 2030 to see how that is shaping up.

“The HomeKit ADK implements key components of the HomeKit Accessory Protocol (HAP), which embodies the core principles Apple brings to smart home technology: security, privacy, and reliability.”
– A descriptive gem from the README

Apple’s previous loosening-of-restrictions allowed people to begin building devices which could interact natively with their iOS devices without requiring a specific Apple-sold “auth chip” to authenticate them. This meant existing commercial devices could become HomeKit enabled with an OTA, and hobbyists could interact in sanctioned, non-hacky ways. Part of this was a release of the (non-commercial) HomeKit specification itself, which is available here (with Apple developer sign in, and license agreement).

Despite many breathless mentions in the press release it’s hard to tell what the ADK actually is. The README and documentation directory are devoid of answers, but spelunking through the rest of the GitHub repo gives us an idea. It consists of two primary parts, the HomeKit Accessory Protocol itself and the Platform Abstraction Layer. Together the HAP implements HomeKit itself, and the PAL is the wrapper that lets you plug it into a new system. It’s quite a meaty piece of software; the HAP’s main header is a grueling 4500 lines long, and it doesn’t take much searching to find some fear-inspiring 50 line preprocessor macros. This is a great start, but frankly we think it will take significantly more documentation to make the ADK accessible to all.

If it wasn’t obvious, most of the tools above are carefully licensed by Apple and intended for non-commercial use. While we absolutely appreciate the chance to get our hands on interfaces like this, we’re sure many will quibble over if this really counts as “open source” or not (it’s licensed as Apache 2.0). We’ll leave that for you in the comments.

Homekit Compatible Sonoff Firmware Without A Bridge

Generally speaking, home automation isn’t as cheap or as easy as most people would like. There are too many incompatible protocols, and more often than not, getting everything talking requires you to begrudgingly sign up for some “cloud” service that you didn’t ask for. If you’re an Apple aficionado, there can be even more hoops to jump through; getting your unsupported smart home devices working with that Cupertino designed ecosystem often involves running your own HomeKit bridge.

To try and simplify things, [Michele Gruppioni] has developed a firmware for the ubiquitous Sonoff WIFI Smart Switch that allows it to speak native HomeKit. No more using a Raspberry Pi to act as a mediator between your fancy Apple hardware and that stack of $4 Sonoff’s from AliExpress, they can now talk to each other directly. In the video after the break you can see that the iPad identifies the switch as unofficial device, but since it’s compliant with the HomeKit API, that doesn’t prevent them from talking to each other.

Not only will this MIT licensed firmware get your Sonoff Basic, Sonoff Slampher, or Sonoff S26 talking with your Apple gadgets, but it also provides a web interface and REST API so it retains compatibility with whatever else you might be running in your home automation setup. So while the more pedestrian users of your system might be turning the porch light on with their iPhones, you can still fire it up with a Bash script as nature intended.

Of course, if you don’t mind adding a Raspberry Pi bridge to the growing collection of devices on your network, we’ve got plenty of other HomeKit-enabled projects for you to take a look at.

Continue reading “Homekit Compatible Sonoff Firmware Without A Bridge”

Smartphone TV Remote Courtesy Of Homekit And ESP8266

Good grief, this smartphone-to-TV remote really drives home how simple hardware projects have become in the last decade. We’re talking about a voltage regulator, IR LED, and ESP8266 to add TV control on your home network. The hardware part of the hack is a homemade two sided board that mates an ESP with a micro-USB port, a voltage regulator to step down fom 5 to 3.3 v, and an IR LED for transmitting TV codes.

Let’s sit back and recount our good fortunes that make this possible. USB is a standard and now is found on the back of most televisions — power source solved. Cheap WiFi-enabled microcontroller — check. Ubiquitous smartphones and established protocols to communicate with other devices on the network — absolutely. It’s an incredible time to be a hacker.

Television infrared remote codes are fairly well documented and easy to sniff using tools like Arduino — in fact the ESP IR firmware for this is built on [Ken Shirriff’s] Arduino IR library. The rest of the sketch makes it a barebones device on the LAN, waiting for a connection that sends “tvon” or “tvoff”. In this case it’s a Raspberry Pi acting as the Homekit server, but any number of protocols could be used for the same (MQTT anyone?).

Continue reading “Smartphone TV Remote Courtesy Of Homekit And ESP8266”

Custom Siri Automation With HomeKit And ESP8266

Knowing where to start when adding a device to your home automation is always a tough thing. Most likely, you are already working on the device end of things (whatever you’re trying to automate) so it would be nice if the user end is already figured out. This is one such case. [Aditya Tannu] is using Siri to control ESP8266 connected devices by leveraging the functionality of Apple’s HomeKit protocols.

HomeKit is a framework from Apple that uses Siri as the voice activation on the user end of the system. Just like Amazon’s voice-control automation, this is ripe for exploration. [Aditya] is building upon the HAP-NodeJS package which implements a HomeKit Accessory Server using anything that will run Node.

Once the server is up and running (in this case, on a raspberry Pi) each connected device simply needs to communicate via MQTT. The Arduino IDE is used to program an ESP8266, and there are plenty of MQTT sketches out there that may be used for this purpose. The most recent example build from [Aditya] is a retrofit for a fiber optic lamp. He added an ESP8266 board and replaced the stock LEDs with WS2812 modules. The current version, demonstrated below, has on/off and color control for the device.

Continue reading “Custom Siri Automation With HomeKit And ESP8266”