Running Way More LED Strips On A Raspberry Pi With DMA

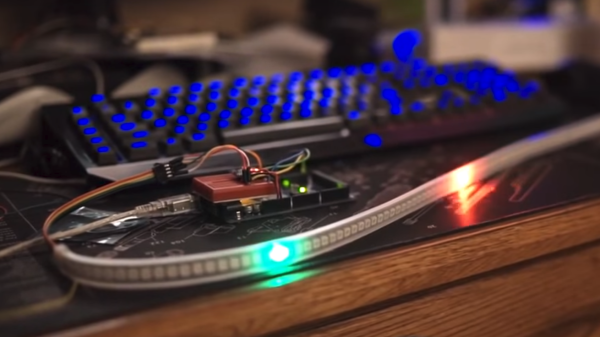
The Raspberry Pi is a powerful computer in a compact form factor, making it highly useful for all manner of projects. However, it lacks some of the IO capabilities you might find on a common microcontroller. This is most apparent when it comes to running addressable LED strings. Normally, this is done using the Pi’s PWM or audio output, and is limited to just a couple of short strings. However, [Jeremy P Bentham] has found a way to leverage the Pi’s hardware to overcome these limitations.

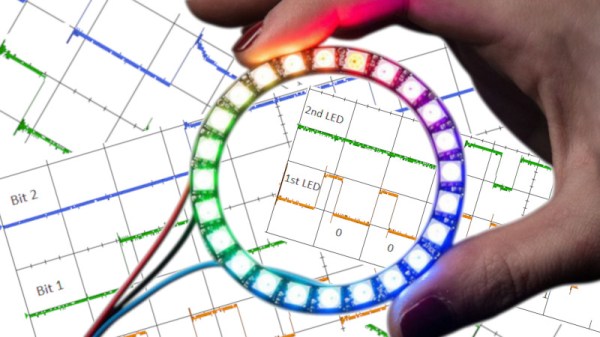
The trick is using the Raspberry Pi’s little-documented Secondary Memory Interface. The SMI hardware allows the Pi to shift out data to 8 or 16 I/O pins in parallel using direct memory access (DMA), with fast and accurate timing. This makes it perfect for generating signals such as those used by WS2812B LEDs, also known as NeoPixels.

With [Jeremy]’s code and the right supporting hardware, it’s possible to run up to 16 LED strips of arbitrary length from the Raspberry Pi. [Jeremy] does a great job outlining how it all works, covering everything from the data format used by WS2812B LEDs to the way cache needs to be handled to avoid garbled data. The hack works on all Pis, from the humble Pi Zero to the powerful Pi 4. Thanks to using DMA, the technique doesn’t overload the CPU, so performance should be good across the board.

Of course, there are other ways to drive a ton of LEDs; we’ve seen 20,000 running on an ESP32, for example.

[Thanks to Petiepooo for the tip!]

Surfboard LED Strips Light Up The Waves

Surfing is an activity predominantly enjoyed during the day, primarily for reasons of warmth and water safety. Of course, if you prefer to carve the waves at night, you might enjoy the latest project from [Moritz Sivers] – a surfboard kitted out with motion-reactive LEDs.

The build consists of a regular surfboard, with a channel cut around the perimeter into which WS2812B LED strips are glued. Powered by a lithium rechargable battery, commands are given by an Arduino Nano hooked up to a MPU6050 3-axis gyroscope. This allows the Arduino to change the light patterns based on the movement of the board. Left and right turns, pumping the board, and surfing down a wave all come with their own animations.

It’s a fun twist on night surfing, and makes it easier to spot a downed surfer, too. It’s a build we expect to see recreated in a high-end 4K surf film before the year is out. Of course, if you just need to know if the conditions are right before you head out, this surf weather station might be just the build for you. Video after the break. Continue reading “Surfboard LED Strips Light Up The Waves”

WiFi Remote Control Those Cheap LED Strips With An ESP8266 Passthrough

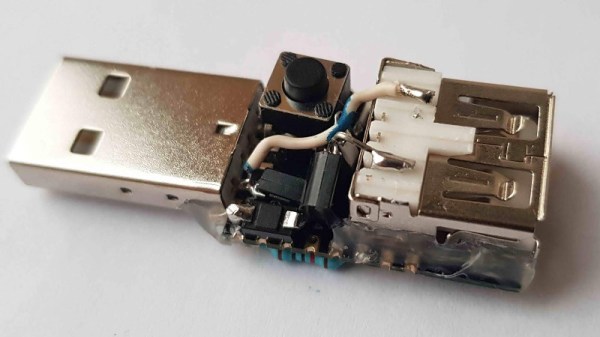
The explosion of cheap LED lighting products has given a never-ending array of opportunities for the resourceful hacker. A few dollars can secure strings of colourful illumination, but without further expenditure they lack the extra utility of electronic control. This is something that [Albert David has addressed] with his simple ESP8266-based WiFi switcher that he’s added to a string of USB-powered LEDs, and he’s neatly mounted the ESP-12 module it used atop a USB plug.

The circuitry is pretty straightforward, with only a couple of I/O lines being used. A transistor takes care of the heavy lifting, and the software comes courtesy of the Tasmota firmware for Sonoff (and similar) devices. We suspect with this economy of connection, the same task could be achieved even with the limited resources provided by the lesser ESP-01 module.

There was a time not so long ago when performing a task such as controlling a light over a wireless network involved significant cost, power, and complexity. In the nearly five years since we reported on the arrival of the ESP8266 we have progressed to the point at which that task is a simple project using commodity components, and that represents something of a miracle.

LED Strips Are So Hot Right Now

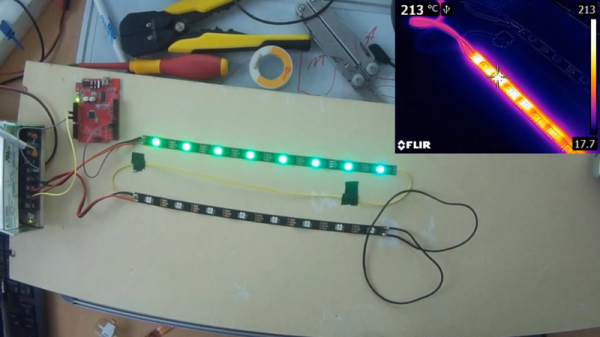
Sometimes there will appear a figure that flies in the face of reason, and challenges everything you think you know about a subject. Just such a moment came from [Chris Taylor] at Milton Keynes Makerspace when he characterised a set of LED strips, and the figure in question was that he found an LED strip creates the same amount of heat as its equivalent incandescent bulb.

We can hear your coffee hitting the monitor and your reaching for the keyboard to place a suitably pithy comment, because yes, that’s a pretty unbelievable statement. But it’s no less true, albeit that the key to it lies in its details. If you have a 100 W incandescent bulb, 88% of the energy is radiated as light and infra-red, leaving 12 W heating the bulb itself. To get the same light output from an LED meanwhile we’d only need 17 W, of which 11.9 W would be left to heat the LED. Which means that an LED strip can get as hot as an incandescent bulb with equivalent light output, and he’s run some tests to prove it.

If you’ve worked with LEDs, you’ll know that they get hot. But to learn that they have the potential to get as hot as their incandescent equivalents is something of a eye-opener, and should demonstrate the need for adequate thermal mitigation. It’s easy to take them for granted, and we’ve taken a look before at some of their safety pitfalls.

Disclosure: [Jenny List] is a member of MK Makerspace.

The Engineering Case For Fusing Your LED Strips

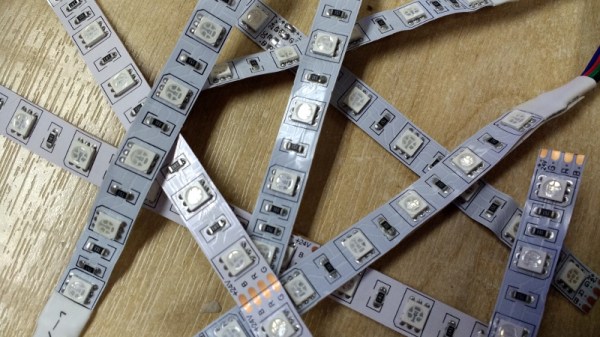
Modern LED strips are magical things. The WS2812 has allowed the quick and easy creation of addressable RGB installations, revolutionizing the science of cool glowy things. However, this accessibility means that it’s easy to get in over your head and make some simple mistakes that could end catastrophically. [Thomas] is here to help, outlining a common mistake made when building with LED strips that is really rather dangerous.

The problem is the combination of hardware typically used to run these LED strings. They’re quite bright and draw significant amounts of power, each pixel drawing up to 60 mA at full-white. In a string of just 10 pixels, the strip is already drawing 600 mA. For this reason, it’s common for people to choose quite hefty power supplies that can readily deliver several amps to run these installations.

It’s here that the problem starts. Typically, wires used to hook up the LED strips are quite thin and the flex strips themselves have a significant resistance, too. This means it’s possible to short circuit an LED strip without actually tripping the overcurrent protection on something like an ATX power supply, which may be fused at well over 10 amps. With the resistance of the wires and strip acting as a current limiter, the strip can overheat to the point of catching fire while the power supply happily continues to pump in the juice. In a home workshop under careful supervision, this may be a manageable risk. In an unattended installation, things could be far worse.

Thankfully, the solution is simple. By installing an appropriately rated fuse for the number of LEDs in the circuit, the installation becomes safer, as the fuse will burn out under a short circuit condition even if the power supply is happy to supply the current. With the example of 10 LEDs drawing 600 mA, a 1 amp fuse would do just fine to protect the circuit in the event of an accidental short.

It’s a great explanation of a common yet dangerous problem, and [Thomas] backs it up by using a thermal camera to illustrate just how hot things can get in mere seconds. Armed with this knowledge, you can now safely play with LEDs instead of fire. But now that you’re feeling confident, why not check out these eyeball-searing 3 watt addressable LEDs?

Continue reading “The Engineering Case For Fusing Your LED Strips”

DIY Dungeon Crawler Game Plays On Single LED Strip

A delightful version of a clever one-dimensional game has been made by [Critters] which he calls TWANG! because the joystick is made from a spring doorstop with an accelerometer in the tip. The game itself is played out on an RGB LED strip. As a result, the game world, the player, goal, and enemies are all represented on a single line of LEDs.

How can a dungeon crawler game be represented in 1D, and how is this unusual game played? The goal is for the player (a green dot) to reach the goal (a blue dot) to advance to the next level. Making this more difficult are enemies (red dots) which move in different ways. The joystick is moved left or right to advance the player’s blue dot left or right, and the player can attack with a “twang” motion of the joystick, which eliminates nearby enemies. By playing with brightness and color, a surprising amount of gameplay can be jammed into a one-dimensional display!

Code for TWANG! is on github and models for 3D printing the physical pieces are on Thingiverse. The video (embedded below) focuses mainly on the development process, but does have the gameplay elements explained as well and demonstrates some slick animations and sharp feedback.

Continue reading “DIY Dungeon Crawler Game Plays On Single LED Strip”

FoTW: LED Strips Make Awful Servo Drivers

We must all have at some time or another spotted a hack that seems like an incredible idea and which just has to be tried, but turns out to have been stretching the bounds of what is possible just a little too far. A chunk of our time has disappeared without trace, and we sheepishly end up buying the proper part for the job in hand.

[Orionrobots] had a conversation with a YouTube follower about LED strips. An LED strip contains a length of ready-made PWM drivers, they mused. Wouldn’t it be great then, if each of the drivers on a strip could be connected to a servo, making the strip a ready-made single-stop SPI servo driver. With a large multi-servo robot to build, he set to work on a strip of WS2801s.

If you are in the Soldering Zone and have elite skills at the iron, then soldering a wire to a surface mount driver chip is something entirely possible. For mere mortals though it’s a bit of a challenge, and he notes just how much extra time it’s added to the project. The fun starts though when the servo is hooked up, the best that can be said is that it vibrates a bit. On paper, the LED drivers should be able to drive a servo, because they can create the correct waveform. But in practice the servo is designed to accept a logic level input while the driver is designed to sit in series with an LED and control its current. In practice therefore the voltages required for a logic transition can’t quite be achieved.

He concludes by recommending that viewers splash out on a servo driver board rather than trying an LED strip. We applaud him for the effort, after all it’s a hack any of us might have thought of trying for ourselves.

Continue reading “FoTW: LED Strips Make Awful Servo Drivers”