SDR As A Police And Fire Radio Scanner

If you’ve lost interest in that DVB dongle you bought to give software defined radio a try you should bust it back out. [Harrison Sand] just finished a guide on how to use SDR to listen in on Police and Fire radio bands.

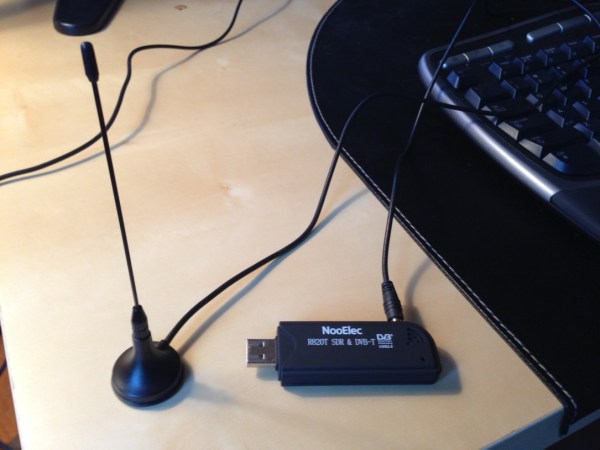
The project, which results in the crystal clear audio reception heard after the break, uses a whole lists of packages on a Windows box to access the emergency bands. SDRSharp, which has been popular with other DVB dongle hacks, handles the hardware work. In this case the dongle is a Newsky TV28T v2 module that he picked up for a few bucks. He’s also using some support programs including the Digital Speech Decoder which turns the data into audio.

We wonder how many areas this will work for. It was our understanding that law enforcement was moving to encrypted communications systems. But all we really know about it is that you can jam the system with a children’s toy.

Continue reading “SDR As A Police And Fire Radio Scanner”

Makerbot Shows Off 3D Scanner

scan

We’ve said our piece over Makerbot and their interpretation of what Open Source means, but the fact remains if you’re sourcing a 3D printer for a high school shop class or a hackerspace, you really can’t do much better than a Makerbot Replicator. Apparently Makerbot is looking to expand their 3D design and fabrication portfolio; they just announced an upcoming 3D scanner at SXSW. It’s called the Makerbot Digitizer, and it takes real, 3D objects and turns them into CAD files.

Since Makerbot and [Bre Pettis] didn’t give out much information about the 3D scanner they’re working on, the best information comes from Techcrunch. The Makerbot Digitizer uses two lasers to scan real objects and turns them into 3D CAD files. The hardware isn’t finalized, and the prototype is made of a few pieces of laser cut plywood. No details are available on how much the Digitizer will cost, when it will be available, or what its resolution is.

Of course 3D scanning of real objects to translate them into CAD files is nothing new for Hackaday readers. We’ve seen our fair share of desktop 3D scanners, including one that was built in a day out of junk. Even the Kickstarter crew has gotten into the action with a few desktop 3D scanners, some of which scan in full color.

3D Scanner Made In A Day

diy-3d-scanner

The LVL1 Hackerspace held a hackathon back in June and this is one of the projects that was created in that 24-hour period. It’s a 3D scanner made from leftover parts. The image gives you an idea of the math used in the image processing. It shows the angular relations between the laser diode, the subject being scanned, and the webcam doing the scanning.

The webcam is of rather low quality and one way to quickly improve the output would be to replace it with a better one. But because the rules said they had to use only materials from the parts bin it worked out just fine. The other issue that came into play was the there were no LCD monitors available for use in the project. Because of that they decided to make the device controllable over the network. On the right you can see a power supply taped to the top of a car computer. It connects to the laser (pulled out of a barcode scanner which produces a line of red light) and the turntable. A Python script does all of the image processing, assembling each slice of the scan into both an animated GIF and an OBJ file.

[Thanks Nathan]

Flatbed Scanner Eliminates The Perils Of Macro Photography

IMG_7728

If you have ever played around with macro photography, you’ll know how hard it is to get a focused image of something that isn’t two-dimensional. For virtually every 3D object, you’ll have to deal with the depth of field – the small region where things are actually in focus. [David] came up with a neat homebrew solution for making sure everything in his macro photos is in focus using a discarded flatbed scanner and a Raspberry Pi.

[David]’s technique relies on focus stacking. Basically, [David] takes dozens of images of the same object, moving the camera closer by a fraction of an inch before snapping each frame. These pictures are stitched together with CombineZ, a piece of software used for extending the depth of field in images.

The hardware part of the build is a Raspberry Pi hooked up to a stepper motor driver and the shutter button of [David]’s camera. By attaching his camera to the carriage of a flatbed scanner, [David] can inch his camera ever closer to his object of study while grabbing the images for CombineZ.

The results are impressive, and would be nearly impossible to replicate any other way without tens of thousands of dollars in camera equipment.

[Ben Krasnow] Builds A CT Scanner

gif

After building a homebrew x-ray backscatter imager, [Ben Krasnow] realized he had nearly all the components to build his own CT scanner, able to make a 3D model of the inside of a frozen chicken.

Basically, a CT scanner takes dozens of x-rays of an object and reassembles them with the help of fancy algorithms to allow doctors to peer inside a human body. The CT scanners you’ll find at your local hospital are monstrous devices, rotating an x-ray tube and sensor around a patient with the help of some very heavy duty electromechanical engineering. [Ben] wanted to keep his build rather small, so instead of rotating the x-ray tube and screen around an object, he simply made a stepper motor-driven lazy suzan to rotate his frozen bird.

[Ben] set a digital camera off to the side of his build and captured 45 images of a rotating chicken. After correcting for the perspective distortion, the images were thrown into 3D Slicer to create a true 3D representation of a x-rayed chicken.

Continue reading “[Ben Krasnow] Builds A CT Scanner”

DIY TSA Backscatter Body Scanner

[Ben Krasnow] built his own version of the TSA’s body scanner. The device works by firing a beam of x-rays at at target. Some of the beam will go through the target, some will be absorbed by the target, and some will reflect back. These reflected x-rays are called ‘backscatter‘, and they are captured to create an image.

In [Ben]’s setup a rotating disk focuses x-rays into beams that travel in arcs across the X-axis. The disk is moved along the Y-axis to fill in the scan. On the disk assembly, there is a potentometer to measure the y-axis position of the beam, and an optical sensor to trigger an oscilloscope, aligning the left and right sides of the image. Using these two sensors, the scope can reconstruct an X-Y plot of the scan.

To detect the x-rays, a phosphorous screen turns the backscattered x-rays into visible light, and a photo-multiplier amplifies the light source. A simple amplifier circuit connects the photo-multiplier to a scope, controlling the brightness at each point.

The result is very similar to the TSA version, and [Ben] managed to learn a lot about the system from a patent. This isn’t the first body scanner we’ve seen though: [Jeri Ellsworth] built a microwave version a couple years ago.

The impressive build does a great job of teaching the fundamentals of backscatter imaging. [Ben] will be talking about the project at EHSM, which you should check out if you’re in Berlin from December 28th to the 30th. After the break, watch [Ben]’s machine scan a turkey in a Christmas sweater.

Continue reading “DIY TSA Backscatter Body Scanner”

Google Books Team Open Sources Their Book Scanner

It’s no secret that Google has been scanning hundreds of thousands of books in the hope of recreating the Library of Alexandria. Publishers and authors really didn’t like that idea, so the Google books team is doing the next best thing: they’re releasing the plans for a very clever book scanner in the hope others will pick up the torch of creating a digital library of every book ever written.

Unlike some other book scanners we’ve seen that rely on an operator manually flipping pages, this linear book scanner turns the pages automatically with the help of a vacuum cleaner and a cleverly designed sheet metal structure after passing them over two image sensors taken from a desktop scanner.

The bill of materials comes in at around $1500, but according to the official design documents this includes a very expensive scanner, something that could be replaced in true hacker style with a few salvaged flatbed scanners.

After the break you can check out a Google Tech Talk presented by [Dany Qumsiyeh] going over the design and function of his DIY book scanner. There’s also a relatively thorough design document over on a Google code page.

Continue reading “Google Books Team Open Sources Their Book Scanner”