Recreate A PCB With A Scanner And Inkscape

turnsig

[John] has managed to replace a broken turn signal PCB by scanning it and converting to Gerber format. [John] purchased a Triumph Spitfire with toggle switch wired up for turn signal control. The “official” replacement part worked better than the toggle switch, but it didn’t cancel after turning. He was able to get the original switch, only to find it had a hole completely burned through the phenolic board. This isn’t completely surprising, as Triumph used a Lucas Industries electrical system. As anyone who has owned a car with a Lucas “prince of darkness” electrical system will tell you, Lucas systems were not known for quality. A quick Google search brings up plenty of pages attesting to this.

Phenolic resin/paper was a common early PCB material.  The FR-4 fiberglass boards most commonly used today could be considered descendants of FR-1 and FR-2 phenolic. (The FR in this case stands for Fiber Reinforced). The standardization worked in [John’s] favor, as his burned board was 31 mils thick, which is still a standard PCB thickness. Re-creating an odd sized board such as this isn’t a hard job. It would however mean spending quite a bit of time with a ruler and a caliper. Rather than spend all that time measuring and re-drawing, [John] scanned his PCB on a flatbed scanner. He used graph paper as a background to verify the image wasn’t being stretched or skewed.

[John] brought his scan into inkscape, and traced both the outline and copper areas. The outline and copper had to be exported as two separate files, so he added corner marks outside the board outline as fiducials.  He then used pstoedit to convert inkscape’s eps output files to gEDA pcb format. The two files were rejoined in gEDA. From there [John] exported a Gerber, and ran it on his home PCB milling machine.  The results look good. [John] plans to make another revision of the board from a professional PCB house with vias to hold the copper to the substrate.

39 Raspberry Pi 3D Scanner

[Richard] just posted an Instructable on his ridiculously cool 39 Pi 3D Scanner! That’s right. 39 individual Raspberry Pies with camera modules.

But why? Well, [Richard] loves 3D printing, Arduinos, Raspberry pies, and his kids. He wanted to make some 3D models of his kids (because pictures are so last century), so he started looking into 3D scanners. Unfortunately almost all designs he found require the subject to sit still for a while — something his 2-year old is not a fan of. So he started pondering a way to take all the pictures in one go, to give him the ability to generate 3D models on the fly — without the wait. 

He originally looked at buying 39 cheap digital cameras, but didn’t want to have all the images on separate SD cards, as it would be rather tedious to extract all the images. Using the Raspberries on the other hand, he can grab them all off a network. So he set off to build a very awesome (and somewhat expensive) life-size 3D scanning booth. Full details are available on his blog at www.pi3dscan.com

Stick around after the break to see it in action at Maker Faire Groningen 2013!

Continue reading “39 Raspberry Pi 3D Scanner”

Towards A Low Cost, Desktop CT Scanner

For [Peter Jansen], the most interesting course in grad school was Advanced Brain Imaging; each class was a lecture followed by a trip to the imaging lab where grad students would take turns being holed up in a MRI machine. A few years into his doctorate, [Peter] found himself in a very opportune situation – his local hackerspace just acquired a shiny new laser cutter, he had some free time on his hands, and the dream of creating a medical imaging device was still in the back of his mind. A few weeks later, the beginnings of an open source CT scanner began to take shape.

This isn’t an MRI machine that [Peter] so fondly remembered from grad school. A good thing, that, as superconducting magnets chilled with liquid helium is a little excessive for a desktop unit. Instead, [Peter] is building a CT scanner, a device that takes multiple x-ray ‘slices’ around an axis of rotation. These slices can then be recompiled into a 3D visualization of the inside of any object.

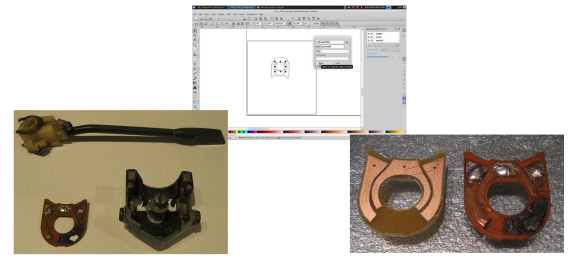
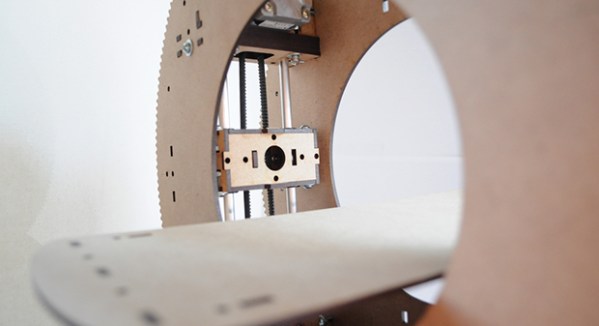
The mechanics of the build are a Stargate-like torus with stepper motor moving back and forth inside the disk. This, combined with the rotation of the disk and moving the bed back and forth allow the imager to position itself anywhere along an object.

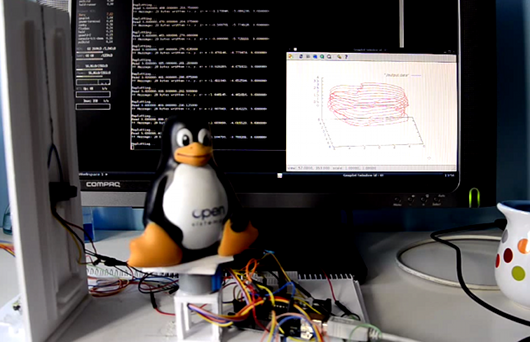
For the radioactive detector, [Peter] is using a CCD marketed as a high-energy particle detector by Radiation Watch. Not only does this allow for an easy interface with a microcontroller, it’s also much smaller than big, heavy photomultiplier tubes found in old CT scanners. As for the source, [Peter] is going for very low intensity sources, most likely Barium or Cadmium that will take many minutes to capture a single slice.

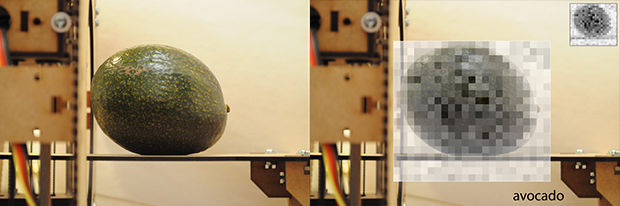
The machine operates just above normal background radiation, so while being extremely safe for a desktop CT scanner, it is, however, very slow. This doesn’t bother [Peter], as ‘free’ time on a CT scanner allows for some very interesting, not seen before visualizations, such as a plant growing from a seed, spreading its roots, and breaking the surface as a seedling.

[Peter] still has some work to do on his desktop CT scanner, but once the stepper motor and sensor board are complete, he should be well on his way towards scanning carrots, apples, and just about everything else around his house.

Hacking A Flatbed Scanner To Scan Very Large Documents

lds

When you need to scan really large documents, camera setups can get pretty expensive. There are professionals that do it, but they are fairly pricey too. What if you need to do it on the cheap? A flatbed scanner would be perfect, but the lip on the edge of most flatbed scanners keeps the document from touching the platen properly. [Matthew] decided to hack his Canon LiDE 90 scanner to use it in a face-down format. By removing the top of the case, and making a couple extra tweaks, the scanner can now lay flat and simply be moved in a grid.

Once you have the images, you’ll need a way to stitch them together. [Matthew] points to this tutorial, but he awesomely decided to write a little Python script to make it all happen automatically. We imagine that script might be useful for more than just this project.

We’ve seen some other scanners recently, but this one is probably the easiest for the majority of hobbyists to achieve with parts on hand.

Scratch-built Gigapixel Scanner

scratch-built-gigapixel-scanner

The presence of a camera in this image may be a bit confusing since we’re calling it a scanner. What’s actually going on is that macro-images this piece of art are being captured automatically. The multiple shots will later be assembled into one fascinatingly high-resolution image. The CNC scanner rig is [Charlie Romer’s] summer project.

Unfortunately [Charlie] hasn’t yet collected all the information on the project into one place. After the break you’ll find more images, as well as a few demo videos. The best place to start is probably his proof-of-concept from this Spring. He shows a single-axis CNC mount for the camera. It takes an entire row of images. The assembled photo from that test is shown below. We believe the faint yellow dots in the macro part of the example are fingerprints purposefully left by the printer called printer stenography to help prevent forgery.

The larger rig uses movement on two axes. The idea is that the artwork will be perfectly positioned so that manual focus set at one point will work along all points in the capture routine. He’s using a lamp for a light source but we’re sure he will upgrade so something like a ring light as the project continues.

Continue reading “Scratch-built Gigapixel Scanner”

Kinect Full Body Scanner

kinect-full-body-scanner

Why let the TSA have all the fun when it comes to full body scanning? Not only can you get a digital model of yourself, but you can print it out to scale.

[Moheeb Zara] is still in development with a Kinect based full body scanner. But he took a bit of time to show off the first working prototype. The parts that went into the build were either cut on a bandsaw, laser cut, or 3D printed. The scanning part of the rig uses a free-standing vertical rail which allows the Kinect to move along the Z axis. The sled is held in place by gravity and moved up the rail using a winch with some steel cable looped over a pulley at the top.

The subject stands on a rotating platform which [Moheeb] designed and assembled. Beneath the platform you’ll find a laser cut hoop with teeth on the inside. A motor mounted in a 3D printed bracket uses these teeth to rotate the platform. He’s still got some work to do in order to automate the platform. For this demo he move each step in the scanning process using manual switches. Captured data is assembled into a virtual module using ReconstructMe.

The Kinect has been used as a 3D scanner like this before. But that time it was scanning salable goods rather than people.

Continue reading “Kinect Full Body Scanner”

3D Scanner With Remarkable Resolution

Modeling simple objects in 3D can take some time. Modeling complex items… well you can get your college degree in that sort of thing. This method side-steps the artistic skill necessary to make the real virtual by using a laser and camera to map a three-dimensional object.

[Alessandro Grossi] is breaking the rules by using a 100mW laser for the project. He thinks that the Italian government prohibits anything over 5mW, but also mentions that the lens used to turn the laser dot into a vertical line drops the power dramatically. The beefy diode does still pay off, providing an incredibly intense line of light on the subject being mapped. The high-end DSLR camera mounted on the same arm as the laser captures a detailed image, which can be processed to dump everything other than the laser line itself. Because the two are mounted on different axes, the image provides plenty of perspective.  That translates to the 3D coordinates used in the captured model shown in the inlaid image.

We’ve seen 3D scanners that move the subject; they usually rotate it to map every side. This method only captures one side, but the stepper motor moves in such small increments that the final resolution is astounding. See for yourself in the video after the break.

Continue reading “3D Scanner With Remarkable Resolution”