Expanding The K40 Laser Cutter With Aluminum Extrusion

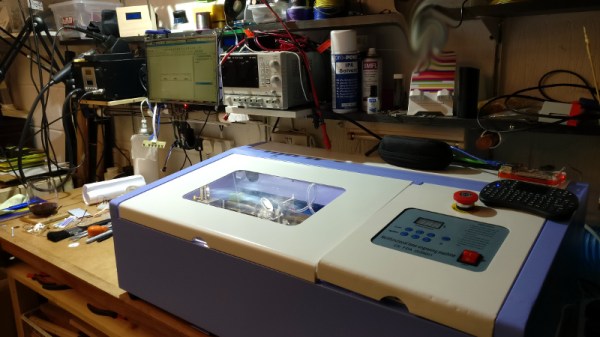
The K40 laser cutter is an excellent option if you need to laze some plywood or acrylic. It’s ubiquitous, it’s cheap, and there’s a vast community out there that will help you support any issue you could have. Unfortunately, the K40 laser cutter is lacking. It has a small bed, and it doesn’t have the latest technology like ‘switches’ that turn off the laser when you open the door.

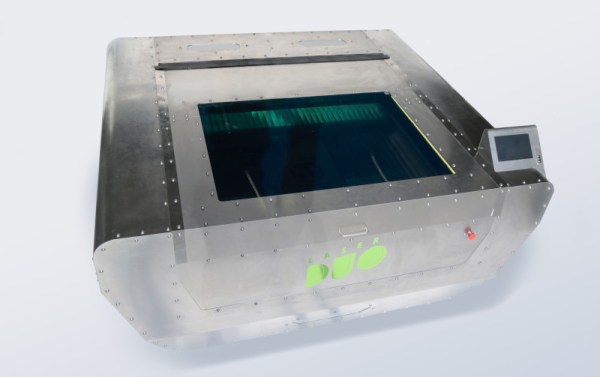
[frederik] recently upgraded his K40 to something great. He’s calling it the Layzor, and it has a huge 600×400 mm bed area, a feed-through slot for even wider workpieces, and fancy technology [frederik] is calling an ‘E-stop’. Sounds expensive, doesn’t it?

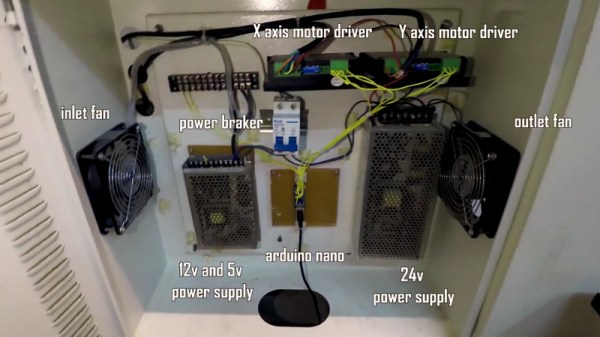
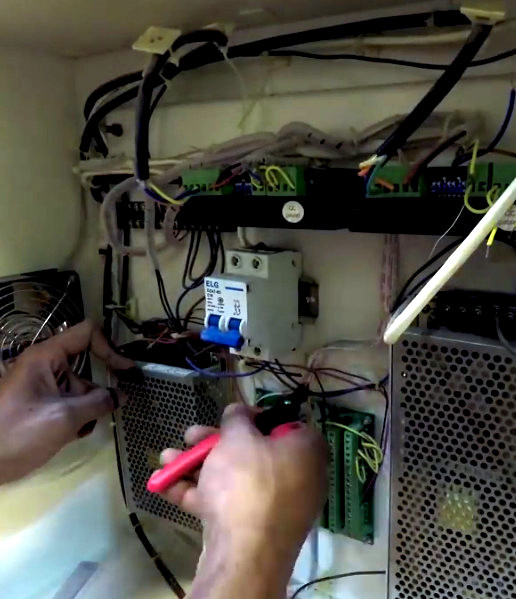
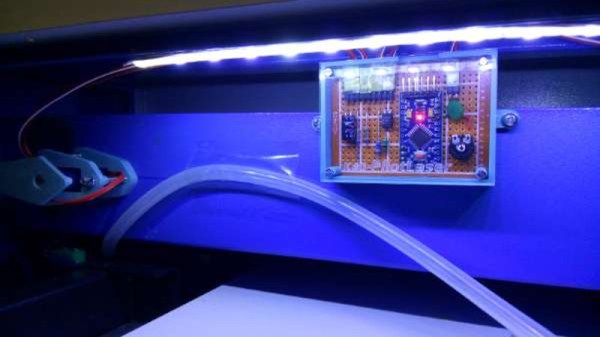
The build began by scavenging the K40 laser cutter for the electronics and laser tube, then building a new frame out of aluminum extrusion. A few parts had to be custom made, including a few stepper motor mounts and something to hold the laser tube. All of this was tied up in a box with acrylic panels, and went together as easily as any other CNC machine.

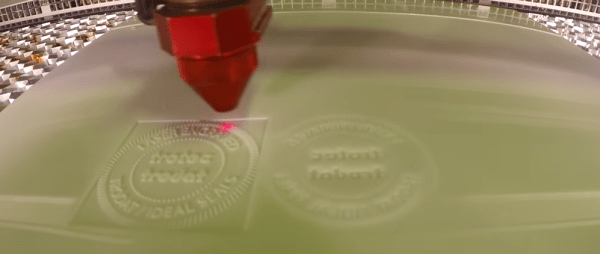
The finished project is great. It’s a relatively powerful laser cutter capable of most hobby work, and it was cheap. The total cost for this build was under €500. That’s not including the scavenged K40, but that’s still an amazing price for a very capable laser cutter.

Dual Source Laser Cutter Built Like A Tank, Cuts Most Anything

Laser cutters aren’t the sort of thing that you might think about making at home, but there’s no reason not to if you are careful and do your research. That’s what [Daniele Ingrassia] did with the Laser Duo, an open source laser cutter that has two light sources for cutting various materials. His final product is not a small device: it has a press-formed aluminum case that looks more like a World War I tank than a piece of precision machinery. But that’s for a good reason: you don’t mess about with lasers, especially the 130 Watt CO2 and 75 Watt Yag lasers that the Laser Duo uses. Continue reading “Dual Source Laser Cutter Built Like A Tank, Cuts Most Anything”

Laser Cutter Turns Scrapped To Shipped

We’ll go way out on a limb here and say you’ve probably got a ridiculous amount of flattened cardboard boxes. We’re buying more stuff online than ever before, and all those boxes really start to add up. At the least we hope they’re making it to the recycling bin, but what about reusing them? Surely there’s something you could do with all those empty shipping boxes…

Here’s a wild idea…why not use them to ship things? But not exactly as they are, unless you’re in the business of shipping big stuff, the probably won’t do you much good as-is. Instead, why not turn those big flattened cardboard boxes into smaller, more convenient, shippers? That’s exactly what [Felix Rusu] has done, and we’ve got to say, it’s a brilliant idea.

[Felix] started by tracing the outline of the USPS Priority Small Flat Rate Box, which was the perfect template as it comes to you flat packed and gets folded into its final shape. He fiddled with the design a bit, and in the end had a DXF file he could feed into his 60W CO2 laser cutter. By lowering the power to 15% on the fold lines, the cutter is even able to score the cardboard where it needs to fold.

Assuming you’ve got a powerful enough laser, you can now turn all those Amazon Prime boxes into the perfect shippers to use when your mom finally makes you sell your collection of Yu-Gi-Oh! cards on eBay. Otherwise, you can just use them to build a wall so she’ll finally stay out of your side of the basement.

[Thanks to Adrian for the tip.]

Continue reading “Laser Cutter Turns Scrapped To Shipped”

Arduino Revives Junkyard Laser Cutter

Some people have all the luck. [MakerMan] writes in to gloat tell us about a recent trip to the junkyard where he scored a rather serious looking laser cutter. This is no desktop-sized K40 we’re talking about here; it weighs in at just under 800 pounds (350 Kg), and took a crane to deliver the beast to his house. But his luck only took him so far, as closer inspection of the machine revealed it was missing nearly all of its internal components. Still, he had the frame, working motors, and laser optics, which is a lot more than we’ve ever found in the garbage.

After a whirlwind session with his wire cutters, [MakerMan] stripped away most of the existing wiring and the original control board inside the electronics bay. Replacing the original controller is an Arduino Nano running Grbl, likely giving this revived laser cutter better compatibility with popular open source tools than it had originally. Even though the laser cutter was missing a significant amount of hardware, he did luck out that both the motor drivers were still there (and working) as well as the dual power supplies to run everything.

After a successful motion test, [MakerMan] then goes on to install a new 90W laser tube. Supporting the tube is a rigged up water cooling system using a plastic jug and a cheap bilge pump. He also added an air assist system, complete with side mounted compressor. This pushes air over the laser aperture, helping to keep smoke and debris away from the beam. Finally, a blower was installed in the bottom of the machine with flexible ducting leading outside to vent out the smoke and fumes that are produced when the laser is in operation.

This machine is a considerable upgrade from the previous laser [MakerMan] built, and as impressive as this rebuild is so far, we’re interested in seeing where it goes from here. If you ask us, this thing is begging for an embedded LaserWeb server.

Continue reading “Arduino Revives Junkyard Laser Cutter”

Emboss Your Own Seals With A Laser Cutter

Parchment might be a thing of the past, but for those of us who still use paper an embossed seal can give everything from your official documents to your love letters a bold new feeling of authenticity. As far as getting your own seals made, plenty of folks will settle for having a 3rd party make them a seal, but not us. [Jason] shows us just how simple it is to raster our own seals with a laser cutter.

As far as the process goes, there are no tricks outside the typical workflow for raster engraving. Here, [Jason] simply creates a positive and (mirrored) negative seal pattern for each side of the seal embosser. The pattern is set for raster engraving, and the notched outline will be vector cut. From here, he simply exports the design, and the laser handles the rest.

This hack turned out so cleanly it almost seems like it could got into professional use–and it already is! Some extra Google-fu told us that it’s actually a fairly standard technique across the embossing industry for making embossing seals. Nevertheless, we couldn’t share our excitement for just how accessible this technique can be to anyone within reach of some time on a laser cutter.

[Jason] is using Delrin as his material to capture the design, which cuts cleanly and nicely handles the stress of being squished against your legal documents a couple hundred times. We’ve had our fair share of love on these pages for this engineering plastic. If you’re looking to get a closer look at this material, have a go at our materials-to-know debrief and then get yourself equipped with some design principles so that you’re ready to throw dozens of designs at it.

It’s not the first time the crafting and hacking communities intermingle and start sharing tools. In fact, if you’ve got yourself a vinyl cutter kicking around, why not have a go at churning out a few pcb stencils?

Thanks for the tip, [Doug]!

Continue reading “Emboss Your Own Seals With A Laser Cutter”

K40 Laser Cutter, Meet Raspberry Pi

The inexpensive Chinese K40 laser cutter has become the staple of many a small workshop within our community, providing a not-very-large and not-very-powerful cutter for a not-very-high price. As shipped it’s a machine that’s not without its flaws, and there is a whole community of people who have contributed fixes and upgrades to make these cutters into something a lot more useful.

[Alex Eames] bought a K40, and since he’s the person behind the Raspi.tv Raspberry Pi business, when he switched from the supplied Corel-based software to the popular open-source K40 Whisperer his obvious choice was to run it on a Raspberry Pi. Since K40 Whisperer is written in Python he reasoned that the Pi’s ARM platform would not prevent its use, so he set to work and documented the process and his workflow.

It’s a straightforward enough process, and his K40 now has a Pi into which he can SFTP his files rather than the inevitable old laptop that accompanies most K40s. With so many K40 improvements created by its community, we find it surprising that some enterprising Chinese manufacturer hasn’t seen the opportunity to make a quick buck or two extra and incorporate some of them into their products at the factory, including one of the many single board computers that could perform this task.

We’ve covered a lot of K40 stories over the years, if you are new to this machine you might like to take a look at this story of bringing one to life.

Laser Cutter Alignment Mod Skips Beam Combiner

A lot of the DIY laser engravers and cutters we cover here on Hackaday are made with laser diodes salvaged from Blu-ray drives and projectors, which are visible lasers in the 400 – 450nm range (appearing as violet or blue). Unfortunately there is an upper limit in terms of power on visible diode lasers, most builds max out at 5W or so. If you need more power than that, you’ll likely find yourself looking at gas laser cutters like the K40. While the K40 is a great starting point if you’re looking to get into “real” lasers, it’s a very different beast from the homebrew builds using visible lasers.

With a gas laser the beam itself is invisible, making it much more difficult to align or do test runs. One solution is to add a visible laser to the K40 which can be used to verify alignment, but making sure it’s traveling down the same path as the primary laser usually requires an expensive beam combiner. Looking to avoid this cost, [gafu] wanted to see if it was possible to simply move the visible laser into the path of the primary beam mechanically.

An adjustable microswitch detects when the lid has been opened.

In the setup that [gafu] has come up with, a cheap laser module (the type from a handheld laser pointer) is moved into the path of the primary laser on an arm that’s actuated by a simple hobby servo. To prevent the primary and visible lasers from firing at the same time, an Arduino is used to control the servo given the current state of the K40’s lid. If the lid of the K40 is open, the primary laser is shutoff and the visible laser is rotated into position so the operator can see where the primary laser’s beam would be hitting. Once the lid is closed, the visible laser rotates out of the way and the primary is powered back up.

Running the cutting or engraving job with the lid of the K40 machine open now let’s [gafu] watch a “dry run” of the entire operation with the visible laser before finally committing to blasting the target with the full power beam.

We’ve covered many hacks and modifications for everyone’s favorite entry-level CO2 laser cutter. From replacing the controller to making it bigger, K40 owners certainly seem like a creative bunch.