Creating A Laser Cutter From A 3D Printer

The average FDM 3D printer is not so different from your garden variety laser cutter. They’re often both Cartesian-coordinate based machines, but with different numbers of axes and mounting different tools. As [Gosse Adema] shows, turning a 3D printer into a laser cutter can actually be a remarkably easy job.

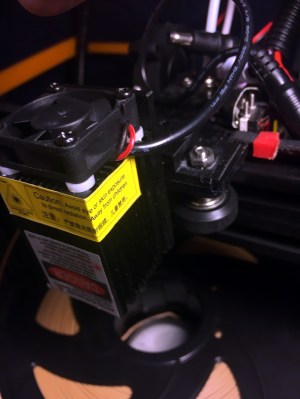
The build starts with an Anet A8 3D printer. It’s an affordable model at the lower end of the FDM printer market, making it accessible to a broad range of makers. With the help of some 3D printed brackets, it’s possible to replace the extruder assembly with a laser instead, allowing the device to cut and engrave various materials.

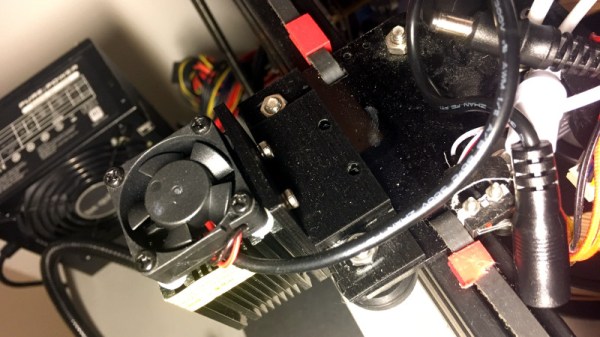
[Gosse] went with a 5500 mW diode laser, which allows for the cutting and engraving of wood, some plastics and even fabrics. Unlike a dedicated laser cutter there are no safety interlocks and no enclosure, so it’s important to wear goggles when the device is operating. Some tinkering with G-Code is required to get things up and running, but it’s a small price to pay to get a laser cutter on your workbench.

We’ve seen [Gosse]’s 3D printer experiments before, with the Anet A8 serving well as a PCB milling machine.

Modular CNC Build Gets You Both A Mill And A Laser Cutter

CNC builds come in all shapes and sizes. There’s delta manipulators, experimental polar rigs, and all manner of cartesian builds, large and small. After completing their first CNC build, [jtaggard] took what they learned and applied it in the development of a new machine.

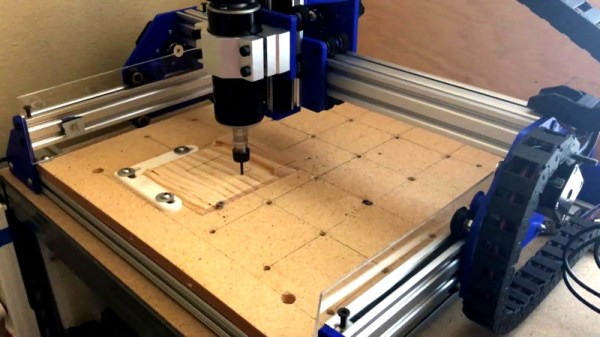
It’s a desk-sized cartesian design, with a frame built from V-slot extrusion cut to size by circular saw. This is a great way to get quality extrusion for a custom build, and is readily available and easy to work with. The gantry rides on wheels, with the X and Y axes being belt driven, plus a screw drive for Z. A couple of NEMA 17s and a NEMA 23 provide motive power, and an Arduino Uno with stepper drivers is the brains of the operation. 1/4″ thick PLA plates are used to assemble everything, and while [jtaggard] intended to replace these with aluminium down the track, so far the plastic has proved plenty rigid enough for early tests of both machining and engraving wood.

It’s a great entry-level CNC build, which has proved usable with both a 500W spindle and a 2.5W laser for engraving. Being modular in nature, it would be easy to add other tools, such as a pen plotter or vinyl cutting blade for further versatility.

DIY CNC builds are always popular, as you end up with a useful tool as a reward for your hard work. Video after the break.

Continue reading “Modular CNC Build Gets You Both A Mill And A Laser Cutter”

Fail Of The Week: Did My Laser Cutter Tube Really Burn Out?

All the cool kids are doing it these days, or more like for many years now: you can get a laser cutter for a song if you don’t mind doing your own repairs and upgrades — you know, being a hacker. The downside is that some failures can really ruin your day. This is what [Erich Styger] encountered with his cutter that is just a bit more than a year old. This Fail of the Week looks at the mysterious death of a CO2 laser tube.

This is the infamous K40 laser cutter. Our own [Adam Fabio] just took one on a couple of months back and [Erich] even references Hackaday coverage of the K40 Whisperer project as what pushed him over the edge to make the purchase. We’ve followed his blog as he acquired the cutter and made upgrades along the way, but after an estimated 500 hours of use, a horrible teeth-gnashing screech sprung forth from the machine. [Erich’s] reaction was to hit the e-stop; that’s certainly why it’s there.

Chasing down the problem is a story well-told, but as is often the case with these FotW articles, in the end what caused the failure is not entirely known. We’d love to hear what you think about it in the comments below.

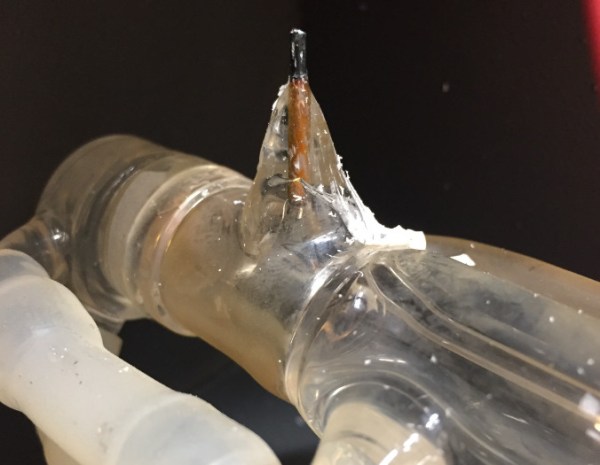
The investigation began at the power supply for the laser, but that didn’t yield any answers. Next he moved to the tube itself, noticing that the wire connection to the tube’s anode wasn’t soldered. The anode is an unknown material he suspects to be graphite and he found a video showing the “soldering” process for connecting a wire. (We added quotes to that as the video he linked doesn’t actually solder anything but the wrapped wire strands themselves.) The solution he found is a great tip to take away from the story. It’s a socket by TE Connectivity to which he soldered the wire. Assuming it’s power rated for the task, and won’t fall off during normal operation, this is a great way to do it.

But we digress. Even with the connection made, the old tube had to be replaced with a new one. It’s also notable that the portion of that anode inside the bad tube is orange in color when a new tube would be black like the part on the outside. Does this hint at why that tube died, and could this have been avoided? If you have insight, help us learn from this failure by leaving a comment below.

Scratch-Building A Supersized Laser Cutter

Now that 3D printers have more or less hit the mass market, hackers need a new “elite” tool to spend their time designing and fiddling with. Judging by the last couple of years, it looks like laser cutters will be taking over as the hacker tool du jour; as we’re starting to see more and more custom builds and modifications of entry-level commercial models. Usually these are limited to relatively small and low powered diode lasers, but as the following project shows, that’s not always the case.
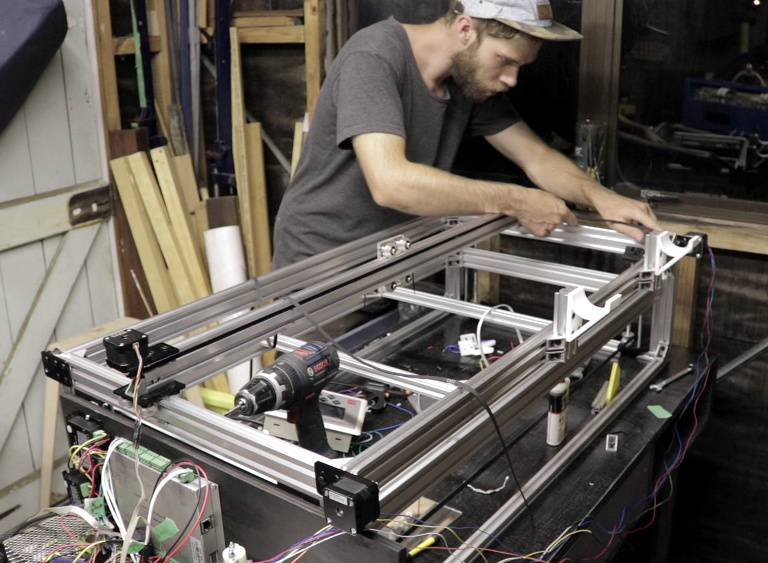
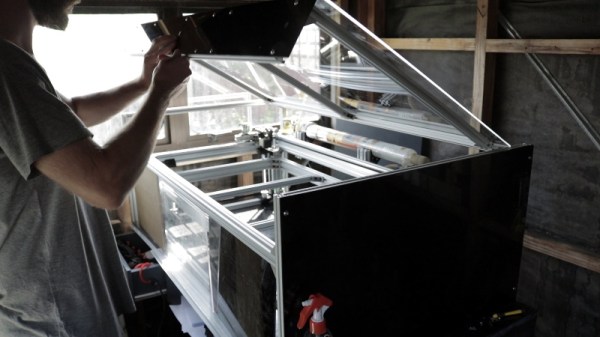
This large format laser cutter designed and built by [Rob Chesney] is meticulously detailed on his blog, as well as in the in the video after the break. It’s made up of aluminium profile and a splattering of ABS 3D printed parts, and lives in an acrylic enclosure that’s uniquely isolated from the laser’s internal gantry. All told it cost about $2,000 USD to build, but considering the volume and features of this cutter that’s still a very fair price.

[Rob] carefully planned every aspect of this build, modeling the entire machine in CAD before actually purchasing any hardware. Interestingly enough his primary design constraint was the door to his shed: he wanted to build the largest possible laser cutter that could still be carried through it. That led to the final machine’s long and relatively shallow final dimensions. The design was also guided by a desire to minimize material waste, so when possible parts were designed to maximize how many could be cut from a one meter length of aluminum extrusion.

The laser features a movable Z axis that’s similar in design to what you might see in a Prusa-style 3D printer, with each corner of the gantry getting an 8 mm lead screw and smooth rod which are used in conjunction to lift and guide. All of the lead screws are connected to each other via pulleys and standard GT2 belt, but as of this version, [Rob] notes the Z axis must be manually operated. In the future he’ll be able to add in a stepper motor and automate it easily, but it wasn’t critical to get the machine running.

He used 3D printed parts for objects which had a relatively complex geometry, such as the laser tube holders and Z axis components, but more simplistic brackets were made out of cut acrylic. In some components, [Rob] used welding cement to bond two pieces of acrylic and thereby double the thickness. Large acrylic panels were also used for the laser’s outer enclosure, which was intentionally designed as a separate entity from the laser itself. He reasoned that this would make assembly easier and faster, as the enclosure would not have to be held to the same dimensional tolerances as it would have been if it was integrated into the machine.

[Rob] gives plenty of detail about all the finer points of water cooling, laser control electronics, aligning the mirrors, and really anything else you could possibly want to know about building your own serious laser cutter. If you’ve been considering building your own laser and have anything you’re curious or unsure about, there’s a good chance he addresses it in this build.

Short of having the fantastically good luck to find a laser cutter in the trash that you can refurbish, building your own machine may still be the best upgrade path if you outgrow your eBay K40.

Continue reading “Scratch-Building A Supersized Laser Cutter”

The How And Why Of Laser Cutter Aiming

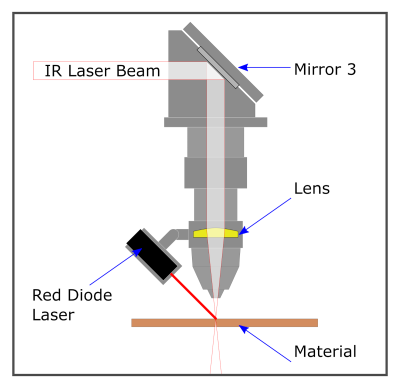
Laser aficionado [Martin Raynsford] has built up experience with various laser cutters over the years and felt he should write up a blog post detailing his first-hand findings with an often overlooked aspect of the machines: aiming them. Cheap diode laser cutters and engravers operate in the visible part of the spectrum, but when you get into more powerful carbon dioxide lasers such as the one used in the popular K40 machines, the infrared beam is invisible to the naked eye. A secondary low-power laser helps to visualize the main laser’s alignment without actually cutting the target. There are a couple of ways to install an aiming system like this, but which way works better?

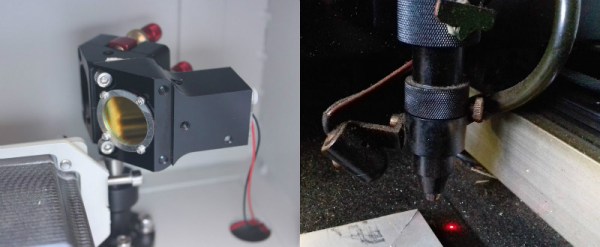
[Martin] explains that there are basically two schools of thought: a head-mounted laser, or a beam combiner. In both cases, a small red diode laser (the kind used in laser pointers) is used to indicate where the primary laser will hit. This allows the user to see exactly what the laser cutter will do when activated, critically important if you’re doing something like engraving a device and only have one chance to get it right. Running a “simulation” with the red laser removes any doubt before firing up the primary laser.

That’s the idea, anyway. In his experience, both methods have their issues. Head-mounted lasers are easier to install and maintain, but their accuracy changes with movement of the machine’s Z-axis: as the head goes up and down, the red laser dot moves horizontally and quickly comes out of alignment. Using the beam combiner method should, in theory, be more accurate, but [Martin] notes he’s had quite a bit of trouble getting both the red and IR lasers to follow the same course through the machine’s mirrors. Not only is it tricky to adjust, but it’s also much more complex to implement and may even rob the laser of power due to the additional optics involved.

In the end, [Martin] doesn’t think there is really a clear winner. Neither method gives 100% accurate results, and both are finicky, though in different scenarios. He suggests you just use whatever method your laser cutter comes with from the factory, as trying to change it probably isn’t worth the effort. But if your machine doesn’t have anything currently, the head-mounted laser is certainly the easier one to retrofit.

In the past, we’ve covered a third and slightly unconventional way of aiming the K40, as well as a general primer for anyone looking to pick up eBay’s favorite laser cutter.

Laser Cutter Resurrection Uncovers A Magnificent Machine Beneath The Ash

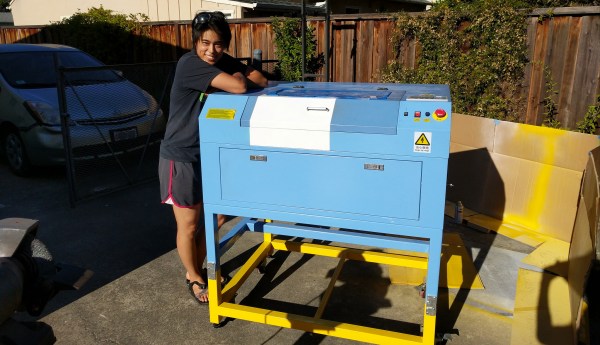
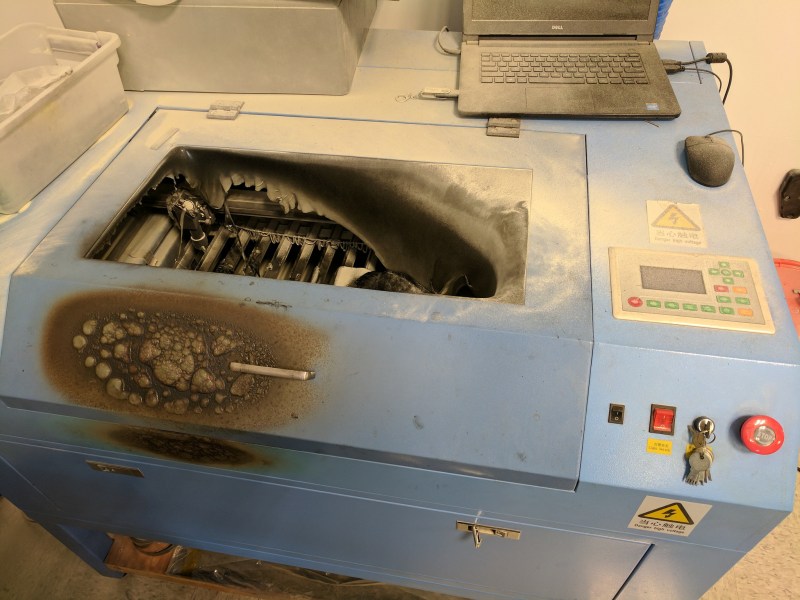
Trash is relative. When my coworker accidentally lit an ABS-barbecue inside the company laser cutter, he made trash. The wreckage was headed for the dump, but I managed to save it and pass it on to my friend [Amy]. Four months later, she phoenixed it back to life from the trash-it-was to a glorious new system more powerful than the original. This is her story, carefully told in detail in a three-part series (part one, part two, part three) that takes us on a journey from trash to triumph. She even recorded video of the entire process (also embedded below)

Get your notes out because while [Amy] spares every expense to keep this project cheap, she spares no expense at laying out the details for anyone’s path to success when working with these beasts.

Free Laser Cutter Starter Pack

As far as origin stories go, our story starts at my last employer’s office. I was in the machine shop asking one of our MechEs a question when the intern points a finger towards the corner of the room and asks: “hey is that supposed to be on fire?” I turn around to see billowing flames coming from our budget Chinese laser cutter. “Nope!” I say. “We need a fire extinguisher!” But our MechE was already on it. In half a moment he returned with an extinguisher. With one squirt the fire was out, but the machine was caked with a nasty powdery debris. It turns out another coworker had committed the almighty sin of laser cutting: he turned it on and walked away. Better yet, it was cutting ABS with a disconnected air nozzle.

This cutter was headed to the dump, but a few shenanigans later, I managed to divert this heap to [Amy]. The paint job was an absolute disaster on the outside, and the gooey ABS-and-powder mixture had caked over the inside. [Amy] dug in, stripping off the paint flakes and re-coating it. Apart from the belts, she salvaged every other part inside the machine. Her secret: “IPA and steel wool.” From there, she built her own fume extractor and lofted the whole system onto a frame she welded herself so that she could push both extractor and cutter around her wood shop as a unit. These days, it’s seeing some mileage for cutting out jigs for her woodworking projects.

Perhaps what’s truly special about this project is that she restored it with the camera rolling. As if building projects isn’t hard enough, getting the right lighting and camera angles while you’re doing the work is even more work! There’s no drop-down lofted camera setup in her garage, so each documented step is carefully set up so it captures what’s happening onscreen. While the IPA-and-steel wool might’ve been one nifty trick, by the end of these videos you’ll find that there really aren’t any secrets: just one engineer who sees the dignity in a project done well and has the patience to carry it out.

Get to know [Amy] on her blog, and you’ll discover the true finesse of her scavenging and engineering wielded hand-in-hand. From Ukuleles borne of fallen tree branches to a garage woodshop bootstrapped from a series of Craigslist adventures, it’s no surprise that a broken laser cutter would find a new life when it landed in her hands.

Continue reading “Laser Cutter Resurrection Uncovers A Magnificent Machine Beneath The Ash”

Turn A Cheap 3D Printer Into A Cheap Laser Cutter

We know it’s hard to hear it, but the days of you being a hotshot at the local Hackerspace because you’ve got a 3D printer at home are long gone. While they’re still one of the most persnickety pieces of gear on the hacker’s bench, they’re certainly not the rarest anymore. Some of these printers are so cheap now they’re almost impulse buys. Like it or not, few people outside of your grandmother are going to be impressed when you tell them you’ve got a personal 3D printer anymore; and we wouldn’t be surprised if even granny picked up a Monoprice Mini during the last open box sale.

But while 3D printer ownership isn’t the pinnacle of geek cred it once was, at least there’s a silver lining: cheap motion platforms we can hack on. [squix] writes in to tell us about how he added a laser to his $200 USD Tevo Tarantula 3D printer, greatly expanding the machine’s capabilities without breaking the bank. The information in his write-up is pretty broadly applicable to most common 3D printer designs, so even if you don’t have a Tarantula it shouldn’t be too hard to adapt the concept.

The laser is a 2.5 W 445 nm module which is very popular with low-cost laser cutter setups. It’s a fully self-contained air cooled unit that just needs a source of 12 V to fire up. That makes it particularly well suited to retrofitting, as you don’t need to shoehorn in any extra support electronics. [squix] simply connected it to the existing power wires for the part cooling fan he added to the Tarantula previously.

You may want to check the specs for your 3D printer’s control board before attaching such a high current device to the fan connector. Best case it just overloads the board’s regulator and shuts down, worst case the magic smoke might escape. A wise precaution here might be to put a MOSFET between the board’s fan output the and the laser, but we won’t tell you how to live your life. As far as laser safety, this device should probably work inside an opaque box, or behind closed doors.

Once the laser is hanging off the fan port of your printer’s controller, you can turn it on with the normal GCode commands for fan control, M106 and M107 (to turn it on and off, respectively). You can even control the laser’s power level by adding an argument to the “on” command like: M106 S30.

Then you just need to mount the laser, and it’s more or less business as usual. Controlling a laser engraver/cutter isn’t really that different from controlling a 3D printer, so [squix] is still using OctoPrint to command the machine; the trick is giving it a “3D model” that’s just a 2D image with no Z changes to worry about. We’ve seen the process for doing that in Inkscape previously.

With this laser module going for as little as $60 USD (assuming you’ve got a 3D printer or two laying around to do the conversion on), this is a pretty cheap way to get into the subtractive manufacturing game. Next stop from there is getting one of those K40’s everyone’s talking about.

Continue reading “Turn A Cheap 3D Printer Into A Cheap Laser Cutter”