One of the problems that has accompanied the advent of ever more complex home entertainment systems is the complexity of the burgeoning stack of remote controls that manifest themselves alongside your system. It doesn’t matter if you have a fancy does-the-lot universal remote, you are still left with a slew of functions to perform before you can sit down to enjoy the music.
[Robert Cowan] had this problem with his whole-house audio system. Playing music required a fiddle with the remote, and the moment was gone. What was needed was an automatic system that simply issued the relevant commands to the stereo without all the fuss.
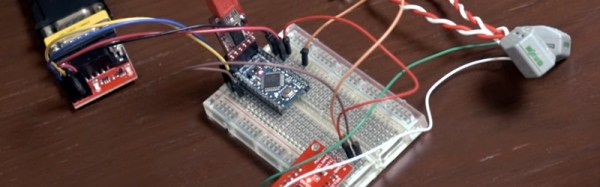
His solution was to have everything happen when an audio output was detected from his Sonos Connect streaming media player. He tried rectifying its line output to detect music but hit problems, so instead used a SparkFun audio detector module. This in turn speaks to an Arduino, which then talks via a level shifter to the stereo’s RS232 port. [Robert] included all the relevant parts, schematic, and software is links in the video description. It’s a project that should almost be a feature built into a decent stereo, yet the manufacturers prefer the awful interfaces of their remote controls.