Hacking Oklahoma State University’s Student ID Cards

[Sam] took an information security class at Oklahoma State University back in 2013. For his final project, he and a team of other students had to find a security vulnerability and then devise a theoretical plan to exploit it. [Sam’s] team decided to focus on the school’s ID cards. OSU’s ID cards are very similar to credit cards. They are the same size and shape, they have data encoded on a magnetic strip, and they have a 16 digit identification number. These cards were used for several different purposes. Examples include photo ID, physical access to some areas on campus, charges to an online account, and more.

[Sam] and his team analyzed over 100 different cards in order to get a good sample. They found that all cards started with same eight digits. This is similar to the issuer identification number found in the first six digits of a credit card number. Th analysis also showed that there were only three combinations used for the next two digits. Those were either 05, 06, or 11. With that in mind, the total possible number of combinations for card numbers was mathematically calculated to be three million.

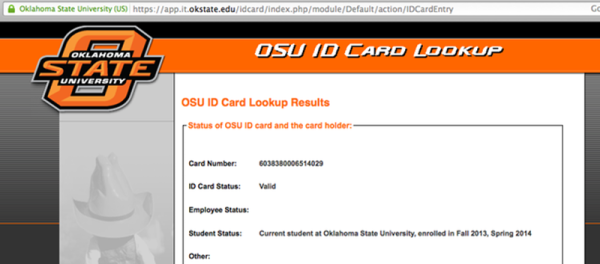
OSU also had a URL printed on the back of each card. This website had a simple form with a single field. The user can enter in a 16 digit card number and the system would tell the user if that card was valid. The page would also tell you if the card holder was an employee, a student, or if there were any other special flags on the card. We’re not sure why every student would need access to this website, but the fact is that the URL was printed right on the back of the card. The website also had no limit to how many times a query could be made. The only hint that the university was aware of possible security implications was the disclaimer on the site. The disclaimer mentioned that usage of the tool was “logged and tracked”.

The next step was to purchase a magnetic card reader and writer. The team decoded all of the cards and analyzed the data. They found that each card held an expiration date, but the expiration date was identical for every single card.  The team used the reader/writer to copy the data from [Sam’s] card and modify the name. They then wrote the data back onto a new, blank magnetic card. This card had no printing or markings on it. [Sam] took the card and was able to use it to purchase items from a store on campus. He noticed that the register reached back to a server somewhere to verify his real name. It didn’t do any checks against the name written onto the magstripe. Even still, the cashier still accepted a card with no official markings.

The final step was to write a node.js script to scrape the number verification website. With just 15 lines of code, the script will run through all possible combinations of numbers in a random sequence and log the result. The website can handle between three and five requests per second, which means that brute forcing all possible combinations can be completed in roughly two days. These harvested numbers can then be written onto blank cards and potentially used to purchase goods on another student’s account.

[Sam’s] team offers several recommendations to improve the security of this system. One idea is to include a second form of authorization, such as a PIN. The PIN wouldn’t be stored on the card, and therefore can’t be copied in this manner. The primary recommendation was to take down the verification website. So far OSU has responded by taking the website offline, but no other changes have been made.

Building A Magnetic Levitating Quadcopter

hover Three days ago on October 21, 2014 it was announced to the world the Back to the Future hoverboard was real. It’s a Kickstarter, of course, and it’s trending towards a $5 Million dollar payday for the creator.  Surprisingly for a project with this much marketing genius, it’s a real, existing device and there’s even a patent. From the patent, we’re able to glean a few details of how this hoverboard/magnetic levitation device works, and in our post on the initial coverage, we said we’d be giving away some goodies to the first person who can clone this magnetic levitation device and put it up on hackaday.io.

[jellmeister] just won the prize. It’s somewhat cheating, as he’s had his prototype hoverboard working in July, and demoed a more advanced ‘upside-down quadcopter’ device at the Brighton Mini Maker Faire in September. Good on ‘ya [jelly]. You’re getting a gift card for the hackaday store.

hoverLike the Kickstarter hoverboard, [jelly] is using an array of magnets rotating in a frame above a non-ferrous metal. For the initial test, eight neodymium magnets were arranged in a frame, suspended over 3/4″ aluminum plate, and spun up with a drill. With just this simple test, [jelly] was able to achieve 2kg of lift at 1cm and 1kg of lift at 1 inch of separation. This test also provided some valuable insight on what the magnets do to the aluminum or copper; the 3kg aluminum plate was nearly spinning, meaning if this device were to be used on small plates, counter-rotating pairs of magnetic lifters would need to be used.
The test rig then advanced to two pairs of rotors with standard hobby brushless motors, but stability was a problem; the magnetic rotors provided enough lift, but it would quickly fall over. To solve this problem, [jellmeister] took a standard quadcopter configuration, replaced the props with magnetic rotors, and successfully hovered it above a sheet of aluminum at the Brighton Maker Faire.

Since [jellmeister] has actually built one of these magnetically levitating hoverboards, he has a lot more data about how they work than an embargoed press release. The magnetic rotor hoverboard will work on aluminum as well as copper, but [jell] suspects the Kickstarter hoverboard may be operating right at the edge of its performance, necessitating the more efficient copper half pipe. The thickness of the non-ferrous plate also makes a difference, with better performance found using thicker plates. No, you bojo, hoverboards don’t work on salt water, even if you have pow-ah.

So there ‘ya go. That’s how you build a freakin’ hoverboard. [jellmeister]’s design is a little crude and using a Halbach array for the magnetic rotors should improve efficiency. Using a 3D printed rotor design is a stroke of genius, and we’ll expect a few more quad-magnetic-levitating-things to hit the tip line in short order.

Demos of [jellmeister]’s work below.

Oh. These things need a name. I humbly submit the term ‘Bojo’ to refer to any device that levitates though rotating magnets and eddy currents.

Continue reading “Building A Magnetic Levitating Quadcopter”

Adding A SIM Card To The Photon Q 4G LTE

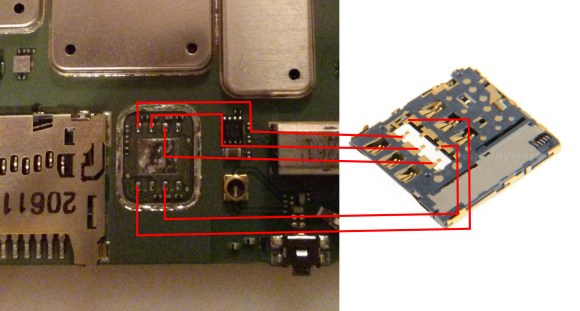
[Charles] is a big fan of phones that have physical keyboards. He thinks they are better suited for writing lengthy emails, but unfortunately his HTC Desire Z was getting old so he had to replace it. [Charles] therefore decided to import the Motorola Photon Q from the USA which exposed one major problem. The Verizon phone uses CDMA so there is nowhere to put a GSM SIM. But a bit of hacking allowed him to add a SIM card slot to it. Even though he’s not the one who originally found this hack (XDA thread here), his write-up is definitely an interesting read. To perform this modification, he needed a hot air reflow station, a soldering iron, a Dremel with the appropriate cutting wheel and several SIM card slot assemblies from the Galaxy S3 (as the first ones usually get burned during the disassembly process).

Obviously the first steps involved opening the phone, which may have taken a while. Using hot air, [Charles] removed the EMI shield covering the SIM card IC . He then extracted the latter using the same technique. Finally, he removed another EMI shield covering the contacts to which the SIM card slot should be connected. A few minutes/hours of delicate soldering and case modding later, [Charles] could use his SIM card on his brand new phone.

Magnetic CNC Marble Maze

magnetic-cnc-marble-maze

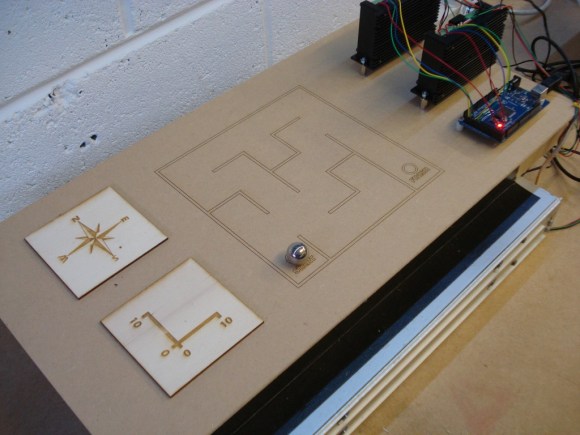
[Martin Raynsford] figured out a way to sneak some learning into a fun package. He did such a good job the test subjects didn’t even know they were teaching themselves just a tiny bit of CNC programming.

The apparatus above is a marble maze, but instead of building walls [Martin] simply etched a pattern on the playing field. The marble is a ball bearing which moves through the maze using a magnetic CNC gantry hidden underneath. Where does one get ball bearings of this size? If you’re [Martin] you scavenge them from your laser-cut Donkey Kong game.

He showed off the rig at the Maker Faire.  It takes simple commands as cardinal directions and units of movement. The ‘player’ (remember, they’re secretly learning something, not just playing a game) inputs a series of movements such as “N10,E10” which are then pushed through a serial connection to the Arduino. It follows these commands, moving the hidden magnet which drags the ball bearing along with it. It’s simple, but watch the clip after the break and we think you’ll agree the sound of the stepper motors and the movement of the ball will be like crack for young minds.

Continue reading “Magnetic CNC Marble Maze”

An Attempt To Replace Multiple RFID Cards With A Single Hacked-together Tag

It’s kind of a convoluted title, but [Hudson’s] attempt to replace multiple HID Prox cards with one AVR chip didn’t fully pan out. The project started when he wanted to reduce the number of RFID access cards he carries for work down to just one. The cards use the HID Proximity protocol which is just a bit different from the protocols used in most of the hobby RFID projects we see. He ended up taking an AVR assembly file that worked with a different protocol and edited it for his needs.

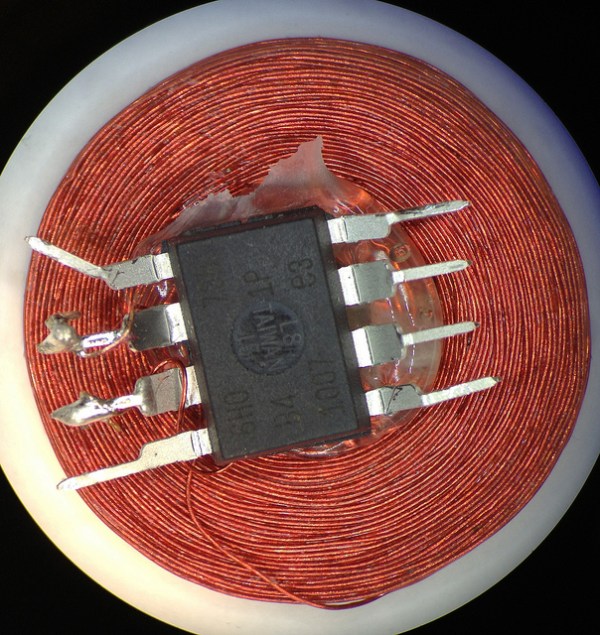
The device above is the complete replacement tag [Hudson] used. It’s just an AVR ATtiny85 and a coil made of enameled wire. The coil pics up current from the card reader’s magnetic field, and powers the chip through the leakage on the input pins (we’ve seen this trick a few times before). The idea he had was to store multiple codes on the device and send them all in a row. He was able to get the tag to work for just one code, but the particulars of the HID Prox reader make it difficult if not impossible to send multiple codes. The card must send the same code twice in a row, then be removed from the magnetic field before the reader will poll for another combination.

RFID Emulator Card Includes A Learning Mode

rfid-emulator

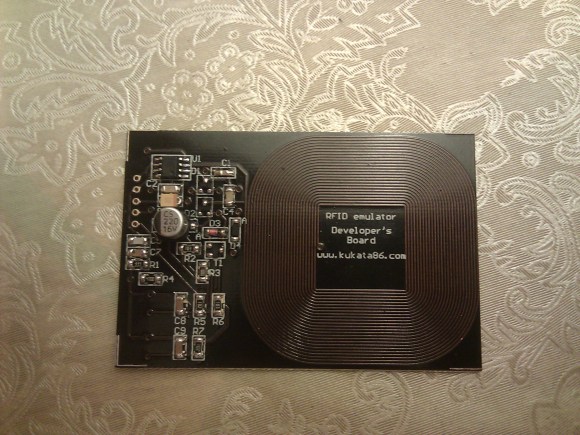
This RFID card has a lot of nice features. But the one that stands out the most is the ability to learn the code from anther RFID tag or card.

You can see that the board includes an etched coil to interact with an RFID reader. This is the sole source of power for the device, letting it pick up enough induced current from the reader to power the PIC 12F683 seen on the upper left of the board. The underside of the PCB hosts just three components: an LED and two switches. One of the switches puts the device in learning mode. Just hold down that button as you move the board into the magnetic field of the reader. While in learning mode a second RFID tag is held up to the reader. It will identify itself and the emulator will capture the code sent during that interaction. This is all shown of in the video after the break. We wonder how hard it would be to make a version that can store several different codes selected by holding down a different button as the emulator is held up to the reader?

If you want to build your own card reader too here’s a project that does it from scratch.

Continue reading “RFID Emulator Card Includes A Learning Mode”

Recording Off A Reel-to-reel With A Credit Card Reader

If you’ve got a few reel-to-reel recordings of 1940s radio, how do you transfer those to a digital medium? [Evan Long] and his dad used a credit card reader built for the iPhone to transfer a vintage [Art Kassel] recording from magnetic tape to the digital domain of .MP3s.

A few months ago, we saw what goes into these Square credit card readers. They’re just a magnetic tape head with a resistor an 1/8″ jack that plugs directly into the headphone jack of any iDevice. Because there’s no hardware limitation of what the Square credit card reader can do, [The Long boys] decided to back up some old reel-to-reel tapes with an iPod Touch.

[Evan] and his father needed to perform a few modifications to the credit card reader; the tape head pressed against the plastic case too tightly to allow feeding 70-year-old tape through the device. After bending a bit of metal the credit card reader was ready to record the dulcet tones of the Big Band era.

It’s a neat build, and anything that reuses proprietary hardware (however limited) is alright in our book. Nice job, guys.