CoreXY For A Dry Erase Plotter

After years of playing DnD, it’s finally [Mike]’s turn to be a DM. Of course he can’t draw maps with his hands, so that means building a tabletop plotter.

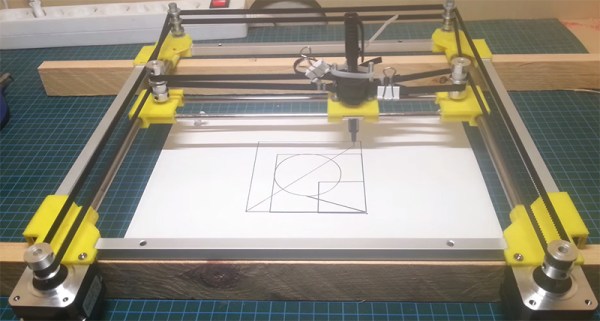
[Mike] is basing his tabletop game plotter on the Makelangelo, a polar plotter that draws images on a vertical platform with the help of two motors in the corner. This is a tabletop plotter, so the usual vertical arrangement wouldn’t work, but there are some projects out there that use the CoreXY system for a similar horizontal build.

The tabletop CoreXY system is built from rigid aluminum yard sticks, 3D printed parts, two very cheap stepper motors, an Arduino, and a whole lot of string. It’s a very inexpensive build and because [Mike] is using metal rulers for the frame, it’s also very low profile – a nice advantage for table top sessions.

So far, [Mike] has the axes of the plotter moving, with a servo and pen mechanism next on the build plan. He has a few neat ideas for how to plot these dungeon maps by vectoring bitmap images and sending them to the Arduino, something we’ll probably see in a an upcoming build log.

You can check out a video of [Mike]’s build below.

Continue reading “CoreXY For A Dry Erase Plotter”

Making Membrane Keypads From Scratch

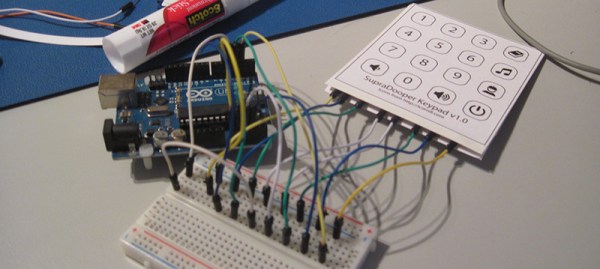
A few years ago, [Paul]’s son got a simple electronic toy that plays funny noises and sings to him. The son loves the toy, but after months and months of use, the toy was inevitably broken beyond repair. Figuring an ‘electronic box that plays sounds’ wouldn’t be a hard project to replicate, [Paul] set out on making his own. The electronics weren’t hard, but custom membrane keypads are hard to come by. No matter, because it’s actually pretty easy to build your own.

Membrane switches are usually made with silkscreen conductive inks on fancy plastic, but that’s not a requirement to build your own. All you really need are four layers – a ‘front decal’, a ‘top foil’ layer for the rows, a ‘bottom foil’ layer for the columns, and a ‘cutout’ layer that provides enough separation between the rows and columns.

[Peter] laid out the four layers in Illustrator, printed the layers, and covered the rows and columns with copper tape. The cutout layer is the crucial part that keeps the layers separated until the button is pressed, and that was just a piece of card stock with strategically placed holes.

Once the rows, columns, and other layers were glued up, [Peter] could connect this keypad up to a microcontroller. The code is very easy with the Arduino keypad library, and should stand up to the rigors of being handled by a child.

“Scotty” Is More Hungry 3D-printing Fax Machine Than Teleporter

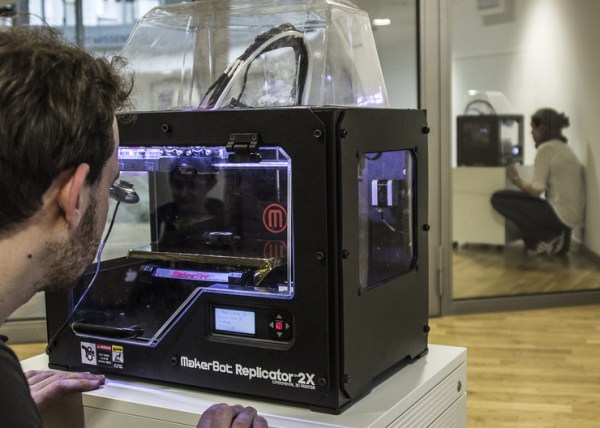
Researchers at the Hasso Plattner Institute have created “Scotty,” a so-called teleportation system. While the name is a clear homage to the famous Star Trek character, this is not the Sci-Fi teleporting you may be expecting. The system is composed of two 3D printers (they used a pair of MakerBot Replicators). The “sender” printer has a camera and built-in milling machine. It uses deconstructive scanning – taking the picture of an object’s layer, then grinding that layer down to expose the next layer – and then sends the encrypted data to a “receiver” printer with a RasPi to decrypt the data so that it can immediately print the object. The ultimate idea behind this is that there is only one object at the end of the process.

It’s a disservice describing Scotty as a teleporter. By the researchers’ definition of a teleporter, the lowly fax machine is on par with Scotty – and it doesn’t destroy the original. The researchers claim that this destructive-reconstuctive method preserves the uniqueness of a given object, as long as any sentimentality. We can agree with the unique aspect: the less copies of something means it retains it intrinsic value in the marketplace. The sentimentality – not so much. We’ve all had a moment in our lives where a treasured item of ours, worthless to everyone else, was destroyed. Either we’d get a replacement or someone else would give us one to silence our wailing, but it wasn’t quite the same. If you could clone your dead pet, subconsciously you’d know it’s not going to be the same Fluffy. It’s that exact thing, atoms and all, that has the emotional attachment. Trying to push that psychological perspective onto Scotty’s purpose is irksome.

Continue reading ““Scotty” Is More Hungry 3D-printing Fax Machine Than Teleporter”

When Adding Noise Helps

It’s a counterintuitive result that you might need to add noise to an input signal to get the full benefits from oversampling in analog to digital conversion. [Paul Allen] steps us through a simple demonstration (dead link, try Internet Archive) of why this works on his blog. If you’re curious about oversampling, it’s a good read.

Oversampling helps to reduce quantization noise, which is the sampling equivalent of rounding error. In [Paul’s] one-bit ADC example, the two available output values are zero volts and one volt. Any analog signal between these two values is rounded off to either zero or one, and the resulting difference is the quantization error.

In oversampling, instead of taking the bare minimum number of samples you need you take extra samples and average them together. But as [Paul] demonstrates, this only works if you’ve got enough noise in the system already. If you don’t, you can actually make your output more accurate by adding noise on the input. That’s the counterintuitive bit.

We like the way he’s reduced the example to the absolute minimum. Instead of demonstrating how 16x oversampling can add two bits of resolution to your 10-bit ADC, it’s a lot clearer with the one-bit example.

[Paul’s] demo is great because it makes a strange idea obvious. But it got us just far enough to ask ourselves how much noise is required in the system for oversampling to help in reducing quantization noise. And just how much oversampling is necessary to improve the result by a given number of bits? (The answers are: at least one bit’s worth of noise and 22B, respectively, but we’d love to see this covered intuitively.) We’re waiting for the next installment, or maybe you can try your luck in the comment section.

Atari CNC Pendant

Atari 2600 Controller Now Controls CNC Plasma Cutter

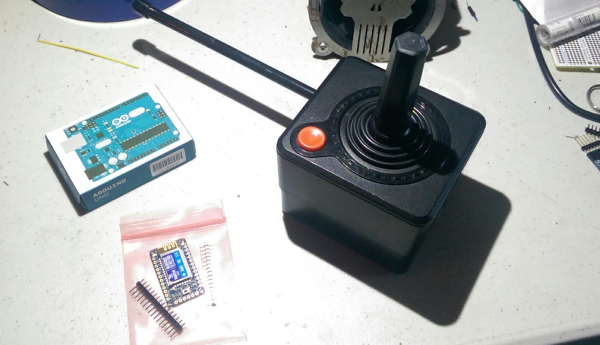
When using any CNC machine the system has to understand where the part to be machined is physically located. This is most commonly done by jogging the tool to a position relative to the part and then indicating to the controller that the tool is indeed at that position. Hobby CNC enthusiasts [Jeremy] and [Yakob] wanted an easy, convenient (and even fun) way to zero their plasma cutter. They decided to make a wireless jog pendant capable of moving and zeroing their machine….. and it’s built into a retro game controller!

The housing is a wireless Atari 2600 controller. Most of the innards were taken out and replaced with a BlueFruit EZ-Key module that takes input signals from the stock joystick and button switches and, in turn, emulates a Bluetooth keyboard signal that is understood by a PC. Most PC-based CNC Control Software’s have keyboard shortcuts for certain functions. This project takes advantage by using those available keyboard shortcuts by mapping individual pin inputs to specific keyboard key presses.

The X and Y axes are controlled by pushing the joystick in the appropriate direction. Pressing the ‘fire’ button zeros the axis. Even though the remote is working now, these two guys want to add a rotary encoder so that they can make minor Z axis height adjustments on the fly since sometimes the metal they are plasma cutting isn’t completely flat.

If you’re interested in making CNC Pendants out of old tech, check out this once-was TV remote.

New Part Day: Silent Stepper Motors

Some of the first popular printers that made it into homes and schools were Apple Imagewriters and other deafeningly slow dot matrix printers. Now there’s a laser printer in every office that’s whisper quiet, fast, and produces high-quality output that can’t be matched with dot matrix technology.

In case you haven’t noticed, 3D printers are very slow, very loud, and everyone is looking forward to the day when high-quality 3D objects can be printed in just a few minutes. We’re not at the point where truly silent stepper motors are possible just yet, but with the Trinamic TMC2100, we’re getting there.

Most of the stepper motors you’ll find in RepRaps and other 3D printers are based on the Allegro A498X series of stepper motor drivers, whether they’re on breakout boards like ‘The Pololu‘ or integrated on the control board like the RAMBO. The Trinamic TMC2100 is logic compatible with the A498X, but not pin compatible. For 99% of people, this isn’t an issue: the drivers usually come soldered to a breakout board.

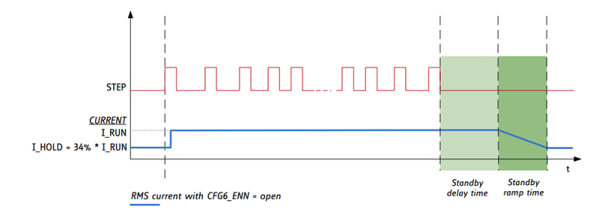
There are a few features that make the Trinamic an interesting chip. The feature that’s getting the most publicity is a mode called stealthChop. When running a motor at medium or low speeds, the motor will be absolutely silent. Yes, this means stepper motor music will soon be a thing of the past.

However, this stealthChop mode drastically reduces the torque a motor can provide. 3D printers throw around relatively heavy axes fairly fast when printing, and this motor driver is only supposed to be used at low or medium velocities.

The spreadCycle feature of the TMC2100 is what you’ll want to use for 3D printers. This mode uses two ‘decay phases’ on each step of a motor to make a more efficient driver. Motors in 3D printers get hot sometimes, especially if they’re running fast. A more efficient driver reduces heat and hopefully leads to more reliable motor control.

In addition to a few new modes of operation, the TMC2100 has an extremely interesting feature: diagnostics. There are pins specifically dedicated as notification of shorted outputs, high temperatures, and undervolt conditions. This is something that can’t be found with the usual stepper drivers, and it would be great if a feature like this were to ever make its way into a 3D printer controller board. I’m sure I’m not alone in having a collection of fried Pololu drivers, and properly implementing these diagnostic pins in a controller board would have saved those drivers.

These drivers are a little hard to find right now, but Watterott has a few of them already assembled into a Pololu-compatible package. [Thomas Sanladerer] did a great teardown of these drivers, too. You can check out that video below.

Continue reading “New Part Day: Silent Stepper Motors”

Audience Pong And RC Trash Bins: An Intro To TEI

This past weekend, I had the chance to visit this year’s Tangible, Embedded, and Embodied Interaction Conference (TEI) and catch up with a number of designers in the human-computer-interaction space. The conference brings together a unique collection of artists, computer scientists, industrial designers, and grad students to discuss computer interactivity in today’s world. Over the span of five days (two for workshops, and three for paper presentations), not only did I witness a number of today’s current models for computer interactivity (haptics, physical computing with sensors), I also witnessed a number of excellent projects: some developed just to prove a concept, others, to present a well-refined system or workflow. It’s hard to believe, but our computer mouse has sat beneath our fingertips since 1963; this conference is the first place I would start looking to find new ways of “mousing” with tomorrow’s technology.

Over the next few days, I’ll be shedding more light on a few projects from TEI. (Some have already seen the light of day.) For this first post, though, I decided to highlight two projects tied directly to the conference culture itself.

Before each lunch break, the audience was invited to take part in an audience-driven interactive game of “Collective” Pong. With some image processing running in the background, players held up pink cards to increase the height of their respective paddle–albeit by a miniscule amount. The audience member’s corresponding paddle weight was mapped to their respective marker location on the screen (left or right). It turns out that this trick is a respectful nod back to its original performance by [Loren Carpenter] at Siggraph in 1991. With each audience member performing their own visual servoing to bring the paddle to the right height, we were able to give the ball a good whack for 15 minutes while lunch was being prepared.

TEI_2015Cards

Next off, the conference’s interactivity spread far beyond the main conference room. During our lunch breaks we had the pleasure of discarding our scraps in a remotely operated trash bin. Happily accepting our refuse, this bin did a quick jiggle when users placed items inside. Upon closer inspection, a Roomba and Logitech camera gave it’s master a way of navigating the environment from inside some remote secret lair.

Overall, the conference was an excellent opportunity to explore the design space of tinkerers constantly re-imagining the idea of how we interact with today’s computers and data. Stay tuned for more upcoming projects on their way. If you’re curious for more details on the papers presented or layout of the conference, have a look at this year’s website.

Continue reading “Audience Pong And RC Trash Bins: An Intro To TEI”