Wiggling Screen And DLP Power This Volumetric POV Display

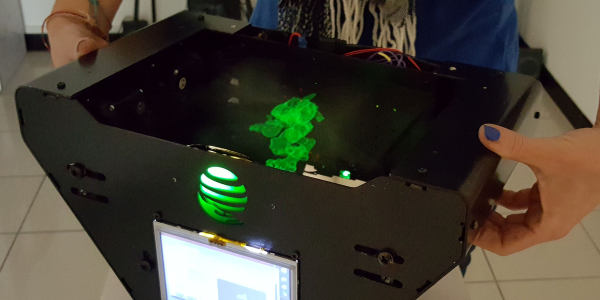
It seems like the world is ready for a true 3D display. We’ve seen them in sci-fi for decades now, with the ability to view a scene from any angle and inspect it up close. They’ve remained elusive, but that might just be changing thanks to this open-source persistence-of-vision volumetric display.

If the VVD, as it has been named by its creator [Madaeon], looks somewhat familiar, perhaps it’s because editor-in-chief [Mike Szczys] ran into it back in 2019 at Maker Faire Rome. It looks like it has progressed quite a bit since then, but the basic idea is still the same. A thin, flexible membrane, which is stretched across a frame, is attached to articulated arms. The membrane can move up and down rapidly, fast enough that a 1,000-fps high-speed camera is needed to see it move. That allows you to see the magic in action; a digital light processor (DLP) module projects slices of a 3D image onto the sheet, sending the correct image out for each vertical position of the membrane. Carefully coordinating the images creates the POV illusion of a solid image floating in space, which can be observed from any angle, requires no special glasses, and can even be viewed by groups.

With displays like this, we’re used to issuing the caveat that “it no doubt looks better in person”, but we have to say in the GIFs and videos included the VVD looks pretty darn good. We think this is a natural for inclusion in the 2021 Hackaday Prize, and we’re pleased to see that it made it to the semi-finals of the “Rethink Displays” round.

Need A Small Keyboard? Build Your Own!

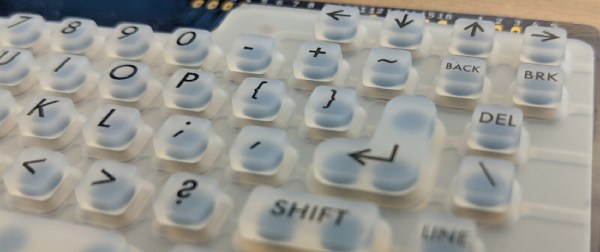
If you want keyboards, we can get you keyboards. If you want a small keyboard, you might be out of luck. Unless you’re hacking Blackberry keyboards or futzing around with tiny tact switches, there’s no good solution to small, thin, customization keyboards. There’s one option though: silicone keyboards. No one’s done it yet, so I figured I might as well.

Unfortunately, there is no readily available information on the design, construction, or manufacture of custom silicone keypads. There is a little documentation out there, but every factory that does this seems to have copy and pasted the information from each other. Asking a company in China about how to do it is a game of Chinese Whispers. Despite this, I managed to build a custom silicone keypad, and now I’m sharing this information on how to do it with you.

Continue reading “Need A Small Keyboard? Build Your Own!”

Resistance In Motion: What You Should Know About Variable Resistors

Adjusting the volume dial on a sound system, sensing your finger position on a touch screen, and knowing when someone’s in the car are just a few examples of where you encounter variable resistors in everyday life. The ability to change resistance means the ability to interact, and that’s why variable resistance devices are found in so many things.

The principles are the same, but there are so many ways to split a volt. Let’s take a look at what goes into rotary pots, rheostats, membrane potentiometers, resistive touchscreens, force sensitive resistors, as well as flex and stretch sensors.

Continue reading “Resistance In Motion: What You Should Know About Variable Resistors”

Synth Guitar

Arduino Synth Guitar Really Rocks

[Gr4yhound] has been rocking out on his recently completed synth guitar. The guitar was built mostly from scratch using an Arduino, some harvested drum pads, and some ribbon potentiometers. The video below shows that not only does it sound good, but [Gr4yhound] obviously knows how to play it.

The physical portion of the build consists of two main components. The body of the guitar is made from a chunk of pine that was routed out by [Gr4yhound’s] own home-made CNC. Three circles were routed out to make room for the harvested Yamaha drum pads, some wiring, and a joystick shield. The other main component is the guitar neck. This was actually a Squire Affinity Strat neck with the frets removed.

For the electronics, [Gr4yhound] has released a series of schematics on Imgur. Three SoftPot membrane potentiometers were added to the neck to simulate strings. This setup allows [Gr4yhound] to adjust the finger position after the note has already been started. This results in a sliding sound that you can’t easily emulate on a keyboard. The three drum pads act as touch sensors for each of the three strings. [Gr4yhound] is able to play each string simultaneously, forming harmonies.

The joystick shield allows [Gr4yhound] to add additional effects to the overall sound. In one of his demo videos you can see him using the joystick to add an effect. An Arduino Micro acts as the primary controller and transmits the musical notes as MIDI commands. [Gr4yhound] is using a commercial MIDI to USB converter in order to play the music on a computer. The converter also allows him to power the Arduino via USB, eliminating the need for batteries.

Continue reading “Arduino Synth Guitar Really Rocks”

Making Membrane Keypads From Scratch

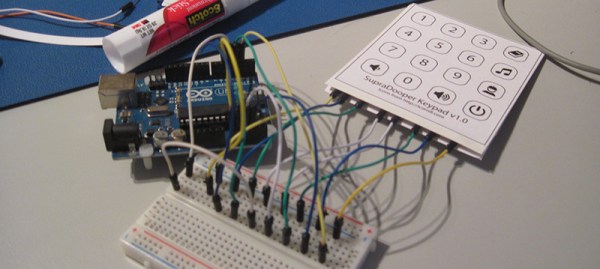
A few years ago, [Paul]’s son got a simple electronic toy that plays funny noises and sings to him. The son loves the toy, but after months and months of use, the toy was inevitably broken beyond repair. Figuring an ‘electronic box that plays sounds’ wouldn’t be a hard project to replicate, [Paul] set out on making his own. The electronics weren’t hard, but custom membrane keypads are hard to come by. No matter, because it’s actually pretty easy to build your own.

Membrane switches are usually made with silkscreen conductive inks on fancy plastic, but that’s not a requirement to build your own. All you really need are four layers – a ‘front decal’, a ‘top foil’ layer for the rows, a ‘bottom foil’ layer for the columns, and a ‘cutout’ layer that provides enough separation between the rows and columns.

[Peter] laid out the four layers in Illustrator, printed the layers, and covered the rows and columns with copper tape. The cutout layer is the crucial part that keeps the layers separated until the button is pressed, and that was just a piece of card stock with strategically placed holes.

Once the rows, columns, and other layers were glued up, [Peter] could connect this keypad up to a microcontroller. The code is very easy with the Arduino keypad library, and should stand up to the rigors of being handled by a child.