Rocketduino, For High-G, High Altitude Logging

rocketduino

Although the thrill of launching rockets is usually found in their safe decent back to Earth, eventually you’re going to want some data from your flight. Everything from barometric pressure, GPS logging, and acceleration data is a useful thing to have, especially if you’re trying to perfect your craft. [zortness] over on reddit created a data logging board created especially for amateur rocketry, a fabulous piece of work that stands up to the rigors of going very fast and very high.

The design of the board is a shield for the Arduino Mega and Due, and comes with enough sensors for over-analyzing any rocket flight. The GPS logs location and altitude at 66Hz, two accelerometers measure up to 55 G. Barometric, temperature, and compass sensors tell the ground station all the data they would need to know over a ZigBee 900MHz radio link.

Because this is an Arduino, setting up flight events such as deploying the main and drogue chutes are as easy as uploading a bit of code. [zortness] built this for a 4″ diameter rocket, but he says it might fit in a 3″ rocket. We just can’t wait to see some videos of it in action.

Taking Picture Of Exploding Wire

wire

[Patrick] didn’t just want his name in lights. He wanted his name in glowing plasma explosions, made by sending thousands of volts through a very thin wire.

This project is an experiment in capturing high speed images of exploding wires. [Patrick] wanted to know if he could shape wires in such a way that they would explode into letters of plasma. Of course, photographic proof of this would be needed, and would make for an awesome logo in any event.

To get pictures of wire turning into plasma, [Patrick] first needed to construct the necessary electronics. A simple spark gap was constructed on a large plastic cutting board – an excellent high voltage insulator. The huge capacitors are charged with a pair of high voltage transformers, and the entire assembly is triggered with an optocoupler and a very beefy SCR.

Even though [Patrick] designed the system for a low propagation delay, there was still the matter of capturing an exploding wire on film. The camera delay varied by about 120μs, but with a really great camera trigger, [Patrick] eventually got some impressive pictures.

After getting the electronics and photography portion of the build down, [Patrick] turned to making letters out of expanding plasma. Simply shaping the wire into a letter shape before vaporizing it had no effect, so he turned to 3D printed channels to contain the plasma. After a few attempts, this actually worked, allowing him to form the letters L, U, and X in an expanding ball of vaporized wire.

Raspberry Pi Learns The Lost Art Of Teletext

rpi-teletext

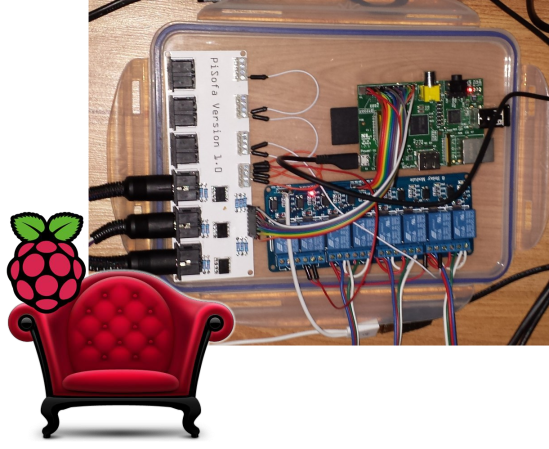
Exploring dead protocols is often the calling card of hobby electronics enthusiasts. And why not? The mistakes have already been made and fixed — you can learn from them. This Raspberry Pi TeleText hack is the perfect example. It let [Moonlit] explore the realm of generating composite video, as well as establishing communications between the Raspberry Pi  and a microcontroller.

Teletext was a method of accessing information on a television before computer networks were available to the general public. It was pretty impressive at the time, as you can tell from this Retrotechtacular feature. [Moonlit] started looking into recreating a Teletext device by simply generating a PAL signal with an AVR chip. He was met with an equipment failure (remember, it’s always a hardware problem) in to form of a fake composite to USB dongle. After changing the receiving device he was up and running and ready to explore the particulars of the protocol. As you can see, his success even led him to spin a breakout board which plugs in to the RPi GPIO header. A Y-splitter (joiner?) combines the composite output of the RPi with the the overlay data from his own board.

3D Printed Bike Shifter

Shifter

[Rich] is embarking on a fairly long bike trip in a few weeks – Seattle to Portland – and thought including some 3D printed gear on his ride would be a fun endeavor. His first idea was a printed belt drive, but the more he looked at that idea the less realistic it seemed. He finally hit upon the idea of creating a 3D printed bike shifter, and after an afternoon of engineering and printing, the shifter ended up working very well.

[Rich]’s shifter is actually a friction shifter. Instead of ‘clicking’ into position, this type moves the derailleur gradually. It’s much more tolerant of slight misalignment, and most touring bikes – the type that would embark on long journeys along the coast of the Pacific northwest – have these types of shifters.

Total printing time was about one and a half hours, and was attached to [Rich]’s bike with off-the-shelf hardware. He’s already put about 150 miles on his custom designed shifter with no signs of failure.

Putting Two Years Into One Bowl

bowl


Over the last few months, [Frank Howarth] has been putting a lot of effort into a gigantic sequoia log he started milling two years ago. He recently completed a wonderful chair, but in the years these gigantic blocks of lumber have been sitting around, he’s always had one project in the back of his mind: a giant wooden bowl made from this sequoia log.

The wood for this bowl came from a relatively small cutoff from the original sequoia log. [Frank] had initially cut this cutoff into a circle to let it dry for an eventual run on a lathe. The bowl blank was so big, though, that he needed to create a jig to trim off most of the excess and keep from wasting many hours with a gouge.

With a bowl this large – about 20 inches across – simply screwing it onto the lathe wasn’t an option. [Frank] had to construct a jig for his chuck, capable of holding the bowl by the rim so he could shape the bottom.

The end product, coated with linseed oil and beeswax, is a work of art. Making anything this size on a lathe takes a lot of skill, and we’re thankful for [Frank] sharing it with us.

Brute Force Attack Xbox 360 Parental Controls

brute-force-xbox-360-parental-controls

The Xbox 360 has the option of parental controls. It limits the rating of games which can be played on the system. [Oscar] didn’t really need to remove the lock-out. It was simply an interesting proof of concept for him. In the image above he’s holding up a Vinciduino board. It has an ATmega32u4 chip that can brute-force attack the Xbox 360 parental code (translated).

We’ve seen quite a few of these attacks lately. Like the recent iPad pin attack this uses the microcontroller to emulate a keyboard. As you can see in the video, [Oscar] first navigates the menu system to the unlock code screen, then plugs in his device.

The unlock screen calls for a four-digit numeric PIN. That’s a total of 10000 possible combinations. It looks pretty slow in the demo, but according to his calculations the worst case scenario would still break the code in less than seventeen hours. Apparently there’s no lock-out for the max number of wrong codes.

Continue reading “Brute Force Attack Xbox 360 Parental Controls”

Bolstering Raspberry Pi HDMI With A Current Regulator

rpi-hdmi-current-regulator

We’ve never tried using an HDMI to VGA converter with Raspberry Pi. We heard they were expensive and have always just used HDMI out (although DVI would be just as easy). Apparently if you have a VGA converter that isn’t powered the RPi board may output unstable video due to lack of current from the connector. [Orlando Cosimo] shows how to fix the problem with a few inexpensive components.

Just this morning we saw a portable PSU using an LM317. This project uses the same part, but in a different way. [Orlando] uses three resistors in parallel to make the LM317 behave like a current regulator (as opposed to a voltage regulator) which will output about 550 milliamps. Input voltage is pulled directly from the 5V line of the microUSB port. The output is injected into the HDMI connector. This will boost the amount of juice available to the unpowered VGA converter, stabilizing the system.

There are a lot of other power hacks out there for the RPi. One of our favorites is pulling the stock linear regulator in favor of a switch mode regulator.

[via Dangerous Prototypes]