[Ricky] absolutely loves watching DVDs. He is epileptic and is cognitively functioning at a level roughly that of a 6 year old. His younger brother [Ronnie] noticed that [Ricky’s] DVDs as well as his DVD player never lasted very long due to some rough handling. [Ronnie] stepped up to make [Ricky’s] life just a little bit easier by building this super rugged DVD watching station.
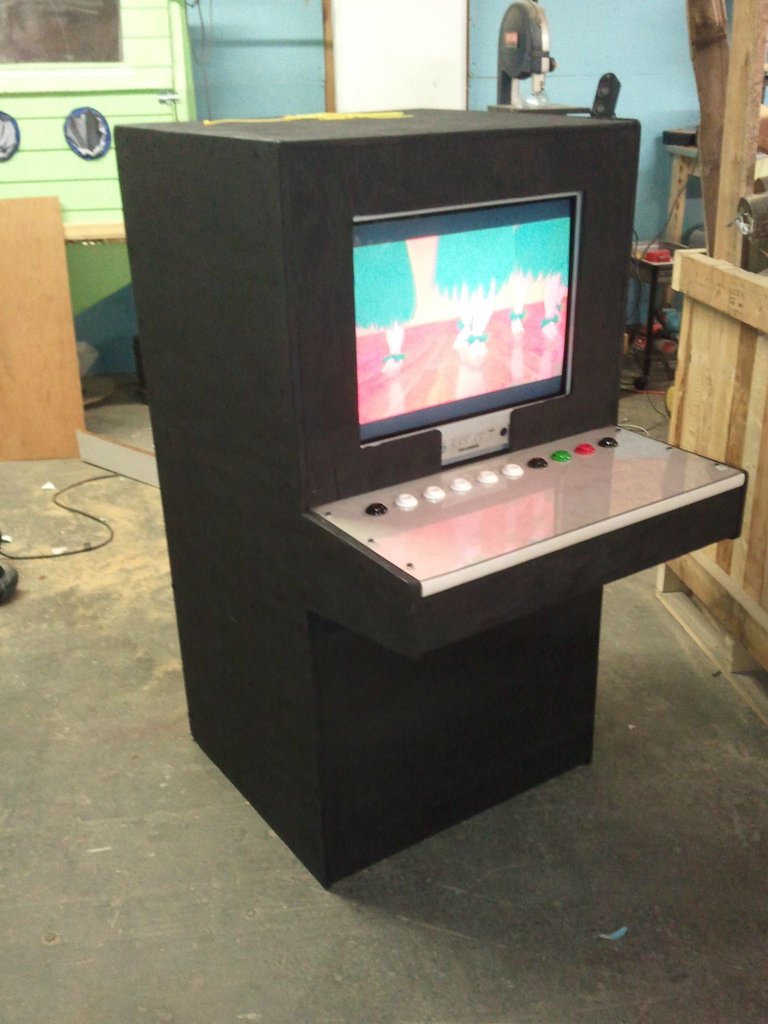
He started by ripping out the front pcb of the DVD player that has all the buttons. [Ricky] can wear through a set of standard buttons in no time, so [Ronnie] extended these to arcade buttons. Then he mounted everything into a custom cabinet that can withstand a considerable amount of abuse.
Now they can load 5 disks in and [Ricky] can watch what he pleases without worry of destroying the player.
[Ronnie] mentioned that he’d like to make a more complex control system using some kind of microcontroller, but frankly I find the simplicity of this to be perfect. Maybe a media pc loaded with movies might be a decent next step. You can see [Ronnie’s] build log here.
If you’ve ever considered making something like this to improve someone’s life, you should check out thecontrollerproject.com where people with special needs can connect with people who can build interfaces.