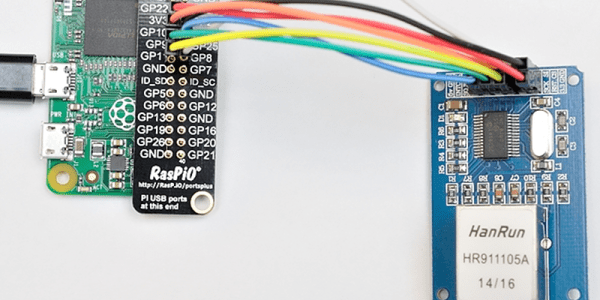
[Alex@Raspi.tv] had the misfortune of blowing the USB hub and Ethernet port on a Raspberry Pi B+. He thought about using a cheap SPI to Ethernet board to rescue it, and while he bought the board, he never got around to interfacing it to the broken Pi. However, when he saw the Raspberry Pi Zero arrive and noticed that everyone wanted to connect it to the network, he remembered the SPI board, rescued it from his junk box, and a few hours later had Ethernet via Raspberry Pi GPIO working.
Hacking Old Ethernet Gear
Have you ever wanted a pocket-sized device that could tell you if a network jack was live or not? [TanzerGuy] did and he hacked a piece of old networking gear to do the job.
Today when you think of Ethernet, you probably think of CAT-5 cable or something similar. But it hasn’t always been like that. In the early days of Ethernet networking, an Ethernet cable was a big piece of coax. A media attachment unit (MAU) clamped to the cable and then connected to an attachment unit interface (AUI) that resided in the actual network card. Later standards used thinner coax that attached to the card using a Tee connector, but even these are rare today.
Bit-banging Ethernet On An ATTiny85
[Cnlohr] just published an ingenious but dangerous way to send Ethernet packets using an ATTiny85. The ATtiny directly drives one pair of differential TX wires of a standard Ethernet cable. Doing so will force the TX signal ground to be the same as the ATTiny’s and in some cases may put 48V on your AVR if your cable is plugged into a Power Over Ethernet switch… which may be a problem.
In the video embedded below [cnlhor] explains that the microcontroller is clocked at 20Mhz to bit-bang the Manchester encoded electrical signals. Using a neat trick his home switch will detect his platform as a 10MBit Ethernet switch which can then send hard-coded packets to his computer. As you can guess, each of this packets takes quite a bit of space inside the ATTiny’s flash memory: 2+Kbytes. All of the code used may be downloaded on the creator’s GitHub repository, though he constantly warned us that it shouldn’t be used for real life applications.
Edit: One of our readers also let us know of a similar awesome project called the IgorPlug-UDP. Make sure to check it out!
I2S Audio And SPI Display With An Ethernet Module
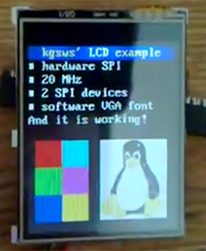
 [kgsws] is working on a small project that requires some audio and a display of some sort. While this project can be easily completed with a bigish microcontroller or ARM board, he’s taking a much simpler route: the entire project is built around a cheap router module, giving this project amazing expandability for a very meager price.
The router module in question is the HLK-RM04 from Hi-Link, commonly found via the usual Chinese resellers for about $25. On board this module is a UART, Ethernet, and a WiFi adapter along with a few GPIO pins for interfacing with the outside world.
[kgsws] is using the native SPI pins on this module to control the clock and data lines for the tiny LCD, with a GPIO pin toggling the chip select. I2S audio is also implemented, decoded with an 8-bit DAC, the MCP4801.
It’s an extremely inexpensive solution for putting audio and video in a project, and since this board has Ethernet, WiFi, and a few more GPIO pins, it’s can do much more than whatever [kgsws] is planning next.
Hackaday Retro Edition: Parallel Port Ethernet
It’s time once again for a roundup of ancient hardware that has successfully loaded our retro edition. Up this time is a completely random and totally not planned roundup of parallel port to Ethernet adapters.
First up is [Tom Moss] with his IBM 5150 – the first ‘IBM Compatible’ home computer, progenitor of the i7 boxxen warming your ankles as you read this. This machine comes standard with a 4.77 MHz 8088 CPU, 8087 FPU, 512k RAM, two 360k 5.25″ floppy drives, and a few very cool additions: an ISA to CompactFlash card adapter, giving [Tom]’s box 4GB of storage.
How is [Tom] connecting to the Internet? A Xircom PE3-10BT Network Adapter. This neat device turns any parallel port into an Ethernet. With a Telnet program, [Tom] was able to connect to a Unix system and use Lynx to browse over to the retro site. He’s yet to get a DOS browser working, but FTP is go, allowing him to download ancient software directly onto his huge CF card.
The next one isn’t exactly vintage, but it does carry the spirit of antiquated hardware onto the web. [Valentin] is using a FleaFPGA and a 186 over at OpenCores. The FPGA board gives him VGA output, an SD card, A PS/2 keyboard, but no options for networking. That’s no problem for [Valentin], as he wired up a Xircom PE3 parallel port to Ethernet adapter. Yes, the same adapter as the 5150 above. [Valentin] says his parallel port hack is a bit of a mess with non-bidirectional and no dedicated IRQ hardware support. It works, though, so we can’t fault him for that.
We’re always looking for people who have loaded our retro edition on old hardware. If you have some outdated hardware sitting in the attic, get it out, load up Hackaday Retro, and send it in.
Pics from [Tom] and [Valentin] below.
Continue reading “Hackaday Retro Edition: Parallel Port Ethernet”
Building An Ethernet Connected RFID Reader
For the last few years, [Lt_Lemming] was the president of Brisbane’s hackerspace. Until several months ago, access to the local was done using 125KHz RFID tags and an Arduino board with a prototyping shield. As the hackerspace gained members and moved to bigger facilities, [Lt_Lemming] decided to build himself a more compact and advanced platform.
His Simple NetworkAble RFID Controller (SNARC) is a platform which can be connected to an Ethernet network and different RFID readers in order to implement smart access control functionalities. Through hole components were selected so even solder apprentices may assemble it. The PCB was designed using Fritzing, and development can even be done inside the Arduino IDE as ISP and serial headers are available on the board. Finally, an N-channel mosfet controls the door locking mechanism.
The project is open hardware and software, and all the sources can be downloaded from [Lt_Lemming]’s github repo.
Comparing USB To Ethernet Converters: Apple Vs. Knock-off

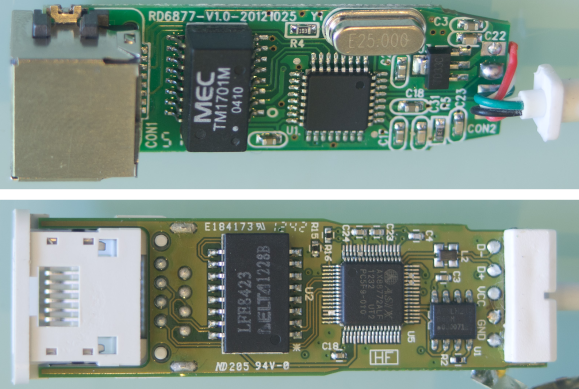
[Angus Gratton] recently cracked open a pair of USB to Ethernet converters to see what’s inside. One was an Apple branded device, the other a no-name from eBay. The former rings in at $30, with the latter just $4. This type of comparison is one of our favorites. It’s especially interesting with Apple products as they are known for solid hardware choices and the knock-offs are equally infamous for shoddy imitations.
From the outside both devices look about the same. The internal differences start right away with a whole-board metal shield on the Apple dongle and none on the off-brand. But the hardware inside is actually quite similar. There’s an RJ-45 jack on the left, followed by the Ethernet isolation chip next to it. From there we start to see differences. The off-brand had a blank chip where Apple’s ASIX AX88772ALF USB to Ethernet bridge controller is located. There is also a difference with the clock; Apple is using two crystals with the other using just one.
[via Reddit]


