Good 3D printers now have multiple hot ends. You ought to be able to print in different colors or print support material. However, a lot of us don’t have multiple hot ends. Turns out, you don’t have to have multiple hot ends to print in multiple colors. To accomplish that you need a lot of patience and the willingness to tell bald-faced lies. Don’t worry, though, you’ll only be lying to some computer hardware and software, so that doesn’t count.
You may have seen people talk about putting a pause between layers to switch from one color to another. That works, but it limits your options. For example, if you want to put some colored text on a different colored background, you have to either have the text poke out, or it has to be “under” the background. It can’t be flush if you only have a single extruder and hot end. My method is a lot more trouble, but it can generate good results.
Keep in mind, with hobby-grade printers, multiple color printing has a lot of problems even if you do have multiple extruders. This isn’t a panacea. But you can get results on par with a similar printer that has multiple heads.
Bottom Line Up Front
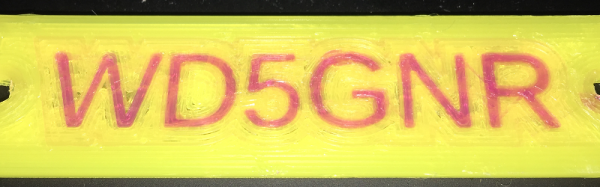
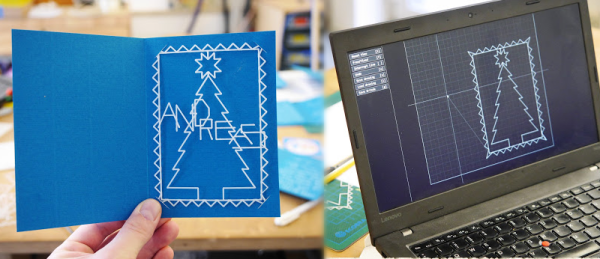
Here are a few pictures of test prints that use this technique. A Monoprice Mini printer with the stock extruder and hot end created them using different PLA filament. On the left is a test cube, with a color spot in the middle of the layers (as well as some spots on the top surface you can’t see). To the right is a plate with my call sign in a contrasting color. It is hard to tell in the picture, of course, but there is one surface. The text is at the same height as the yellow surface.
I didn’t spend a lot of time making these prints since I was more focused on perfecting the methodology. The layer heights aren’t very fine, the infill is sparse, and the print speed was fast. However, you could invest time into making better-looking prints. You can also use the usual techniques that you use with a “real” multi-extrusion printer (such as priming towers, ooze shields, etc.).
Continue reading “Liar’s 3D Printing: Multiple Colors With One Extruder” →