Automatic 3D Scanning On The Cheap

After hearing about a few 3D object scanners, [Will] thought one of these tools could find a place in his workshop. The price of these scanners made him reconsider simply buying one, so he just made one out of parts that were sitting around. This was the first version of his 3D scanner. It worked, but there were a few shortcomings. [Will] had to rotate the object manually. That’s a cheap way of doing it, but the method is tedious.

Now [Will] is back for round two. He’s made some improvements, and this time a few bits of electronics automate the process, allowing [Will] to hit a button, walk away, and come back to a scanned object.

Even though [Will] has improved his setup immensely, the theory of how to scan an object remains the same. He’s projecting a straight vertical line on an object, taking a few snapshots with a webcam, and reconstructing the object with computer vision algorithms and Meshlab. The new additions include a BeagleBone Black, a stepper motor and an EasyDriver from Sparkfun, and a turntable.

[Will] wrote two scripts for this project. The first does the mechanical heavy lifting – turning the stepper motor and taking a picture, while the second converts the output from the webcam to a point cloud. From there, the point cloud is sent over to Meshlab, and an object appears on [Will]’s hard drive.

There’s about $80 in hardware invested in this setup, and considering the inspiration for this project was the $800 Makerbot Digitizer, we’re going to call [Will]’s experiments in 3D scanning a success.

3D Printable LED Diffusors

While you can get an LED matrix in any size or shape, the really cool looking ones that are perfect for low-res displays all have diffusors. When they come from a nameless Chinese factory, these diffusors are thin sheets of plastic set into an extruded plastic frame. Since [Jana] has a 3D printer, she figured a custom diffusor was just a few bits of filament and a SCAD file away.

The basis for this custom LED diffusor was a LoL Shield given to [Jana] by the creator at the recent 31C3 conference. This shield is really only just 126 LEDs, multiplexed and in an Arduino form factor, and that many LEDs were just too bright and indistinct next to each other. The plan for a 3D printed diffusor was hatched.

After taking a few measurements, a pair of OpenSCAD files were whipped up and printed out. Assembly consisted of pressing 126 tiny little white diffusors into a frame, but once everything was attached to the matrix, the results were worth it.

Check out the video below for the before and after, demonstrating what a few bits of plastic can do to a LED matrix.

Continue reading “3D Printable LED Diffusors”

Parametric Spherical Speakers Are Not A Moon

A good speaker enclosure is not just about building a box out of plywood and covering it with carpet, although playing with 1F capacitors is pretty cool. No, for a good speaker enclosure you need the right internal volume, the right size bass port, the right speaker, and it should definitely, certainly, not be a moon.  [Rich] figured out he could do all of this with a 3D printer, resulting in the NOMOON: The NOMOON Orbital Music-Making Opensource, Openscad-generated Nihilator.

This work is a continuation of earlier work that designed parameterized speakers in the shape of Borg cubes. Now [Rich] is on to Borg scout ships,  and this version has everything you would expect for speaker design.

The NOMOON is available on the Thingiverse Customizer with variables for the internal diameter, the volume of the enclosure in liters, wall thickness, speaker hole, bass port, and wire holes. Of course a customized design is also possible with a stock OpenSCAD installation.

[Rich] has printed a few of these not moons and even with a speaker with terrible bass response, he has a pretty good-sounding setup as far as Youtube videos go. You can check that out below.

Continue reading “Parametric Spherical Speakers Are Not A Moon”

3D Printed SMD Tool

We’ve seen pick and place tools in the form of tweezers, mechanical pencils adapted to aquarium pumps, but never as a 3D printed tool optimized for standard blunt-nose needles in a comfortable, ergonomic shape.

[Zapta] created this 3D printed SMD hand picker to populate a few boards. The tool is mostly 3D printed parts that come together for an airtight enclosure. The needles are the standard eBay affair, with the smallest he could find easily lifting 0402 and 0603 components from their tape reel. There’s also the option to switch over to larger needles for bigger components.

There are files available for two versions of this vacuum picker – one with a hole in the handle for those of us who would rather connect this thing directly to a modified aquarium pump, and one for the geniuses among us who use a foot pedal and pneumatic valve to release the tiny part. Other than the pump, the only a few bits of tubing are required to turn this bit of 3D printed plastic into a useful tool.

New 3D Printing Technique – Friction Welding

Even though 3D printers can fabricate complex shapes that would be nearly impossible to mill, they are not well suited to designs requiring bridging or with large empty spaces. To overcome this, [Scorch] has applied an easy plastic welding technique that works with both ABS and PLA. All you need is a rotary tool.

Friction welding” is the process of rubbing two surfaces together until the friction alone has created enough heat to join them. Industrially, the method is applied to joining large, metal workpieces that would otherwise require a time-consuming weld. In 2012, [Fran] reminded us of a toy from decades ago that allowed children to plastic weld styrene using friction. This modified method is similar to stick welding in that a consumable filler rod is added to the molten joint. Inspired by our coverage of [Fran], [Scorch] experimented and discovered that a stick of filament mounted into a Dremel works just as well for joining 3d prints.

That is all there is to it. Snip off a bit of filament, feed it into your rotary tool, and run a bead to join parts and shapes or do repairs. Friction welded plastic is shockingly strong, vastly superior to glued plastic for some joints. Another tool for the toolbox. See the videos below for [Scorch]’s demo.

Continue reading “New 3D Printing Technique – Friction Welding”

3D Print Spool Holder

Ingenious Filament Spool Holder Keeps Your 3D Printer Printing

If you have a 3D printer, chances are, the company you bought it from skimped out on the design of their filament holder. It’s okay though, it’s not like having a toilet roll holder for your spool will result in failed prints… oh wait…

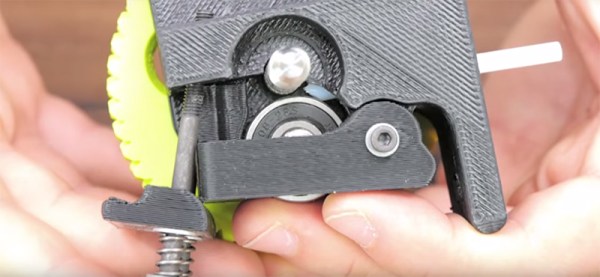
We don’t normally share projects like this because, gasp, it’s not really a hack, but this completely 3D printed filament spool holder by [Creative Tools] is actually quite amazing. It’s been designed to fit pretty much any kind of spool of filament you can imagine, as well as no spool at all. But what impresses us most is how the entire thing is 3D printed or makes use of 3D printer filament. No fasteners, no nothing.

Stuff like using rubber filament instead of grippy foot pads, and hard filament as the axles with 3D printed wheels for the quasi-thrust bearing used to support and rotate the spool.

All the parts are available over at Thingiverse.com — even if you don’t have a 3D printer, you might want to see the following video for some inspiring design tips on how to make such a clean and polished 3D printed assembly.

Continue reading “Ingenious Filament Spool Holder Keeps Your 3D Printer Printing”

roomba

IRobot Releases Hackable Roomba — Without The Vacuum

We love forward thinking companies that take a risk and do something different. iRobot, the company behind the iconic Roomba, just released the newest version of their Roomba Create — a programmable Roomba (minus the vacuum) that can be hacked and programmed to do all sorts of things.

The company developed the Create with STEM students in mind — a robotics learning platform. It came out originally back in 2007, and we’ve covered many hacks that have made use of it. Many. Like, a lot. One of our favorites has got to be this data center monitoring robot that makes use of the platform!

Anyway, the newest version of the Create features the typical hardware upgrades you’d expect, and with some special emphasis on 3D printing. In fact, the CEO of iRobot [Colin Angle] thinks that 3D printing is going to make a big difference in a few years:

“Your Roomba could be a software file that you print at home,” he says. He says the Create’s new features are a way for the company to get ready for that day, while also providing a platform that educators and hobbyists can use to tinker.

Kudos to you guys, iRobot! We just wish people would stop giving Roomba’s knives…

[Thanks PSUbj21!]