Encryption For Arduino With Spritz

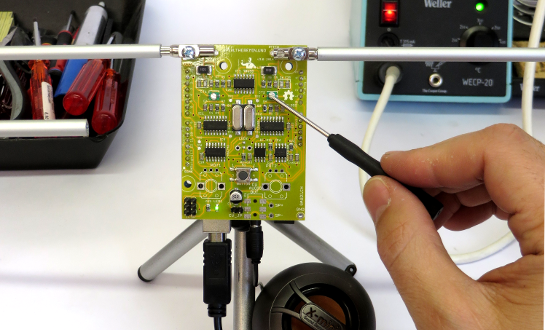
Hackaday.io user [Abderraouf] has written an implementation of the new(ish) Spritz cipher and hash for Arduino. While we’re not big enough crypto-nerds to assess the security of the code, it looks like it’s going to be pretty handy.

Spritz itself is a neat cipher. Instead of taking in fixed blocks of data and operating on them, it allows you to process it in (almost) whatever chunks it comes in naturally, and then extract out the encrypted results piecewise. It works both as a two-way cipher and as a one-way hash function. It looks like Spritz is a one-stop-shop for all of your encryption needs, and now you can run it on your Arduino.

In case you are afraid of new implementations of new ciphers (and you should be), Spritz’s pedigree should help to put you at ease: it was developed by [Ron Rivest] to be a successor to his RC4 algorithm, and it incorporates a lot of the lessons learned about that algorithm over the past. This doesn’t exclude subtle flaws in the implementation of the library (no offence, [Abderraouf]!) or your work downstream, but at least the underlying algorithm seems to be the real deal.

[Abderraouf] links it in his writeup, but just for completeness, here’s the Spritz paper (PDF). What crypto libraries do you currently use for Arduino or microcontroller projects? We’ve been fans of XXTEA for ages, but more because it’s simple and small than because it’s secure. Spritz may be simple enough to implement easily, and still more secure. Sweet.

Robot Listens To Commands–Literally

Where you might see a can, [Adam Kumpf] sees a robot. [Adam’s] robot (named [Canny]) doesn’t move around, but it does have expressive eyebrows, multicolored eyes, and a speaker for a mouth. What makes it interesting, though, is the fact that it receives audio commands via the headphones it wears. You can see [Canny] in action in the video below.

The headphones couple audio tones to [Canny’s] microphone using AFSK (audio frequency shift keying). [Canny] uses an opamp to bring the microphone level up and then uses a 567 PLL IC to decode the audio tones. [Adam] selected two clever frequencies for the mark and space (12345 Hz and 9876 Hz). In addition to being numerically entertaining, the frequencies are far enough apart to be easy to detect, pass through the headphones with no problem, and are not harmonically related.

Continue reading “Robot Listens To Commands–Literally”

Impressive NFC Controlled Infinity Mirror Table Cuts No Corners

If you’re looking to add a bit of the future to your living room, you might want to look at this tutorial to build a very professional infinity mirror table.

It’s an IKEA RAMVIK coffee table, modified to include RGB LEDs and a one-way mirror for that ever-so-awesome infinity effect. And technically, you only have to cut one hole in the table.

By placing a large mirror underneath the glass, wrapping the inner edge with a strip of RGB LEDs and coating the original glass top with a reflective car tint, it’s a pretty simple hack that results in a very polished product — not something that can be said for most of our projects!  But to make it even better, [Pierre] added an NFC chip under the table, allowing you to control the color with just a tap.

Continue reading “Impressive NFC Controlled Infinity Mirror Table Cuts No Corners”

Corkscrew LASER “Hologram”

If you watch much science fiction, you know that in the future, there’re plenty of 3D holographic displays. From Princess Leah’s distress call to the Star Trek holodeck, there’s no shortage of computers that can make realistic images. It might not be up to holodeck standards, but [freedscript] created a 3D display for an Arduino using a chopstick, a motor, some paper, and a LASER. Of course, it isn’t actually a hologram, but neither is half the stuff you see on TV (Star Trek’s holographic characters were disturbingly solid for standing waves). The display is a type of volumetric display.

Continue reading “Corkscrew LASER “Hologram””

Airsoft Sentry Gun Keeps Your House Guarded

Ever since automated turrets became a thing in video games, people have strived to make their own — let’s be honest, who wouldn’t want an automated defense turret? Well, [Austiwawa] just finished making a pretty awesome Airsoft gun turret, and decided to make a video tutorial on how he made it.

The inspiration comes from Project Sentry Gun, a long-standing website dedicated to teaching people how to make automated sentry gun turrets. We’ve seen projects use this to turn Nerf guns into turrets, and people have even made their own paintball gun sentry turrets.

Following along the build only takes about 5 minutes of your time and summarizes the process very concisely. We particularly like the main rotation axis — one RC servo motor and 4 casters make up a controllable lazy susan that reduces the load on the servo motor and allows you to mount a pretty big gun on the turret.

Continue reading “Airsoft Sentry Gun Keeps Your House Guarded”

The Biggest Super Hexagon Fan

For those who haven’t addicted themselves to Super Hexagon yet, it’s pretty… addicting, to say the least. Normally this 80’s arcade-style game would run in a browser but some of the people at Club de Jaqueo in Buenos Aires decided to cram all of that into an Arduino. They didn’t stop there, though, and thought that it would work best with a POV display.

To navigate the intricate maze of blending a POV display with a fast-paced game like this, the group turned to the trusty Arduino Micro. After some frustration in the original idea, they realized that the game is perfectly suited for a POV display since it’s almost circular. The POV shouldn’t take up too much of the processing power of the Arduino, so most of the clock cycles can be used for playing the game. They couldn’t keep the original name anymore due to the lack of hexagon shape (and presumably copyrights and other legal hurdles), but the style of the original is well-preserved.

The group demonstrated their setup this past weekend, and the results are impressive judging by the video below. They’ve also released their source code and schematics as well, in case you have an old fan (or maybe even a bicycle?) lying around that is just begging to be turned into a mini-arcade game.

Continue reading “The Biggest Super Hexagon Fan”

Light Duty Timekeeping: Arduino Berlin Clock

Just when we thought we’d seen all the ways there are to tell time, along comes [mr_fid]’s Berlin clock build. It’s based on an actual clock commissioned by the Senate of Berlin in the mid-1970s and erected on the famous Kurfürstendamm avenue in 1975. Twenty years later it was decommissioned and moved to stand outside the historic Europa-center.

This clock tells the time using set theory and 24-hour time. From the top down: the blinking yellow circle of light at the top indicates the passing seconds; on for even seconds and off for odd. The two rows of red blocks are the hours—each block in the top row stands for five hours, and each block below that indicates a single hour. At 11:00, there will be two top blocks and one bottom block illuminated, for instance.

The bottom two rows show the minutes using the same system. Red segments indicate 15, 30, and 45 minutes past the hour, making it unnecessary to count more than a few of the 5-minute top segments. As with the hours, the bottom row indicates one minute per light.

Got that? Here’s a quiz. What time is it? Looking at the picture above, the top row has three segments lit. Five hours times three is 15:00, or 3:00PM. The next row adds two hours, so we’re at 5:00PM. All of the five-minute segments are lit, which adds 55 minutes. So the picture was taken at 5:55PM on some even-numbered second.

The original Berlin clock suffered from the short lives of incandescent bulbs. Depending on which bulb went out, the clock could be ‘off’ by as little as one minute or as much as five hours. [mr_fid] stayed true to the original in this beautiful build and used two lights for each hour segment. This replica uses LEDs driven by an Arduino Nano and a real-time clock. Since the RTC gives hours from 0-23 and minutes and seconds from 0-59, a couple of shift registers and some modulo calculations are necessary to convert to set theory time.

[mr_fid] built the enclosure out of plywood and white oak from designs made in QCAD. The rounded corners are made from oak, and the seconds ring is built from 3/8″ plywood strips bent around a spray can. A brief tour of the clock is waiting for you after the break. Time’s a-wastin’!

Continue reading “Light Duty Timekeeping: Arduino Berlin Clock”