[Massimo] Talks About Arduino Clones

pick one

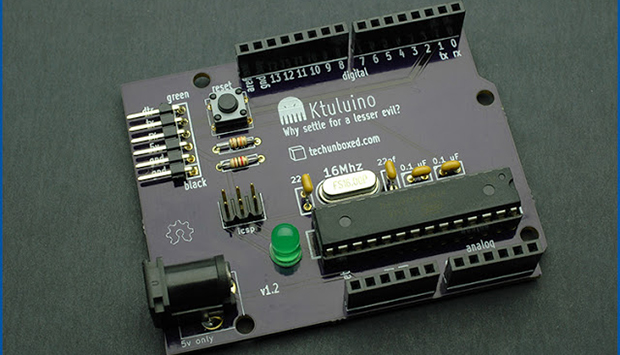
Back in 2005, the Arduino was just a twinkle in they eyes of [Massimo Banzi] and the other core developers. Since then, you can’t go to any electronics site without hitting something beginning with ‘ard~’ or ending with ‘~duino’. The platform has become so popular, people everywhere are piggybacking on the name to the point of trademark infringement or simply outright counterfeiting one of the many official Arduino boards. Now [Massimo] has something to say about these clones, ripoffs, derivatives, and ‘duino-compatible boards.

On the list of things bad for the open source ecosystem, [Massimo] points to direct clones of existing Arduino boards. While these boards are electrically identical to officially licensed boards, they simply don’t support the Arduino project financially and usually don’t contribute to the existing libraries and code. Even worse are counterfeits; these boards copy the trademarks of the Arduino project – sometimes terribly given the three examples above (guess which one is the real one) – and directly profit off of the Arduino project without giving any support in return.

There are other veins of Arduino that [Massimo] considers more acceptable. Arduino-compatible boards, seen by the dozen over on Kickstarter, usually add something of their own, be it a radio chip, or an entirely different microcontroller. Derivatives, like Teensy and Adafruit’s Flora actually bring new things to the table with improved hardware and new and interesting libraries.

As far as counterfeits and clones go, we can’t agree more with what [Massimo] has to say. You have to admire the folks in the Arduino project being so open about their creations and admiring the Arduino derivatives that bring some new hardware to the table. Then again, that’s the lesson of the Arduino project; you can make hardware open source and still be outrageously popular.

DIY Airbag, Explosions Included

AnAirbagSavedMyLife

Your car’s airbag is one of the major engineering accomplishments of the auto industry. In an accident, a whole host of processes must take place in sequence to keep your face from slamming into the steering wheel, and  everything must happen in just a fraction of a second. [Steve] over at Make thought it would be a cool idea to discover what actually goes in to saving a life with an airbag and decided to build his own.

The electronics of the build consisted of an accelerometer and an Arduino. A lot of research, development, and experimentation has gone into the algorithms that trigger airbags, but [Steve] decided to keep things simple: when a sudden acceleration is detected, set off a small charge of black powder.

The airbag itself is ripstop nylon reinforced with canvas, contained in a small wooded box fitted with hinged doors. All these components are put on wheeled aluminum test rig, manned with a honeydew melon crash test dummy, and pulled into a short wall at a few miles per hour.

Despite [Steve] not putting hundreds of thousands of man hours into the development of his airbag – unlike the ones you’ll find in your steering column – his device actually worked pretty well. While not a complete success, he did manage to come up with something that both looks and acts like the familiar device that has saved countless lives.

No Nonsense Guide For Patching Into A Gaming Controller

patching-into-a-gaming-controller

Here a straight-forward guide for tapping into the buttons on most gaming controllers. Why do something like this? Well there’s always the goal of conquering Mario through machine learning. But we hope this will further motivate hackers to donate their time and expertise developing specialized controllers for the disabled.

In this example a generic NES knock-off controller gets a breakout header for all of the controls. Upon close inspection of the PCB inside it’s clear that the buttons simply short out a trace to ground. By soldering a jumper between the active trace for each button and a female header the controller can still be used as normal, or can have button presses injected by a microcontroller.

The Arduino seen above simulates button presses by driving a pin low. From here you can develop larger buttons, foot pedals, or maybe even some software commands based on head movement or another adaptive technology.

Continue reading “No Nonsense Guide For Patching Into A Gaming Controller”

A Different Type Of Arduino Internet Shield

different-arduino-internet-shield

The cost of an Ethernet shield for an Arduino isn’t horrible; generally between $17 and $32 depending on which one you buy. But have you seen the cost of a WiFi shield? Those are running North of $70! [Martin Melchior] has a solution that provides your choice of Ethernet or WiFi at a low-cost and it’ll work for most applications. He’s using a WiFi router as an Arduino Internet shield.

This is the TP-Link WR703N which has been very popular with hackers because of its combination of low price (easy to find at $25 or less) and many features: the USB is super hand and, well, it’s a WiFi router! The Arduino Pro Mini shown dead-bug style is talking to the router using its serial port. [Martin] wires a pin socket to the router, which makes the rest of assembly as easy as plugging the two together. The rest of his post deals with handling bi-directional communications with Arduino code.

If you really just need that direct Ethernet pipe consider building an ENC28J60 chip into your designs.

Paper ROM

This low-resolution memory device packs in just a few bytes of data. But it’s enough to spell out [Michael Kohn’s] name. He’s been experimenting with using paper discs for data storage.

His technique becomes immediately clear when you view the demo video below. The disc spins multiple times with the sensor arm reading one track. This gives the system the chance to measure the black band in order to get the data timing figured out. Once the outer track has been read the servo controlling the read head swings it to the next until all of the data is captured.

An Arduino is monitoring the QTR-1RC reflectance sensor which makes up the reading head. It uses the black band width in order to establish the size of an individual byte. Interestingly enough, the white parts of the disc do not contain data. Digital 0 is a black area 1/4 the width of the large black strip, and digital 1 is half as wide.

[Michael’s] set up the generator which makes the discs so that he can easily increase the resolution. The limiting factor is what the reading hardware is able to detect.

Continue reading “Paper ROM”

Animating A Lamp With The Leap Motion

leap

The Leap Motion is a very cool device, but so far we haven’t seen many applications of interacting with physical devices. [Xavier] wanted to control a cute servo animated desk lamp with his hands, and with the help of a Leap and an Arduino he was able to do just that.

The Leap Motion API has a handy feature that will output all its data over a websocket. It’s a very easy way to transfer hand positions with a minimum amount of overhead, and with just a little bit of Node.js, it’s only two lines of code to connect the Leap to a websocket server.

With the Leap data on a web server, the only thing left to do is pulling it down to an Arduino. Again, [Xavier] used Node.js, this time in the form of johnny five, a Javascript-based Arduino framework. After that, it was a simple matter of mapping the data from the Leap to servo movements in [Xavier]’s Pixar-inspired lamp.

Video of the build below.

Continue reading “Animating A Lamp With The Leap Motion”

Build A Bare Bones Arduino Clone Which Maximizes Its Use Of Real Estate

barebones-arduino-clone-at-home

Check out all the stuff crammed into a small swath of strip board. It’s got that characteristic look of a roll-your-own Arduino board, which is exactly what it is. [S. Erisman] shows you how to build your own copy of his YABBS; Yet Another Bare Bones Arduino (on Stripboard).

The strips of copper on the bottom of the substrate run perpendicular to the DIP chip and have been sliced in the middle. This greatly reduces the amount of jumpering that would have been necessary if using protoboard. A few wires make the necessary connections between the two tooled SIL headers that make up the chip socket. On the right hand side there a voltage regulator with smoothing caps. The left side hosts the obligatory pin 13 LED, and the crystal oscillator can be glimpsed on the far side of the ATmega328.

Pin headers along either side of the board have been altered to allow for soldering from the wrong side of the plastic frames. Note that there’s a three-pin hunk that breaks out the voltage regulator, and an ISP programming header sticking out the top to which those female jumper wires are connected.

Ringing in at as little as $2-$4.75 a piece you’ll have no problem leaving this in a project for the long hall. We can’t say the same for a $30+ brand name unit.