737 Autopilot, Courtesy Of An Arduino

737

To start this off, no, we’re not looking at a piece of actual flight hardware. This is [Andrea Giudici]’s project to tie real-world hardware into Flight Simulator X. It’s an autopilot for simulated aircraft, so those of you looking at flying a 737 sometime in the near future need not worry about computers flying your plane. Airbus passengers, though…

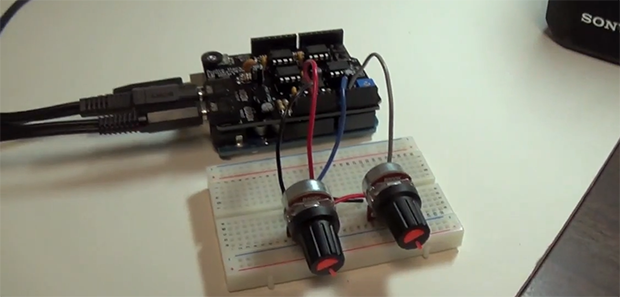
[Andrea] didn’t want to dig around with the clunky point-and-click interface in FSX, so he created a virtual autopilot with a 2×16 LCD display and an Arduino to interact and set the most common autopilot settings such as altitude, speed, heading, and engagement. The physical interface is just three tact switches and a pot, while the interface to FSX is a custom driver that turns the USB out of the Arduino into actual flight commands.

It’s not a 737 cockpit in a garage, but it’s still a wonderful alternative to poking around in a completely computer-bound interface.

Video of the ‘duino in action after the break.

Continue reading “737 Autopilot, Courtesy Of An Arduino”

This Is Run By An Arduino

Let us be the first to say: Not a hack! Nonetheless this is an interesting read about how the Arduino movement has made hobby microcontroller boards attractive for industrial applications.

This is a digital printing machine which looks like it is used for industrial packaging. [Paul Furley] worked for the company which produces it, developing the software for the control interface. He recounts the story of how he helped guide the company away from choosing a microcontroller, and toward using an Arduino board. Actually, using three Arduino boards. We can already hear the flame war boiling up in the comments section. But before you rage, read the article and see if you don’t agree with [Paul’s] reasoning.

The most compelling argument to us is that choosing Arduino is absolutely future proof. If the company goes out of business there are hundreds of clone devices already available. As the Arduino platform evolves it will keep pin compatibility in order to support the older shields. And if they choose a different microcontroller the Arduino IDE will still compile the same sketch for the new hardware.

One thing that pops into our minds is write protection. The machine uses a big PCB to which the three Arduinos mount. That can be produced anywhere without threat of having the source code leak as the PCB doesn’t include chips that need to be programmed. Arduino uses AVR chips that have write protection fuses which can be burnt in-house after they flash the control firmware.

[Thanks Thomas]


Arduino Oscilloscope At Five Megasamples Per Second

There’s no substitute for a proper oscilloscope on your electronics bench. But unfortunately we still don’t have one of our own. But we’ve got an Arduino board and paired with another IC it can sample an astonishing 5 million cycles per second.

[Bob Davis] has been working on an Arduino based oscillscope for a while now. He keep squeezing more and more performance out of it. A previous version hit 3 megasamples using an AD775 chip. When he added a FIFO buffer chip he was able to squeeze 10-25 megasamples out of it… wow! Unfortunately the output tended to be glitchy.

This version gets rid of the AD775 in favor of a CA3306. Both are analog-to-digital converters but the new circuit is less complex and more reliable. It uses just three capacitors and an external clock to support the IC. Take a look at the video below to see how it performs. He’s outputting a graph of the samples on a small LCD screen. The best part is that since the extra chip is doing the sampling this can be ported to your microcontroller of choice.

Continue reading “Arduino Oscilloscope At Five Megasamples Per Second”

Two-way Bluetooth Communication Made Easy

It’s hard to imagine an easier way to set up communications between an Android device and an Arduino using Bluetooth than by following this guide. In the center of the breadboard you can see the cheap and ubiquitous HC-05 Bluetooth module. Having picked up one of these ourselves we can attest that after opening the package and holding one in your hand you may be struck with a “where do I start?” conundrum. If you’ve got an Android handset and an Arduino you start right here, then methodically replace one side of the equation at a time until your own project has a Bluetooth component and you actually understand how it works.

Hardware for the project comes in a couple of parts. The Bluetooth module wants 3.3v logic levels so that is taken into account. The image above shows a buffer chip doing the conversion, but the Fritzing schematic on the post uses a voltage divider. The software end of things consists of an Arduino sketch and an Android app. Check out all the controls on that screen. With bi-directional communications and a slew of already-configured commands this should get you up and running quickly on pretty much any possible project.

One thing to note is that there are different firmwares for these HC-05 units. For more on that see this project.

Continue reading “Two-way Bluetooth Communication Made Easy”

Rocketduino, For High-G, High Altitude Logging

rocketduino

Although the thrill of launching rockets is usually found in their safe decent back to Earth, eventually you’re going to want some data from your flight. Everything from barometric pressure, GPS logging, and acceleration data is a useful thing to have, especially if you’re trying to perfect your craft. [zortness] over on reddit created a data logging board created especially for amateur rocketry, a fabulous piece of work that stands up to the rigors of going very fast and very high.

The design of the board is a shield for the Arduino Mega and Due, and comes with enough sensors for over-analyzing any rocket flight. The GPS logs location and altitude at 66Hz, two accelerometers measure up to 55 G. Barometric, temperature, and compass sensors tell the ground station all the data they would need to know over a ZigBee 900MHz radio link.

Because this is an Arduino, setting up flight events such as deploying the main and drogue chutes are as easy as uploading a bit of code. [zortness] built this for a 4″ diameter rocket, but he says it might fit in a 3″ rocket. We just can’t wait to see some videos of it in action.

Turning A Router Into An Arduino Shield

[Dirk] had a problem: while he already had an Arduino with an Ethernet shield, he needed WiFi for an upcoming project. Running a Cat5 cable was out of the question, and a true Arduino WiFi shield is outrageously expensive. He did, however, have a WiFi router lying around, and decided it would make a perfect WiFi shield with just a little bit of cutting.

The router [Dirk] used was a TL-WR702N, a common router found in the parts bins of makers the world over. Inspiringly, the size of the router’s PCB was just larger than the space between the Arduino’s pin headers. Turning the router into a shield is simply a matter of scoring the edge of the board and gluing on a few pins for mechanical strength.

Power and ground lines were soldered between the pin headers and the router, while data is passed to the Arduino and Ethernet shield through a short cable. It may not look pretty, but if it works in a pinch we can’t complain.

LED Strip Pong As An Arduino Shield

led-pong-strip

[Schuyler Sowa] has been hard at work on his own version of LED strip Pong. We’d say his work has really paid off. The game is robust and full of features.

Unlike the original Pong video game LED pong only has one axis on which the ball travels. The ball will bounce back if the button at the end of the strip is pressed when either of the last two LED pixels are illuminated. To add in a difficulty adjustment [Schuyler] included a poteniometer which alters the speed.

The game board is one meter of LED strip with individually addressable pixels. It cost a whopping $28 and was the second kind he tried after having trouble with the WS2801 based version (which often come as strings of lights). An Arduino board controls the game, with a shield made from protoboard to connect the components. In addition to the two user buttons — which were hacked out of a computer keyboard — you’ll notice a pair of seven segment displays acting as a scoreboard and an HD44780 character LCD rounding out the user interface.

Continue reading “LED Strip Pong As An Arduino Shield”