Wireless Solar Water Heater Controller Ensures Hot Water Every Time

water-heater-controller

[Peter Sobey] had a solar hot water heater installed in his home, which worked great until he relocated his kitchen to a neighboring room. Now a good bit further from the tank, the hot water reaching his sink was tepid at best due to the increased distance and temperature limiting mixer valve in the new heater.

He installed a salvaged solar panel and water tank solely for use in his kitchen, but as the panel was located above the tank, he had to find a way to actively monitor and control the water temperature. His pump and valve system was originally driven with an off the shelf PICAXE-based controller, but he eventually got the urge to add a wireless display and control panel to the mix.

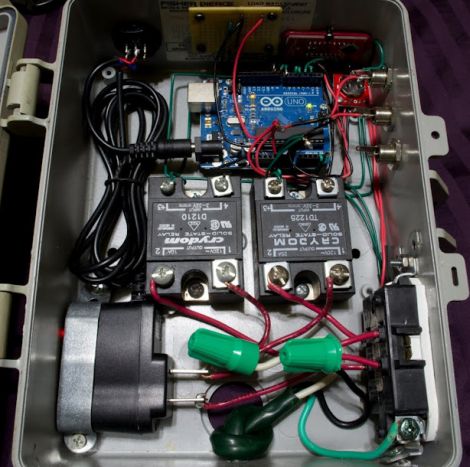
A pair of Arduino Nanos run the show now, one of which resides in the pump controller box, while the other is used in the temperature display box in his kitchen. He uses a set of Bluetooth modules to link the Arduinos together, relaying temperature data and allowing him to send the pump controller manual commands if needed.

He says the system works a treat, and he’s much happier with his homebrew controller than the one he used originally.

Antique Phone Provides A Soundtrack Perfect For Restoring Old Cars

crank-phone-music

[Simon] is in the middle of restoring/building himself an Austin 7 Special out in his garage, and like most tinkerers, found that music helps to move the process along. He happened to have an old Bakelite generator phone out in the garage as well, and figured that he might as well have it do something other than simply hang on the wall.

Playing music from the 1930 seemed like a fitting enough task, so he picked up an Adafruit Waveshield and spent some time wiring it up to the old telephone. His new radio works simply enough, piping .wav files through the handset, provided someone has cranked the phone’s generator recently.

While cranking the generator is required to play music, the Arduino is actually powered off a pair of AA batteries. The cranking is all cosmetic, but he did program the Arduino to slow the music down every once in awhile, requiring that the generator be turned to get things back up to speed.

It really is a neat way to repurpose the old phone, and we like the fact that [Simon] did not gut it to put this project together.

Continue reading to see a short video of his new music player in action.

Continue reading “Antique Phone Provides A Soundtrack Perfect For Restoring Old Cars”

R2R Ladder Connects Multiple Buttons To One ADC Pin

If you’ve run out of I/O pins on a project and need a way to add user input you can find a slew of port expanders that work with various communications protocols like I2C and 1-Wire. But if you just want to add in some buttons without reaching for an extra IC you’ll love this hack. [John Boxall] shows how to add four buttons using one ADC pin.

The concept is nothing new. The buttons make up an R2R resistive ladder. When one of them is pressed, it completes the circuit for a voltage divider. The results are measured by the analog-to-digital converter of an IC to tell which button was pressed. The difficult part is calculating the resistor values. [John] is using eight resistors made up of just two different values. Every button and every combination of buttons has a unique voltage result which can be discerned by the chip. He even made a truth table so you don’t have to.

The example circuit seen in the video after the break uses an Arduino. But this concept is directly applicable to any microcontroller. And it should be quite easy to use an ADC interrupt to drive all of the button-read events. Continue reading “R2R Ladder Connects Multiple Buttons To One ADC Pin”

Minestation – An External Weather Display For Your Minecraft World

minestation

If you’re a big Minecraft fan, the folks at [radikaldesign] have something that might be of interest to you. (Translation) Inspired by some of their Minecraft-loving friends, they have developed Minestation – a weather station for your Minecraft game.

The concept is simple. Here in the real world we have the ability to look out the window and see what it is like outside, but many of us turn to digital weather stations, the Weather Channel, or the local news to get the real scoop. They decided that the world of Minecraft should be no different, so they constructed an Arduino shield that allows players to see weather conditions as they play.

The shield contains a Nokia 6100 LCD screen which displays all sorts of useful information. It features a clock and calendar that reflect in-game time, making it easy to know when night is going to fall. It also continually displays the player’s coordinates as well as what the weather looks like in that region. Having this information at hand when you’ve been slogging away in the mines (losing track of time and weather) seems like it could be pretty useful at times.

You can buy one of the devices at Minestation.me, but the design is completely open, so you can easily construct one of your own without too much hassle.

Continue reading to see a video of the Minestation in action.

[Via HackedGadgets]

Continue reading “Minestation – An External Weather Display For Your Minecraft World”

Semaphore Signal Replica Perfect For The Train Buff In Your Life

semaphore-signal

[John Philip’s] brother has a sizable room set aside for his model railroad setup, and he was looking for something interesting to add to his brother’s collection. Rather than construct something for the railroad itself, he decided that an early 1900’s-style semaphore railroad signal would make a great novelty item for the room.

The project started with [John] scouring the Internet for colored signal lenses. Once he found a set that worked for him, he crunched some numbers to ensure that the rest of the semaphore box stayed true to original scale. Inside the signal’s case you will find a small regulator board for his light source, an Arduino, and a motor controller board to actuate the arm.

To ensure that the signal arm is always perfectly positioned, he installed a pair of reed switches on either side of the case, enabling the Arduino to auto-calibrate the signal’s position each time it is powered on. At first, this control scheme might strike you as a bit over the top, but we really like the fact that the signal can always configure itself to function perfectly, even if someone tinkers with/bumps into/moves the arm at any point.

Be sure to stick around to see a short video of the semaphore signal in action.

Continue reading “Semaphore Signal Replica Perfect For The Train Buff In Your Life”

Projector Calibration On Uneven Surfaces Made Easy

projector-calibrator

If you are thinking of building your own flight/racing sim setup at home, you might want to check this out. [Alex] from the Garoa Hackerspace in Säo Paulo, Brazil put together a slick setup that makes projector image calibration a breeze.

When building a wraparound screen for such a simulator, you are likely to run into problems with both overlapping images and distortion from the curved projection. There are projectors that can easily adjust themselves to work in this sort of setup, but they are often very expensive, so [Alex] thought he would build a solution himself.

After studying a paper written by [Johnny Chung Lee] in 2004, he built a prototype display calibrator last year that used similar, though slightly tweaked methods to get the job done. This time around, [Alex] has improved his calibrator, making the process more precise and a bit quicker.

Light sensors and an Arduino are attached to the back of the projection medium, and a large broad scan of the screen is performed by the projector. His code then triggers an additional sweep of each corner to better estimate the exact edges of his projection surface. Since the video is tweaked in software rather than relying on the projector hardware to handle the task, the result is cheap and very accurate.

Don’t take our word for it though, check out [Alex’s] video demonstration below to see his calibrator in action.

Continue reading “Projector Calibration On Uneven Surfaces Made Easy”

Display Twitter On An Arduino

If you ever wanted your name out on the Internet, now is your time to shine. [Chris] hooked up an Arduino to the Internet and is streaming the results of combing through Twitter live to the entire world.

The SocialBot9000, as [Chris] calls his build, is an Arduino Uno connected to an Ethernet shield and an LCD character display. The firmware uses the Twitter API to search for recent posts containing the phrase, ‘socialbot9000.’ A PHP script on the Arduino does all the heavy lifting and with the great Bildr tutorial on getting the Ethernet shield up and running, [Chris] was off to the races.

Because it’s extremely doubtful that everyone on the Internet could manage typing a message into Twitter that would be correctly parsed by the SocialBot9000, [Chris] put a small form up on the build log that will correctly generate the message and take you to your Twitter account for posting. After all that was done, [Chris] decided to have some fun and set up a live feed from a camera in front of the LCD display for the world to watch.