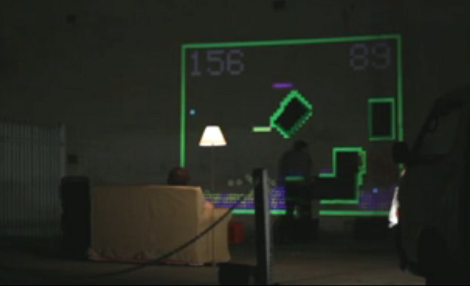
Snake-the-Planet Makes A Game Board Out Of Your Surroundings

It’s Friday night and these guys are driving around town looking for a good spot to play a head-to-head game of Snake. It’s not that they need somewhere to sit (they travel with a couch and floor lamp for that purpose) it’s that they’re using a projector and camera to make a game out of their surroundings.

A white Mystery-Machine-style van has room for everything they need to make the traveling arcade happen. A mobile power supply provides juice to the camera and projector. To get started, the system takes a high-contrast black and white photo of the surface in front of it. Everything that appears below the white threshold becomes a wall on the game board, everything else is a playable area. Obstacles are formed by windows, doorways, pipes, signs, pieces of foam board the guys hang on a wall, and even your body if you stand in the way during scanning. From there the guys each grab a joystick and play the hacker-favorite game of snake.

After the break you can watch a description of how the system works. Continue reading “Snake-the-Planet Makes A Game Board Out Of Your Surroundings”

Using The Parallel Port As A Logic Sniffer

[Fernando] wrote in to share his take on building a logic analyzer. He’s using the parallel port to capture data and feed it to the display software of your choice.

The method depends on a custom kernel which alters the way the parallel port works. The kernel he compiled includes a method of intercepting the signals coming in from the hardware, passing that data to the /dev/parport* as it should, but also sending a copy to /dev/parportsnif*. It also creates a log file which is in the OpenBench Logic Sniffer format for easy use with various display software.

Of course this is easiest to use with a Linux system, but can also be run as a virtual machine under Windows. We’d plan on using a virtual machine within Linux as well since this is a custom kernel and will probably only see occasional use.

Simple Hardware And Python Drive This Splunk LED Meter

Want to monitor the company system without continually loading up the Splunk dashboard? It turns out that they’ve got their own Python package which makes pulling down data a snap. All [Rick] needed to do was hook up an LED meter as an external display.

It used to be that this would take a lot of wire and bit of soldering (or some special Christmas lights), but the advent of affordable LED strips has really taken the guess-work out of it. He’s using an RGB version acquired from Adafruit Industries. These strips are driven using SPI and multiple-colors mean you can display multi-dimensional data using one column. He chose to use a Teensy microcontroller, grabbing some plastic packaging for welding rods as the enclosure. These strips are extremely bright and to help soften the impact he added wax paper to the inside of the enclosure to act as a diffuser.

Looking for more projects that use strips like this one? They make fantastic addressable accent lighting for your home.

R2R Ladder Connects Multiple Buttons To One ADC Pin

If you’ve run out of I/O pins on a project and need a way to add user input you can find a slew of port expanders that work with various communications protocols like I2C and 1-Wire. But if you just want to add in some buttons without reaching for an extra IC you’ll love this hack. [John Boxall] shows how to add four buttons using one ADC pin.

The concept is nothing new. The buttons make up an R2R resistive ladder. When one of them is pressed, it completes the circuit for a voltage divider. The results are measured by the analog-to-digital converter of an IC to tell which button was pressed. The difficult part is calculating the resistor values. [John] is using eight resistors made up of just two different values. Every button and every combination of buttons has a unique voltage result which can be discerned by the chip. He even made a truth table so you don’t have to.

The example circuit seen in the video after the break uses an Arduino. But this concept is directly applicable to any microcontroller. And it should be quite easy to use an ADC interrupt to drive all of the button-read events. Continue reading “R2R Ladder Connects Multiple Buttons To One ADC Pin”

Browser-based Circuit Simulator Boasts A Mountain Of Features

CircuitLab is an electronics simulator which you can run in a browser. Above you can see one of the example circuits provided to help show the power of the application. You can build your schematic (perhaps you want to try [Jeri’s] psu shut-off timer?) in the editor mode, then switch over to the simulator to get data back from the components. In that mode, your cursor becomes a probe, and clicking on different parts of the circuit will return the calculated input and output voltages for that component. But wait, there’s more. It’s got time and frequency simulation in addition to the voltage simulator. This lets you look at waveforms fed through analog filters, or timing data like in the 555 timer circuit above.

Where does this fantastic tool come from? [Humberto Evans] and [Mike Robbins], the guys behind NerdKits developed this site. We’ve seen a lot of their hacks around here, like milling solenoids and making them play a xylophone. Check out the CircuitLab quick start video they put together after the break. Continue reading “Browser-based Circuit Simulator Boasts A Mountain Of Features”

Build Your Own Line Laser For 3D Scanning

diy-line-laser

[Valentin] wanted to experiment with 3D scanning some objects he had around the house, but says he didn’t want to buy a line laser for the project since they are pretty expensive. Fortunately, he had some random components sitting in his parts bin, and he was able to build his own line laser without spending a ton of money.

His tutorial actually covers two different methods of building line lasers, both of which use parts that you likely have on hand already.

His first build involves gluing a small square mirror to a flat platform, which he then mounted on a salvaged DC motor. Once the motor starts spinning, the cheap laser pointer he has aimed at the mirror draws a perfect line across whatever medium he is scanning.

His second line laser uses parts donated from an old hard drive that he no longer used. He removed the drive’s read head from the chassis and mounted a small mirror on the actuator arm before firing up his laser. With the laser aimed at the mirror, he applied an unspecified AC current to the motor, which caused it to oscillate and draw a line similar to his first setup.

While they might not be professionally-built scanning lasers, [Valentin’s] efforts produced some decent images, as you can see on his site.

Continue reading to see a short video of his DC motor laser line in action.

Continue reading “Build Your Own Line Laser For 3D Scanning”

Wind-powered POV Weather Station

The more we think about this one the more we like it. [Michael] built himself a wind-powered persistence-of-vision weather station. Okay, that sounds interesting, but he ups the ante when you find out what’s included in the system.

A stepper motor acts as the generator which powers the electronics. As we’ve seen before; if you spin the shaft of a stepper motor electricity is produced. [Michael] is actually spinning the housing of the motor, with the shaft mounted to the base that holds the weather station in place. This way, the electrical contacts are spinning along with the blades of the generator. By mounting all of the electronics on these blades he gets around the problem of transferring power onto a spinning platform.

A set of LEDs on the end of the blades display temperature and relative humidity readings. A hall effect sensor pulled form an old floppy drive syncs the display with the rotational speed. He’s even got a shunt system which keeps the input voltage at a safe level, and will act as a break in high winds to keep the rotors from spinning out of control. See what we mean? An interesting idea because a fantastic project when you build in features like these!