Vetinari Clock Will Drive You Insane

Sometimes we need more psy ops in our life. Being an eminent fan of the Discworld series, Reddit user [rdmiller3] decided he needed to build Lord Vetinari’s clock. This fictional clock was placed in the waiting room for Lord Vetinari in several of the Discworld books. Although the clock keeps accurate time overall, it sometimes tics irregularly and out of sync. The reason? To whittle away the minds of whoever waits for Lord Vetinari.

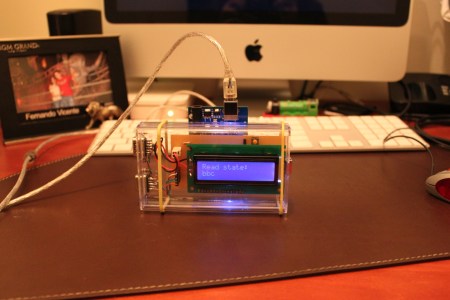
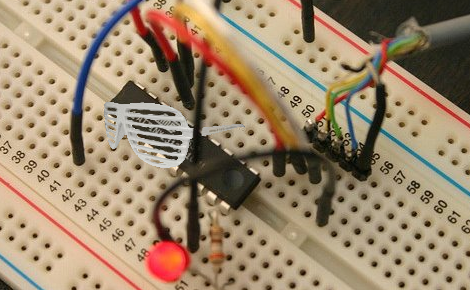
The build uses a standard battery-powered analog clockwork. The ticking mechanism is just a magnet mounted inside a coil driven iron core. The coil leads were disconnected from the clock circuit and connected to digital inputs of an Arduino. With a few random() calls, the clock keeps accurate but random time.

Unfortunately, the clock stopped working after a few weeks because the 5 V from the Arduino was, “pounding it way too hard.” [rdmiller3] says a few resistors and LEDs for the voltage drop would make for a more reliable circuit, though. Check out the hard to watch video of the clock in action after the break.

Continue reading “Vetinari Clock Will Drive You Insane”

magic_music_table_accessible_jukebox

Magic Table Gives Disabled Child Control Over Her Music

Instructables user [XenonJohn] recently put together a fantastic tutorial detailing how he made an RFID-controlled jukebox. The Magic Music Table was created for a disabled child, who is unable to use a CD payer, nor navigate small buttons and menus on MP3 players. He originally though about making the buttons more accessible a la the Frankenkindle, but ultimately settled on making the table instead.

Embedded in the center of the Music Table under a piece of plexiglass is a small project box containing an iPod, Arduino Mega, and a Parallax RFID reader. He crafted small RFID “bricks” that can be waved over the RFID reader, triggering the iPod to play a specific album from a large playlist. The Arduino acts as the middleman, controlling the RFID reader and relaying the appropriate information to the iPod when required.

The system looks pretty sturdy, and [XenonJohn] says that it works great. We think it’s a wonderful use of technology – you certainly can’t argue with brightening up a child’s day.

Continue reading to see a video of the Magic Music Table in action.

Continue reading “Magic Table Gives Disabled Child Control Over Her Music”

Effortlessly Troll Your Friends Each Time They Reach For A Snack

trolling_your_friends_abusive_refrigerator

If you’re trying to lose some weight, [Grissini] has got the just the thing you need!

He recently tweaked his refrigerator to throw out insults each time its opened, though not for his own physical well-being. While we imagine that an abusive refrigerator would help curb your appetite for late night snacks, [Grissini] makes no bones about the fact that he simply wants to effortlessly and automatically troll his roommates.

The device is pretty simple, consisting of an Arduino and an Adafruit wave shield stuffed inside a styrofoam coffee cup. A photocell is used to detect when the refrigerator door has been opened, triggering the Arduino to play a sound bite from the on-board SD card. [Grissini] even spent a good chunk of time working with a text to speech engine in order to create a customized list of insults that point out his friends’ idiosyncrasies – what a guy!

Continue reading to see his abusive fridge in action, and be sure to check out his Instructableto learn how to make your own.

Continue reading “Effortlessly Troll Your Friends Each Time They Reach For A Snack”

DSLR Focus Stacking Assistant Takes The Hard Work Out Of Macro Photography

canon_dslr_focus_stacking_assistant

Focus stacking makes for fantastic macro images, but the process can be tedious without the right tools. While some focus stacking rigs require the camera to be moved away from the subject in small increments, others choose to keep the camera stationary while focusing the lens before each shot.

Both methods produce great results, but you need a steady hand and a lot of patience to get the job done. [Oleg] uses the focus stacking technique relatively frequently, so he decided to automate the process in order to save himself some time. Using an Arduino and a USB host shield from Adafruit, he put together a focus stacking assistant for his Canon EOS camera.

The assistant allows him to set two focal points, leaving the Arduino and his camera with the task of taking pictures. The Arduino commands the camera to tweak the focal point ever so slightly between each image, resulting in an array of images ready for stacking.

He says that the process is a bit slow at the moment, but he’ll be cleaning up the code and building a Nikon-compatible unit in the weeks to come.

PC Temperature Monitoring System Lights Up When Things Get Hot

gpu_overheating_warning_system

[Taylor] popped a new graphics card into his computer, but before he could settle in for a round of gaming, his card started to overheat. He eventually tracked the problem down to an undersized power supply, but the prospect of cooking his new GPU to death made him think twice about how he was monitoring his system’s health.

To continually keep tabs on his video card’s temperature going forward, he put together a small circuit that will alert him if things start to get too hot. He mounted a small temperature sensor on his graphics card near the GPU, wiring it to an Arduino. The Arduino monitors his video card, lighting an RGB LED blue if conditions are alright. If the temperature rises above 50C, the LED changes to red, signaling a problem.

We’re aware that there are all sorts of software applications that can monitor component temperatures for you, but the appeal of [Taylor’s] system is that it can be easily seen from across the room rather than via the desktop. That said, we think that his system could take advantage of his PC’s case fan lighting for a more visible warning, and it wouldn’t hurt to wire in an auto-shutdown feature in case his computer overheats while he’s away.

Build Your Own Portal Turret In 150 Easy Steps

If there were a contest for the most thorough step-by-step project log [Kurt] would the champion. He recently a posted 150 step build log for his fleece-covered Portal turret project. If you can get over the need to click-through 30 pages of steps, there’s a lot to like about this project.

First, what it doesn’t do: The Turret doesn’t split up the middle and fire bullets at you. This is a relief, but the fact that it’s not lethal doesn’t mean it just sits there looking interesting. It can detect movement, it knows when you pick it up, and it can tell when it’s been knocked over. All of these interactive sensory inputs are used to playback various sound bytes from the Portal games, making it a great piece of desk art for those working in geek-centric offices. See for yourself in the video after the break.

The body itself is a food storage container which houses the barebones Arduino and Adafruit Wav shield. As near as we can tell, a PIR sensor detects movement, and leaf switches on the legs tell it when it’s been picked up or tipped over. But we only made a cursor examination of the assembly steps so we might be missing something.

If you’re not into the turrets, maybe this potato is more up your alley.

Continue reading “Build Your Own Portal Turret In 150 Easy Steps”

Hone Your Skills By Building Control Modules

If you ask us, there’s no substitute for learning by doing. But often the hardest part of acquiring new skills is coming up with the idea for a project that utilizes them. [Mike Rankin] wanted to develop a project using laser cut acrylic, and settled on building a control box for an RGB LED strip. He got some practice modeling objects in SolidWorks and seeing the process through to the final build. But it also let him explore an area of microcontroller programming in which he had little experience.

The LED strip he’s using depends on the HL1606. This is an SPI addressable chip that we see popping up in a lot of projects these days. It’s pretty simple to send red, green, and blue values through the data bus, and it allowed [Mike] to try his hand at programming menus and sub-menus. The controller takes input from a clickable rotary encoder. The settings are displayed on an OLED screen, with all the hardware nestled comfortably in his custom-cut enclosure.

Don’t miss the demo video embedded after the break.

Continue reading “Hone Your Skills By Building Control Modules”