GPS Audio Tour Brought To You By Surface Speakers

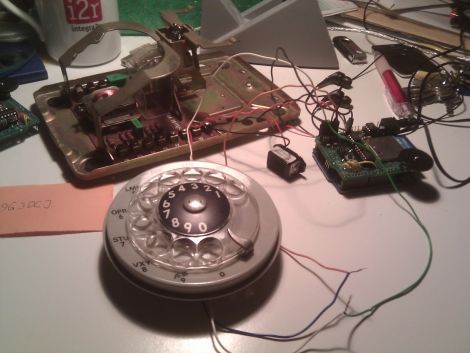
The team at Eschelle Inconnue wanted to “trace a sound cartography of Islam” in Marseilles, France, so they came up with a clever little GPS walking tour powered by an Arduino, MP3 playback module, and a surface transducer speaker.

The team used a Processing app to define geographic areas where each MP3 file would play. An Arduino on the build queries a GPS module and selects the audio file from an MP3 playback module. This isn’t uncommon, and a lot of large outdoor museums (think battlefields) have similar setups.

Determining which audio to play at what location is fairly easy, but that’s not what makes this build special. Instead of simply hooking up a pair of headphones to the build, the team decided to use a surface speaker that turns just about any solid material into a speaker. From the writeup, this is supposed to, “diffuse sounds by giving the illusion to collect them, to listen to the words of the walls, the whisperings through the materials” but we think it’s just a great way to have several people listen to the same audio file at the same time.

Fallout Brought To Life With This Working PIP-Boy 3000

working_pipboy_3000

[MyMagicPudding] wanted to try his hand at hobby electronics, so he decided to go all-in and build himself a PIP-Boy 3000. If the name doesn’t ring a bell, the PIP-Boy 3000 is a wrist-mounted computer from the popular Fallout video game series.

The PIP-Boy is based around an HTC Desire HD mobile phone, which [MyMagicPudding] mounted inside case custom made for him by [Skruffy] from the Replica Prop Forum. He wanted to stay true to the game, so the wrist-mounted computer’s interface eschew’s the Desire’s touch screen and is instead controlled via a set of buttons and dials on its face. The external inputs all interface with the Desire via an Arduino Uno, which communicates with the phone using TCP over USB.

While he admits that his soldering skills are pretty dodgy, and that there’s no longer room behind the neat-looking facade to mount the PIP-Boy on his wrist, we think that it looks great. If this is an example of his first electronics project, we can’t wait to see what comes next.

Continue reading to see the PIP-Boy 3000 in action.

Continue reading “Fallout Brought To Life With This Working PIP-Boy 3000”

Upgrading RAM In An Arduino Mega

[Andy] stuffed some more RAM onto an Arduino Mega and his three-part walk through on the design, construction, and software is a great read and one of the more ‘hard core’ Arduino builds we’ve seen.

The build is centered around a 512K × 8 SRAM module [PDF warning]. Because the RAM is divided up into about 512,000 chunks of 8 bits, the Arduino has to access the RAM through 16 ‘address lines’, then send the data through 8 ‘data lines’. [Andy] didn’t want to use up 24 pins on his Arduino, so he used a latch to multiplex the lowest 8 address lines and the data lines together. With the 512KB RAM expansion installed, the Mega is able to address a whopping 520 Kilobytes.

We’ve seen a few builds that have been limited by the amount of RAM available in the Arduino, like capturing video and some robot hacks, and adding some more RAM to those builds would be great. Multiplexing data and address lines using a latch can be expanded even further, but 520KB ought to be enough for anybody.

Material Of Choice: Felt Pen On Glass

If you’re paying big bucks for those floor-to-ceiling windows why not make them into a canvas for your art as well. Der Kritzler is a motorized plotter that can make this into a reality. It’s a laser-cut pen holder suspended from a pair belt pulleys. Those belts have counterweights, which make it easier for the stepper motors to move the pen jig smoothly. The firmware running on the Arduino that controls Der Kritzler has some very precise setup requirements. Since there is no feedback for the Arduino to sense the position of the pen, the two stepper motors must be exactly 1500 mm apart with 1060mm of toothed belt between the carriage and each stepper motor when the power is turned on.

Input images are converted to code for the device using a processing sketch. So far [Alex] has tried out a couple of different effects, starting with a vector graphic, or using some open source tools to convert bitmaps to vector graphics. Don’t miss his video demonstration embedded after the break.

Continue reading “Material Of Choice: Felt Pen On Glass”

Awesome Fiber Optic LED Viking Helmet

octobrite_led_mohawk_helmet

[Garrett] over at MaceTech was approached by a friend who needed a light-up mohawk installed on a Viking helmet, and he needed it ASAP.

Now, [Garrett] does tons of work with LEDs but it’s not every day you are asked to construct a sound-responsive LED mohawk. He had all sorts of LEDs and other bits on hand, but finding the fiber optics that would make up the mohawk itself took a bit of time.

After a bit of searching, he located some cheap bulk fiber optic toy wands, and got busy cutting them apart to remove the fiber bundles. The fibers were glued into a laser cut plastic assembly, where they were paired with a handful of OctoBrite CYANEA modules [Garrett] had on hand. He bought a handful of components from SparkFun, including an Arduino Pro Mini to control the device, as well as an electret mic and graphic equalizer chip to handle the audio input/filtering.

He wrapped up the code portion of the mohawk and handed it off to his friend, who says that the “helmet is +99 to epic awesomeness”, which sounds like a ringing endorsement to us.

[via BuildLounge]

Check out the video below to see the fiber optic mohawk helmet in action.

Continue reading “Awesome Fiber Optic LED Viking Helmet”

Robust Wireless DSLR Control Over Bluetooth

yanis_android_bluetooth_camera_controller

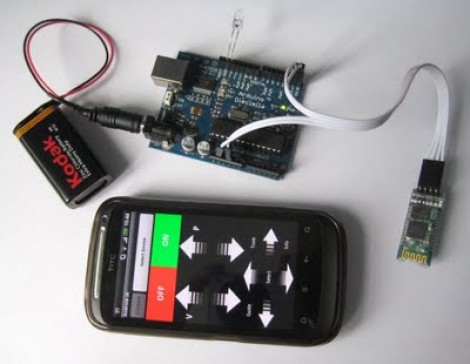
[Manishi] wrote in to share his latest project, a Bluetooth DSLR controller that works with Android. More than a mere Bluetooth shutter trigger, his device lets you control a wide array of other settings such as aperture, shutter speed, ISO, white balance, focus position and live view.

His “YaNis” control system was built using an Arduino Pro Mini, along with a USB host shield and a Bluetooth module he picked up from SparkFun. Obviously any other Arduino and SPP compatible Bluetooth board can be used, though component size is definitely a consideration for this project, and his selections are pretty well-suited to the job. The Arduino half of the software relies heavily on [Oleg Maruzov’s] PTP/USB libraries to get things done, but the free Android control app is all [Manishi’s] creation.

The Bluetooth dongle connects to the camera via USB, and once it’s paired with his Android phone, [Manishi] has total control at his fingertips. He has plenty of improvements planned for the near future including additional camera support, so we expect that we’ll see an even more robust control application before too long.

Continue reading to see a quick video demo of YaNis in action.

Continue reading “Robust Wireless DSLR Control Over Bluetooth”

Bare-bones Electronic Advent Calendar

It’s officially September now (in some parts of the world), and that means we’ve been watching the Christmas decorations go up on the floor of Costco, Walmart and Target for the last few weeks. As a small test of reality, [Eric] decided to build an electronic advent calendar that counts down the days until Christmas. As a simple build using parts lying around on the bench, [Eric] did a pretty good job at deferring his kid’s questions of, “How long until Christmas?” to a machine.

The build is fairly bare-bones, using only an Arduino Pro Mini, RTC and LCD display. For the real-time clock, [Eric] used the ever popular DS3231 RTC. The software reads the time from the clock and calculates the number of seconds between the present time and the hard-coded target date.

Everything is powered by a 9 Volt battery that wouldn’t last the remaining 115 days until Christmas. There is a power switch and the RTC has a battery backup, so the build will probably suffice for all but the most fanatical child.