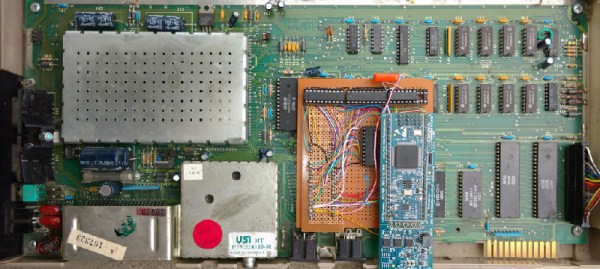
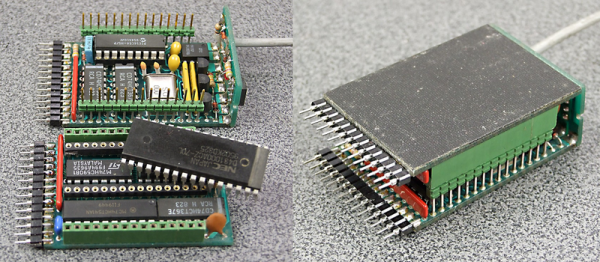
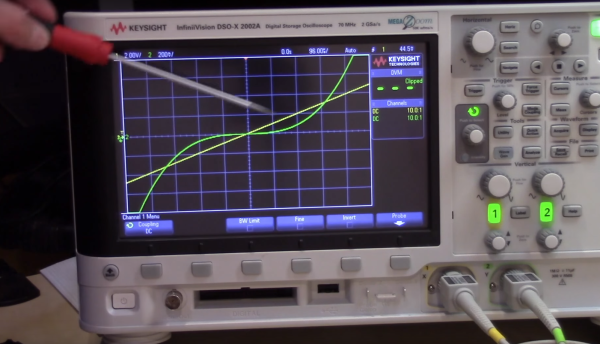
Commodore would never release a laptop, or really much of anything resembling the chunky luggable portable computers of the 1980s. This doesn’t mean a ‘Commodore LCD’ wasn’t designed – it’s sitting in [Bil Herd]’s basement. Of the entire Commodore lineup, the only computer that could remotely be called ‘portable’ is the SX-64, the ‘executive’ version that came with a built-in 5″ monitor, the usual C64 circuitry, one floppy drive, and an empty hole that could obviously hold a second floppy drive. Something must be done about that missing floppy drive, and it only took thirty years for someone to do something about it.
While the conversion requires mucking around in an already tight enclosure, the parts for this conversion are readily available thanks to a few people trying to repair an SX-64, giving up, and parting the whole thing out on eBay. These parts include the 1541 controller relabeled as the ‘FDD’ board in the SX-64, and of course the floppy drive itself. With the right teardown guide, putting the new drive in this old computer isn’t that hard; just remember to cut a jumper to assign the new drive a number other than 8.
The missing floppy drive of the SX-64 is what happens when marketing is put in charge of engineering. There were a few of these dual drive Commodore luggables back in ’83, and we have the computer magazine clippings to prove it. The official story is the power supply wasn’t beefy enough to handle the second drive. This mod, though, seems to work well enough, albeit with a distinct lack of somewhere to store a few floppies.
There’s no better way to learn how to program a computer than assembly, and there’s no better way to do assembly than with a bunch of blinkenlights and switches. Therefore, the best way to learn programming is with a PDP-11. It’s a shame these machines are locked up in museums and the garages of very cool people, but you can build your own PDP-11 with a Raspberry Pi and just a few extra components.
[jonatron] built his own simulated version of the PDP-11 with a lot of LEDs, a ton of switches, and a few 16-bit serial to parallel ICs. Of course the coolest part of any blinkenlight simulator are the front panel graphics, and here [jonatron] didn’t skimp. He put those switches and LEDs on a piece of laser cut acrylic with a handsome PDP11 decal. The software comes with a load of compiler warnings and doesn’t run anything except for very simple machine code programs. That’s really all you can do with a bunch of toggle switches and lights, though.
If this project looks familiar, your memory does not deceive you. The PiDP-8/I was an entry in this year’s Hackaday Prize and ended up being one of the top projects in the Best Product category. We ran into [Oscar], the creator of the PiDP-8, a few times this year. The most recent was at the Hackaday SuperConferece where he gave a talk. He’s currently working on a replica of the king of PDPs, the PDP-11/70.
Motors are everywhere; DC motors, AC motors, steppers, and a host of others. In this article, I’m going to look beyond these common devices and search out more esoteric and unusual electronic actuators that might just find a place in one of your projects. In any case, their mechanisms are interesting in their own right! Join me after the break for a survey of piezo, magnetostrictive, magnetorheological, voice coils, galvonometers, and other devices. I’d love to hear about your favorite actuators and motors too, so please comment below!
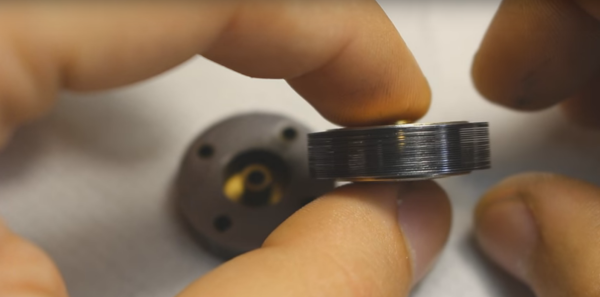
Piezoelectric materials sometimes seem magic. Apply a voltage to a piezoelectric material and it will move, as simple as that. The catch of course is that it doesn’t move very much. The piezoelectric device you’re probably most familiar with is the humble buzzer. You’d usually drive these with less than 10 volts. While a buzzer will produce a clearly audible sound you can’t really see it flexing (as it does shown above).
To gauge the motion of a buzzer I recently attempted to drive one with a 150 volt piezo driver, this resulted in a total deflection of around 0.1mm. Not very much by normal standards!
The PiezoMotor LEGS actuator “walks” along a rod, pushing it as it goes.
For some applications however resolution is of primary interest rather than range of travel. It is here that piezo actuators really shine. The poster-boy application of piezo actuators is perhaps the scanning probe microscope. These often require sub-nanometer accuracy (less than 1000th of 1000th of 1 millimeter) in order to visualize individual atoms. Piezo stacks are ideal here (though hackers have also used cheap buzzers!).
Sometimes though you need high precision over a larger range of travel. There are a number of piezo configurations that allow this. Notably Inchworm, “LEGS”, and slip-stick actuators.
The PiezoMotor LEGS actuator is shown to the above. As noted, Piezos only produce small (generally sub-millimeter) motion. Rather than using this motion directly, LEGS uses this motion to “walk” along a rod, pushing it back and forth. The rod is therefore moved, in tiny nanometer steps. However, piezos can move quickly (flexing thousands of times a second). And the LEGS (and similar Inchworm actuator) allows relatively quick, high force, and high resolution motion.
The tablecloth trick (yes this one’s fake, the kid is ok don’t worry. :))
Another type of long travel piezo actuator uses the “stick-slip phenomenon”. This is much like the tablecloth magic trick shown above. If you pull the cloth slowly there will be significant friction between the cloth and this crockery and they will be dragged along with the cloth. Pull it quickly and there will be less friction and the crockery will remain in place.
This difference between static and dynamic friction is exploited in stick-slip actuators. The basic mechanism is shown in the figure below.
Motion caused by a stick-slip motor
When extending slowing a jaw rotates a screw, but if the piezo stack is compressed quickly the screw will not return. The screw can therefore be made to rotate. By inverting the process (extending quickly, then compressing slowly) the process is reversed and the screw is turned in the opposite direction. The neat thing about this configuration is that it retains much of the piezo’s original precision. Picomotors have resolutions of around 30 nanometer over a huge range of travel, typically 25mm, they’re typically used for optical focusing and alignment and can be picked up on eBay for 100 dollars or so. Oh and they can also be used to make music. Favorites include Stairway to Heaven, and not 1 but 2 versions of Still Alive (from Portal). Obligatory Imperial March demonstration is embedded here:
There are numerous other piezo configurations, but typically they are used to provide high force, high precision motion. I document a few more over on my blog.
Magnetostrictive actuators
Magnetostriction is the tendency of a material to change shape under a magnetic field. We’ve been talking about magnetostriction quite a lot lately. However much like piezos it can also be used for high precision motion. Unlike piezos they require relatively low voltages for operation and have found niche applications.
Magnetorheological motion
Magnetorheological (MR) fluids are pretty awesome! Much like ferrofluids, MR fluids respond to changes in magnetic field strength. However, unlike ferrofluids it’s their viscosity that changes.
This novel characteristic has found applications in a number of areas. In particularly the finishing of precise mirrors and lens used in semiconductor and astronomical applications. This method uses an electromagnet to change the viscosity of the slurry used to polish mirrors, removing imperfections. The Hubble telescope’s highly accurate mirrors were apparently finished using this technique (though hopefully not that mirror). You can purchase MR fluid in small quantities for a few hundred dollars.
Electrostatic motors
While magnetic motors operate through the attraction and repulsion of magnetic fields, electrostatic motors exploit the attraction and repulsion of electric change to produce motion. Electrostatic forces are orders or magnitude smaller that magnetic ones. However they do have niche applications. One such application is MEMS motors, tiny (often less than 0.01mm) sized nanofabricated motors. At these scales electromagnetic coils would be too large and specific power (power per unit volume) is more important than the magnitude of the overall force.
Voice coils and Galvanometers
The voice coil is your basic electromagnet. They’re commonly used in speakers, where an electromagnet in the cone reacts against a fixed magnet to produce motion. However voice coil like configurations are used for precise motion control elsewhere (for example to focus the lens of an optical drive, or position the read head of a hard disc drive). One of the cooler applications however is the mirror galvanometer. As the name implies the device was originally used to measure small currents. A current through a coil moved a rod to which a mirror was attached. A beam of light reflect off the mirror and on to a wall effectively created a very long pointer, amplifying the signal.
These days ammeters are far more sensitive of course, but the mirror galvanometer has found more entertaining applications:
High speed laser “galvos” are used to position a laser beam producing awesome light shows. Modern systems can position a laser beam at kilohertz speeds, rendering startling images. These systems are effectively high speed vector graphic like line drawing systems, resulting in a number of interesting algorithmic challenges. Marcan’s OpenLase framework provides a host of tools for solving these challenges effectively, and is well worth checking out.
In this article I’ve tried to highlight some interesting and lesser known techniques for creating motion in electronic systems. Most of these have niche scientific, industrial or artistic applications. But I hope they also also offer inspiration as you work on your own hacks! If you have a favorite, lesser known actuator or motor please comment below!
[Cody Reeder] had a problem. He wanted to make a ring for his girlfriend [Canyon], but didn’t have enough gold. [Cody and Canyon] spent some time panning for the shiny stuff last summer. Their haul was only about 1/3 gram though. Way too small to make any kind of jewelry. What to do? If you’re [Cody], you head up to your silver mine, and pick up some ore. [Cody] has several mines on his ranch in Utah. While he didn’t go down into the 75 foot deep pit this time, he did pick up some ore his family had brought out a few years back. Getting from ore to silver is a long process though.
First, [Cody] crushed the rock down to marble size using his homemade rock crusher. Then he roasted the rock in a tire rim furnace. The ore was so rich in lead and silver that the some of the metal just dropped right out, forming splatters on the ground beneath the furnace. [Cody] then ball milled the remaining rock to a fine powder and panned out the rest of the lead. At this point the lead and silver were mixed together. [Cody] employed Parks process to extract the silver. Zinc was added to the molten lead mixture. The silver is attracted to the zinc, which is insoluble in lead. The result is a layer of zinc and silver floating above the molten lead. Extracting pure silver is just a matter of removing the zinc, which [Cody] did with a bit of acid.
Cody decided to make a silver ring for [Canyon] with their gold as the stone. He used the lost wax method to create his ring. This involves making the ring from wax, then casting that wax in a mold. The mold is then heated, which burns out the wax. The result is an empty mold, ready for molten metal.
The cast ring took a lot of cleanup before it was perfect, but the results definitely look like they were worth all the work.
The man leaned over his creation, carefully assembling the tiny pieces. This was the hardest part, placing a thin silver plated diaphragm over the internal chamber. The diaphragm had to be strong enough to support itself, yet flexible enough to be affected by the slightest sound. One false move, and the device would be ruined. To fail meant a return to the road work detail, quite possibly a death sentence. Finally, the job was done. The man leaned back to admire his work.
The man in this semi-fictional vignette was Lev Sergeyevich Termen, better known in the western world as Léon Theremin. You know Theremin for the musical instrument which bears his name. In the spy business though, he is known as the creator of one of the most successful clandestine listening devices ever used against the American government.
I thought the surplus electronics market in Dallas was a byproduct of local manufacturing, after all we have some heavy hitters in our back yard: Texas Instruments, Maxim (Dallas Semiconductor), ST Micro (at one time), Diodes Incorporated. If we widen our radius to include Austin (3 hours down the road) we can make a much more impressive list by including: National Instruments, Freescale Semiconductor, better yet I’ll just insert the graphic I’m pulling data from right here:
Granted, not all of these are companies that manufacture silicon, or even have manufacturing facilities here in Texas. That doesn’t necessarily matter for surplus to exist. Back to my point of where surplus originated. While I wasn’t completely wrong (these companies certainly have helped contribute to the surplus electronics market) the beginnings of surplus storefronts date back to World War II. Did anyone see that coming? Neither did I. However it does make sense, the US government would have had a large stock of “stuff” to get rid of at the end of the war.
Enter the sale of government surplus all over the nation, usually near air force bases. So this is how the more generalized concept of a surplus shop came to be in existence; mix in the domestic manufacturing of electronics in the 1970’s and we have electronics surplus shops aplenty.
My First Hand Experience
I didn’t really appreciate how valuable my local electronics shop was until watching Beers in Bunnie’s Workshop – Workshop Video #36. If you haven’t seen the video you only need to know that [Ian] of Dangerous Prototypes and [bunnie] of Andrew [bunnie] Huang are standing in [bunnie]s work-space in Singapore drinking beer and talking about the lab that is [bunnie]s life. You with me now? Okay, there is a point in the video where the two discuss the ability to run down the street and buy a connector as something only available in Singapore or Shenzhen. Let me briefly pause here to clarify that I’m not comparing my local electronics shop to the Shenzhen market or Sim Lim Tower in Singapore, only stating that I too can hold parts in-hand before purchasing them. I’m also not [brandon] of Dangerous Prototypes or Andrew [brandon] Huang, clearly.
I do however have an electronics selection at my disposal that is unmatched until you get to the west coast shops. I went on a bit of an adventure with the owner [Jim Tanner] of my local shop [Tanner Electronics] to take some pictures of the retail floor and a few behind the scenes (warehouse) shots that you can check out after the break.
This year’s Hackaday Prize included a category for the Best Product, and there is perhaps no project that has inspired more people to throw money at their computer screens than [Oscar Vermeulen]’s PiDP-8/I. It’s a replica of the PDP-8/I from 1968. Instead of discrete electronics driving the blinkenlights and switches on the front of this computer, [Oscar]’s version uses a Raspberry Pi and the incredible SIMH emulator for dozens of old mainframes and minicomputers. It is, for all intents and purposes, a miniaturized version of a 50 year old computer that will fit on your desk and is powered by a phone charger.
Check out the video of [Oscar]’s talk below then join us after the break for more discussion of his work.