Nanocounter: Frequency Counter With An Android UI

Have you ever started a project, run into an issue, started a new project to solve the issue, and completely forgot about the original project? [Andy] went down a rabbit hole of needing a tool to calibrate an MCU oscillator, but not having an accurate way to measure frequency. Most people would just buy a frequency counter and be done with it, but [Andy] decided to build his own.

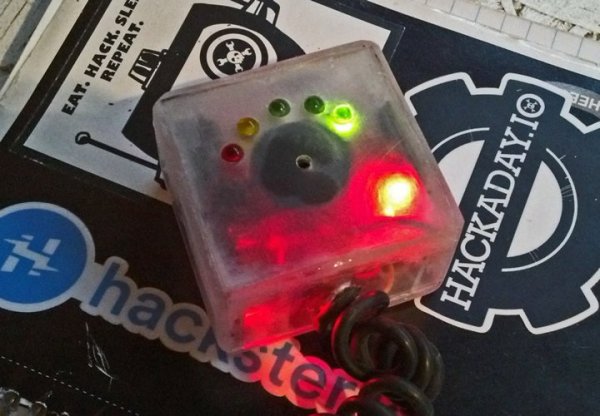
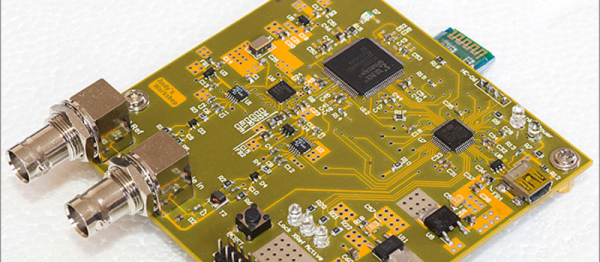
The Nanocounter is an accurate, open source frequency counter that uses an Android phone as its display. It’s based on a high accuracy temperature compensated crystal oscillator (TCXO) fed into a phase locked loop (PLL) to create a high frequency, accurate reference clock.

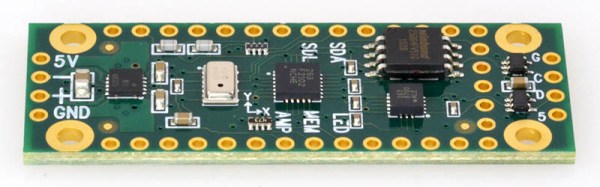
This reference clock, along with the signal to be measured, are sent into a Xilinx FPGA which uses a method called equal precision measurement to determine the frequency. A STM32F072 microcontroller uses a SPI interface to get this data out of the FPGA, and controls the whole system. Finally, a cheap HC-06 Bluetooth module facilitates communication with an Android device.

The project achieves the goal of frequency counting, though [Andy] doesn’t remember what project sparked the idea to build it. (Classic yak shaving!) But the result is a great read of a detailed writeup, and you can watch a video of the Nanocounter in action after the break. That’s a win in our book.

Continue reading “Nanocounter: Frequency Counter With An Android UI”

Bare Metal Media Centre

Sometimes, along comes a build that is simple and bare, and yet exemplifies “hacking” – an art form that uses something in a way in which it was not originally intended. We’ve featured a few Raspberry Pi builds, but this one is less about the Pi and more about putting the rest of the hardware nicely together. [Garage Tech] built this Raspberry-Pi Stand and the end result is brilliant.

MediaPlayerSide-6-5-4It is nothing more than a metal book holder – the kind you are likely to pick up a pair for a few bucks at a charity shop or flea market. He was lucky to also snag a JBL On Stage IIIP Speaker Dock for cheap. Quickly spotting an opportunity, he decided to put together an OpenELEC based media centre using his bounty. Having made up his mind, he needed a couple of other parts to make sure this build looked, and sounded, good. An iQuadio Pi DAC+ , the Pi-DAC+ case from ModMyPi which comes with all the necessary hardware, and the official DSI touch screen.

With all of the stuff on hand, the rest of the build involved a short time at the workbench drilling some holes and slots in the aluminium book holder plate to mount the Pi-DAC case and the display. He drilled the holes and slots such that he can fix the display on either side. Along the way, he discovered an interesting issue regarding the display orientation – check it out. The final result is a nice looking media centre that sits proudly on top of his audio rig.

Retrotechtacular: Hallicrafters Goes To War

When the USA entered World War Two, they lacked a powerful mobile communications unit. To plug this gap they engaged Hallicrafters, prewar manufacturers of amateur radio transmitters and receivers, who adapted and ruggedized one of their existing products for the application.

The resulting transmitter was something of a success, with production running into many thousands of units. Hallicrafters were justifiably proud of it, so commissioned a short two-part film on its development which is the subject of this article.

The transmitter itself was a very high quality device for the era, but even with the film’s brief insight into operating back in the AM era the radio aspect is not what should capture your interest. Instead of the radio it is the in-depth tour of an electronics manufacturing plant in the war years that makes this film, from the development process of a military product from a civilian one through all the stages of production to the units finally being fitted to Chevrolet K-51 panel vans and shipped to the front. Chassis-based electronics requiring electric hoists to move from bench to bench are a world away from today’s surface-mount micro-circuitry.

So sit back and enjoy the film, both parts are below the break.

Continue reading “Retrotechtacular: Hallicrafters Goes To War”

Car Idle Alarm Helps You Stop Wasting Gas While Tweeting

[TVMiller] has a bone to pick with you if you let your car idle while you chat or text on your phone. He doesn’t like it, and he wants to break you of this wasteful habit – thus the idle-deterrence system he built that he seems to want on every car dashboard.

In the video below, the target of his efforts is clear – those who start the car then spend time updating Twitter or Instagram. His alarm is just an Arduino Nano that starts a timer when the car is started. Color-coded LEDs mark the time, and when the light goes red, an annoying beep starts to remind you to get on with the business of driving. The device also includes an accelerometer that resets the timer when the vehicle is in motion; the two-minute timeout should keep even the longest stop light from triggering the alarm.

[TVMiller] plans an amped-up version of the device built around an MKR1000 that will dump idle to moving ratios and other stats to the cloud. That’s a little too Big Brother for our tastes, but we can see his point about how wasteful just a few minutes of idling can be when spread over a huge population of vehicles. This hack might make a nice personal reminder to correct wasteful behavior. It could even be rolled into something that reads the acceleration and throttle position directly from the OBD port, like this Internet of Cars hack we featured a while back.

Continue reading “Car Idle Alarm Helps You Stop Wasting Gas While Tweeting”

Teensy Gets A Prop Shield

God of microcontrollers and king of electrons [Paul Stoffregen] is famous for his Teensy microcontroller dev boards, and for good reason. If you have a project that does more than blink a few pins, but doesn’t need to run a full Linux build, any one of the Teensy dev boards are a great option. As a dev board, [Paul] has released a few ‘shields’ that add various functionality – for example the audio adapter board that is able to play CD quality audio and perform DSP and FFT operations. Now, [Paul] has launched a new shield designed for interactive light and sound effects on art installations and for the rest of the crew at Burning Man. It’s called the Prop Shield, and adds more sensors, audio amps, and blinkies than a Teensy has ever had.

The Teensy Prop shield is equipped with 10DOF motion sensors, including a FXOS8700 accelerometer/magnetometer, a FXAS21002 gyroscope, and an MPL3115 altimeter and temperature sensor. A two Watt LM48310 audio amplifier can drive 4 or 8 ohm speakers, and 8 Megabytes of Flash memory can hold all the data for audio or a very long string of APA102 individually addressable LEDs.

The combination of motion sensors, audio amplifiers, and LED drivers may seem like an odd combination, but this is a shield for very odd projects. Stage effect, wearables, and handheld props become very easy with this board, and haunted houses are about to get really cool. With the on-board Flash, this board makes for a very capable data logger, and although the altitude sensor only reads pressure up to about 40,000 feet, this could be a very handy board for high altitude balloons.

The Prop Shield is available now in [Paul]’s shop. There are two versions, one ‘wit’ the motion sensors for $19.50, and the other ‘witout’ motion sensors for $8.40. The distinction is based on the Philly Cheesesteak protocol.

For the last few weeks, [Paul] has put the prop shield in the hands of a few dozen beta testers. Their impressions are in a forum thread, and like all of [Paul]’s projects, the response has been very good.

When Difference Matters: Differential Signaling

We have talked about a whole slew of logic and interconnect technologies including TTL, CMOS and assorted low voltage versions. All of these technologies have in common the fact that they are single-ended, i.e. the signal is measured as a “high” or “low” level above ground.

This is great for simple uses. But when you start talking about speed, distance, or both, the single ended solutions don’t look so good. To step in and carry the torch we have Differential Signalling. This is the “DS” in LVDS, just one of the common standards throughout industry. Let’s take a look at how differential signaling is different from single ended, and what that means for engineers and for users.

Single Ended

Collectively, standards like TTL, CMOS, and LVTTL are known as Single Ended technologies and they have in common some undesirable attributes, namely that ground noise directly affects the noise margin (the budget for how much noise is tolerable) as well as any induced noise measured to ground directly adds to the overall noise as well.

By making the voltage swing to greater voltages we can make the noise look smaller in proportion but at the expense of speed as it takes more time to make larger voltage swings, especially with the kind of capacitance and inductance we sometimes see.

Differential

diff4

Enter Differential Signaling where we use two conductor instead of one. A differential transmitter produces an inverted version of the signal and a non-inverted version and we measure the desired signal strictly between the two instead of to ground. Now ground noise doesn’t count (mostly) and noise induced onto both signal lines gets canceled as we only amplify the difference between the two, we do not amplify anything that is in common such as the noise.

Continue reading “When Difference Matters: Differential Signaling”

Tindie Is Hiring A Writer

Tindie is the best place to find unique hardware. It’s hardware sold by it’s creators; you can’t just go out and buy it anywhere. The ideas for those creations, the design and engineering that went into them, and the background on both sellers making and buyers building is the story that makes Tindie special. It’s time to make that story a lot easier to discover.

Tindie has a Blog (which you should be following) and is now looking for its scribe to fill those pages. As a writer for Tindie you share the excitement of trying out the newest sensors, making things move, or even just the magic of that first simple blink. You will seek out amazing parts and people to highlight. In a few articles each week you’ll engage and energize the Tindie audience, highlight the cutting-edge new arrivals, and lead in brainstorming new builds.

Have I just described you? Then please apply to be a writer for Tindie. Email Tindie’s jobs line with the following:

  • Tell us about you. How did you get into building hardware? What are your educational, hobby, and professional backgrounds.
  • What direction do you think the Tindie blog should take?
  • Please choose one item offered by a seller on Tindie and write a sample article about it.

The position pays per article written. This is the first time Tindie is hiring a dedicated writer; it’s an opportunity for you to shape something new and amazing.