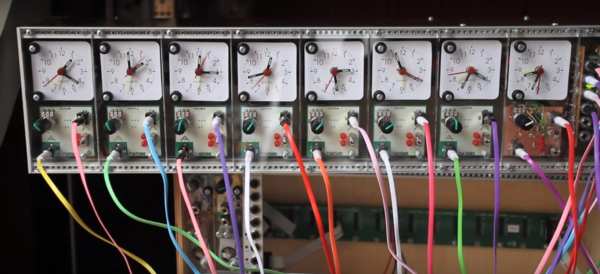
Play the demo video below and try not to let the rhythm worm its way into your brain. What you’re hearing is the sound of a bunch of clocks, amplified. None of them are keeping wall time, but all of them are playing together.
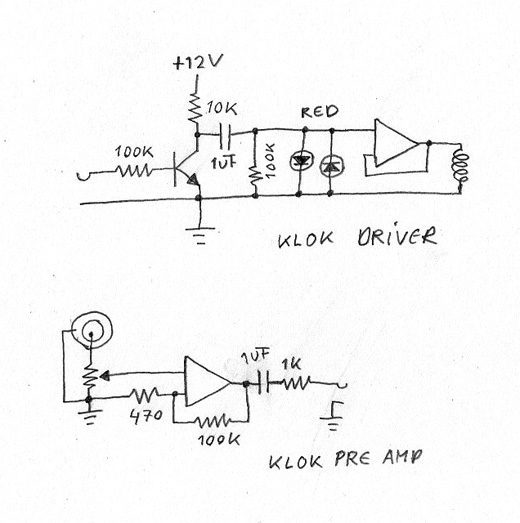
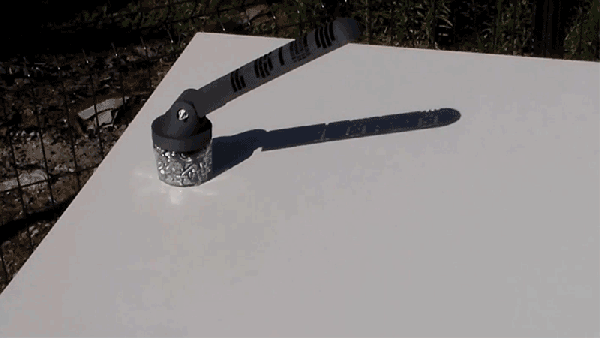
The video looks like eight identical version of the same module. The input takes a voltage and converts the rising and falling edges into pulses to drive the coil of an el-cheapo clock. The LEDs pulse as the poles of the clock switch to the incoming beats. The output comes from an amplified piezo sensor stuck on the back of each clock. That is, what you’re hearing is each clock ticking, but amplified. And if you watch the dials spin, it doesn’t look like any of them are telling time.
So far so good, and it matches up with the schematic. But what’s up with that switch on the front? It doesn’t show up anywhere.
And what’s driving the show? [Gijs] tantalizes us with a master clock module (on the same page) that looks like it does keep time, and outputs subdivisions thereof. But that would be too slow to be what’s used in the video. Has he swapped the crystal to make it run faster? It’s a mystery.
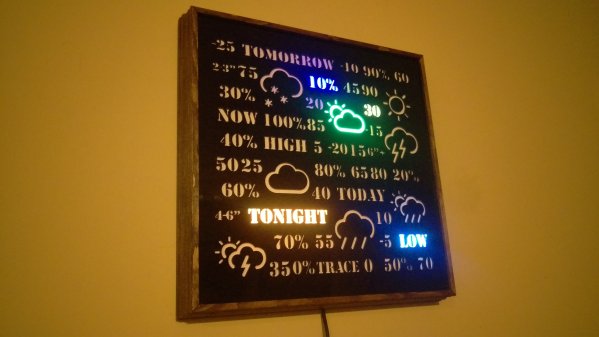
Word clocks are pretty popular “artsy” ways of telling time, but [doktorinjh] wanted to try something a little different. So instead of showing the time — it shows the weather.
He’s using an Arduino Yun to access the Weather Underground API for data and then sends the data out to a grid of 100 individually addressable RGB LEDs — NeoPixels to be precise. The LEDs are overlayed with a laser cut acrylic sheet with various words and weather icons to allow for a pretty specific depiction of current (or future) weather conditions.
The frame is made out of colonial style molding and since it’s a weather clock, he turned the grid of LEDs into a rainbow effect, because, why not?
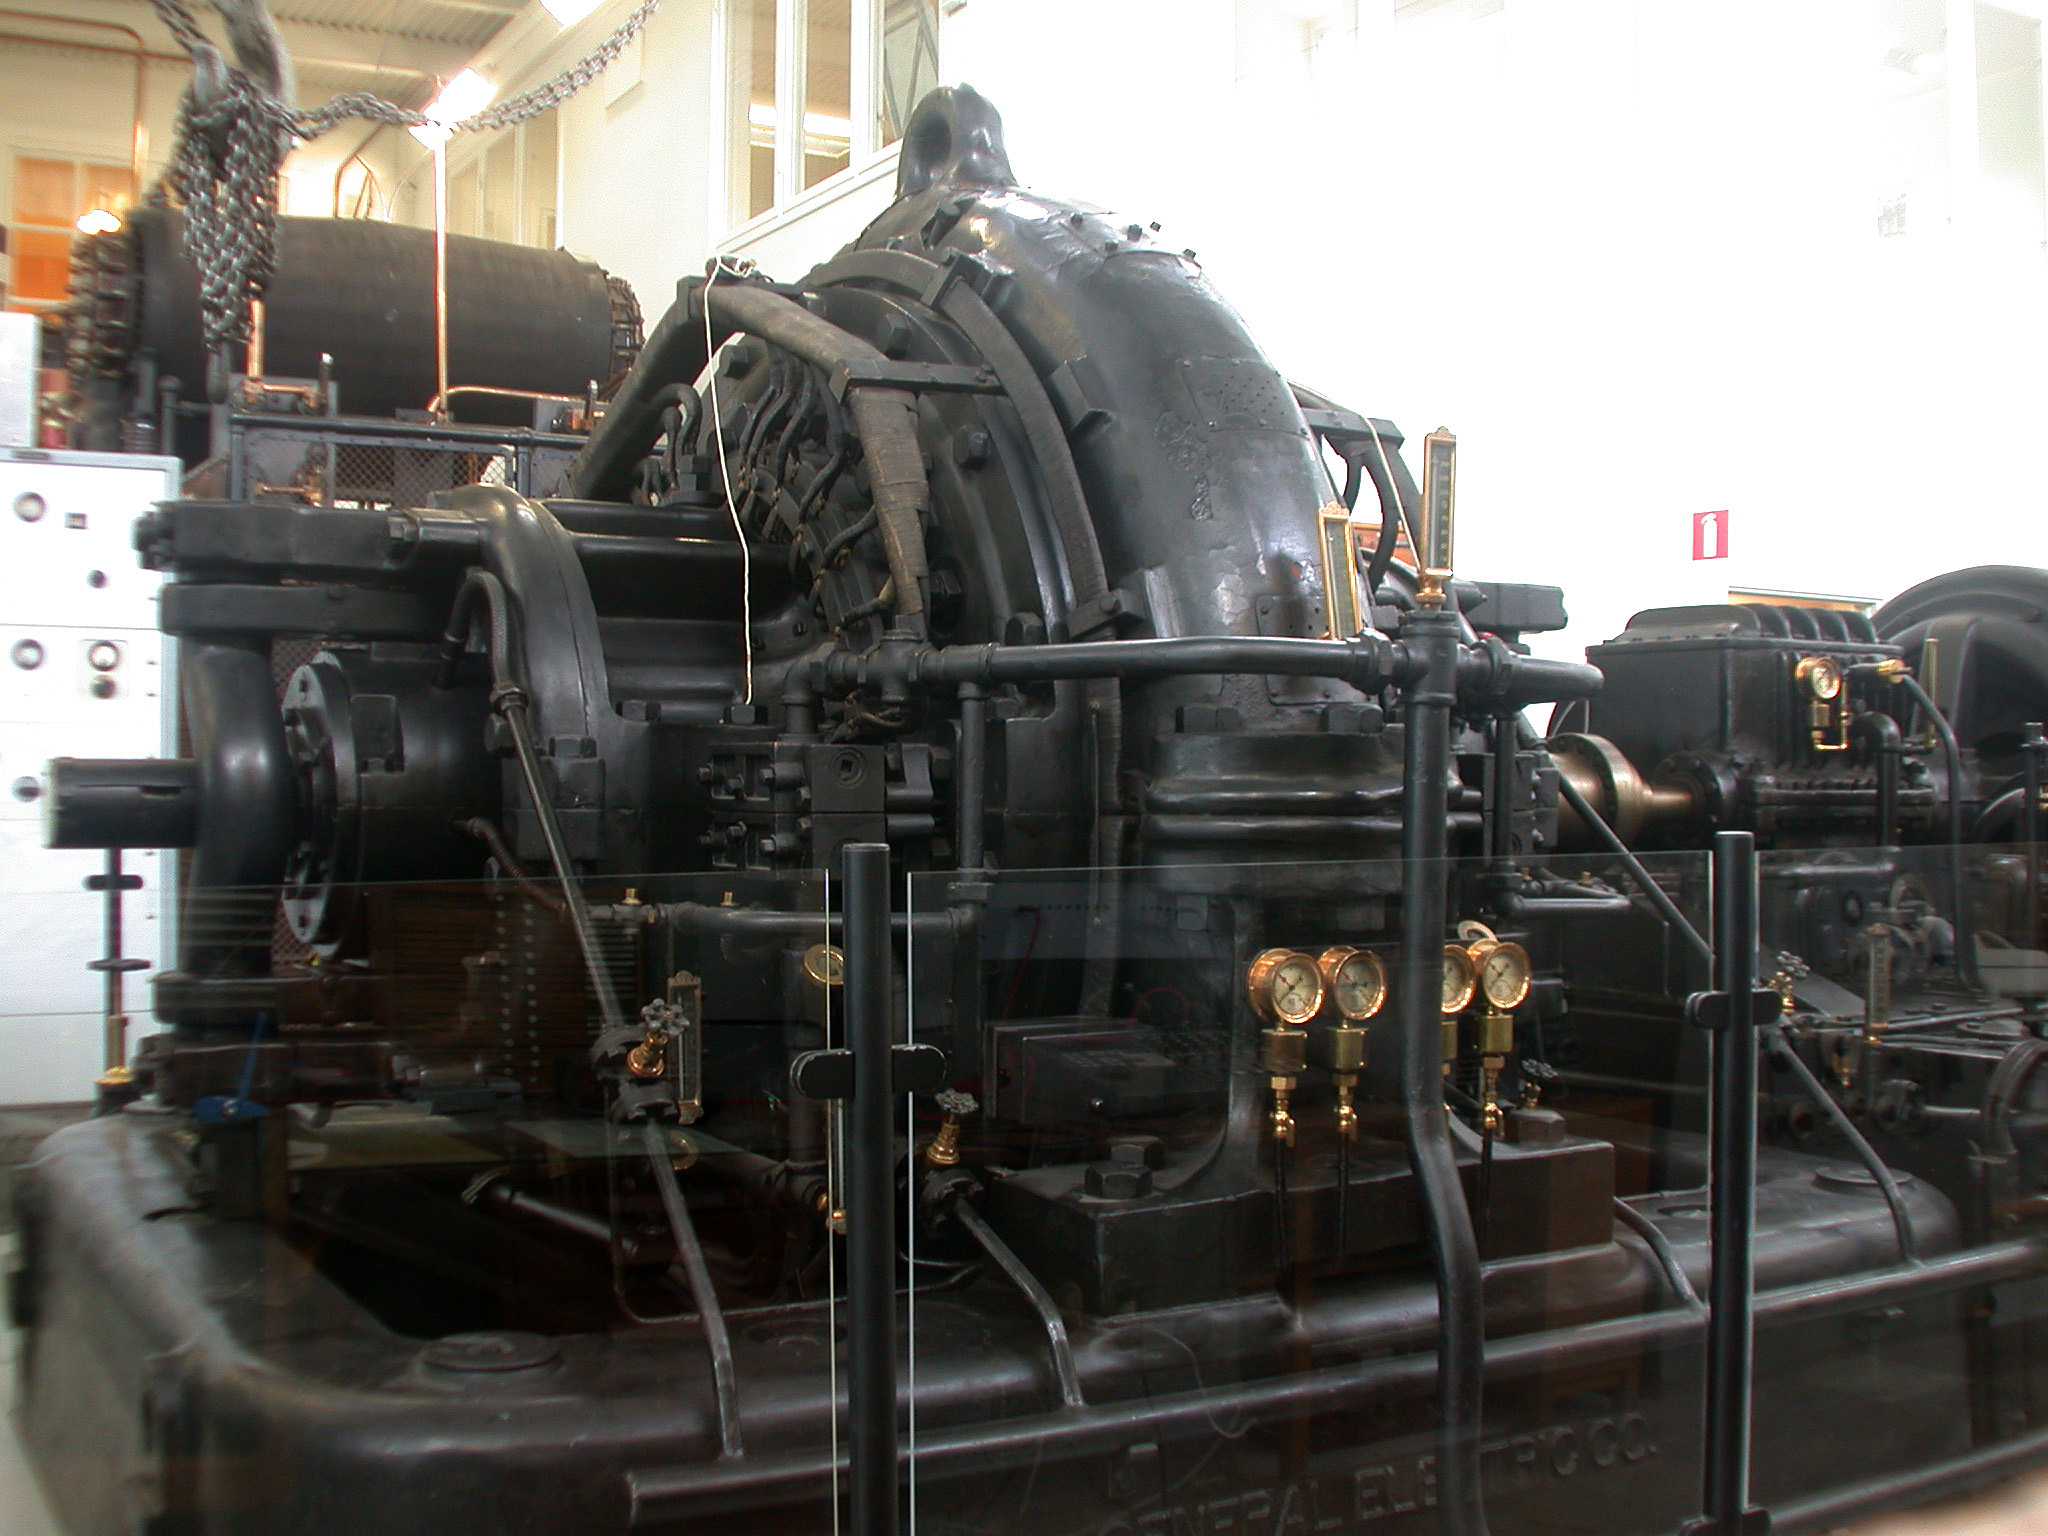
Until the 1960s, watches and clocks of all kinds kept track of time with mechanical devices. Springs, pendulums, gears, oils, and a whole host of other components had to work together to keep accurate time. The invention of the crystal oscillator changed all of that, making watches and clocks not only cheaper, but (in general) far more accurate. It’s not quite as easy to see them in action, however, unless you’re [noq2] and you have a set of strobe lights.
[noq2] used a Rigol DG4062 function generator and a Cree power LED as a high-frequency strobe light to “slow down” the crystal oscillators from two watches. The first one he filmed was an Accutron “tuning fork” movement and the second one is a generic 32,768 Hz quartz resonator which is used in a large amount of watches. After removing the casings and powering the resonators up, [noq2] tuned in his strobe light setup to be able to film the vibrations of the oscillators.
It’s pretty interesting to see this in action. Usually a timekeeping element like this, whether in a watch or a RTC, is a “black box” of sorts that is easily taken for granted. Especially since these devices revolutionized the watchmaking industry (and a few other industries as well), it’s well worthwhile to take a look inside and see how they work. They’re used in more than just watches, too. Want to go down the rabbit hole on this topic? Check out the History of Oscillators. Continue reading “Strobe Light Slows Down Time”→
The laptop I’m using, found for 50 bucks in the junk bins of Akihabara has a CPU that runs at 2.53GHz. Two billion five hundred and thirty million times every second electrons systematically briefly pulse. To the human mind this is unimaginable, yet two hundred years ago humanity had no knowledge of electrical oscillations at all.
There were clear natural sources of oscillation of course, the sun perhaps the clearest of all. The Pythagoreans first proposed that the earth’s rotation caused the suns daily cycle. Their system was more esoteric and complex than the truth as we now know it and included a postulated Counter-Earth, lying unseen behind a central fire. Regardless of the errors their theory contained, a central link was made between rotation and oscillation.
And rotational motion was exploited in early electrical oscillators. Both alternators, similar to those in use today, and more esoteric devices like the interrupter. Developed by Charles Page in 1838, the interrupter used rocking or rotational motion to dip a wire into a mercury bath periodically breaking a circuit to produce a simple oscillation.
As we progressed toward industrial electrical generators, alternating current became common. But higher and higher frequencies were also required for radio transmitters. The first transmitters had used spark gaps. These simple transmitters used a DC supply to charge a capacitor until it reached the breakdown voltage of the gap between two pieces of wire. The electricity then ionized the air molecules in the gap. Thus allowing current to flow, quickly discharging the capacitor. The capacitor charged again, allowing the process to repeat.
As you can see and hear in the video above spark gaps produce a noisy, far from sinusoidal output. So for more efficient oscillations, engineers again resorted to rotation.
The Alexanderson alternator uses a wheel on which hundreds of slots are cut. This wheel is placed between two coils. One coil, powered by a direct current, produces a magnetic field inducing a current in the second. The slotted disc, periodically cutting this field, produces an alternating current. Alexanderson alternators were used to generate frequencies of 15 to 30 KHz, mostly for naval applications. Amazingly one Alexanderson alternator remained in service until 1996, and is still kept in working condition.
A similar principal was used in the Hammond organ. You may not know the name, but you’ll recognize the sound of this early electronic instrument:
The Hammond organ used a series of tone wheels and pickups. The pickups consist of a coil and magnet. In order to produce a tone the pickup is pushed toward a rotating wheel which has bumps on its surface. These are similar to the slots of the Alexanderson Alternator, and effectively modulate the field between the magnet and the coil to produce a tone.
Amplifying the Oscillation
The operation of a tank circuit (from wikipedia)
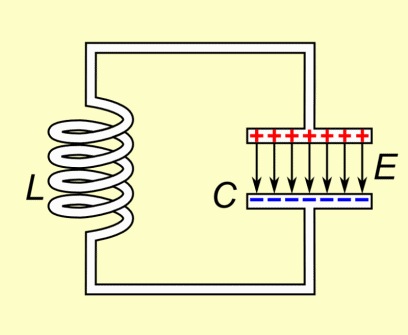
So far we have purely relied on electromechanical techniques, however amplification is key to all modern oscillators, for which of course you require active devices. The simplest of these uses an inductor and capacitor to form a tank circuit. In a tank circuit energy sloshes back and forth between an inductor and capacitor. Without amplification, losses will cause the oscillation to quickly die out. However by introducing amplification (such as in the Colpitts oscillator) the process can be kept going indefinitely.
Oscillator stability is important in many applications such as radio transmission. Better oscillators allow transmissions to be packed more closely on the spectrum without fear that they might drift and overlap. So the quest for better, more stable oscillators continued. Thus the crystal oscillator was discovered, and productionized. This was a monumental effort.
Producing Crystal Oscillators
The video below shows a typical process used in the 1940s for the production of crystal oscillators:
Natural quartz crystals mined in Brazil were shipped to the US, and processed. I counted a total of 13 non-trivial machining/etching steps and 16 measurement steps (including rigorous quality control). Many of these quite advanced, such as the alignment of the crystal under an X-Ray using a technique similar to X-Ray crystalography.
These days our crystal oscillator production process is more advanced. Since the 1970s crystal oscillators have been fabricated in a photolithographic process. In order to further stabilize the crystal additional techniques such as temperature compensation (TCXO) or operating the crystal at a temperature controlled by the use of a heating element (OCXO) have been employed. For most applications this has proved accurate enough… Not accurate enough however for the timenuts.
Timenuts Use Atoms
Typical timenut wearing atomic wristwatch
For timenuts there is no “accurate enough”. These hackers strive to create the most accurate timing systems they can, which all of course rely on the most accurate oscillator they can devise.
Many timenuts rely on atomic clocks to make their measurements. Atomic clocks are an order of magnitude more precise than even the best temperature controlled crystal oscillators.
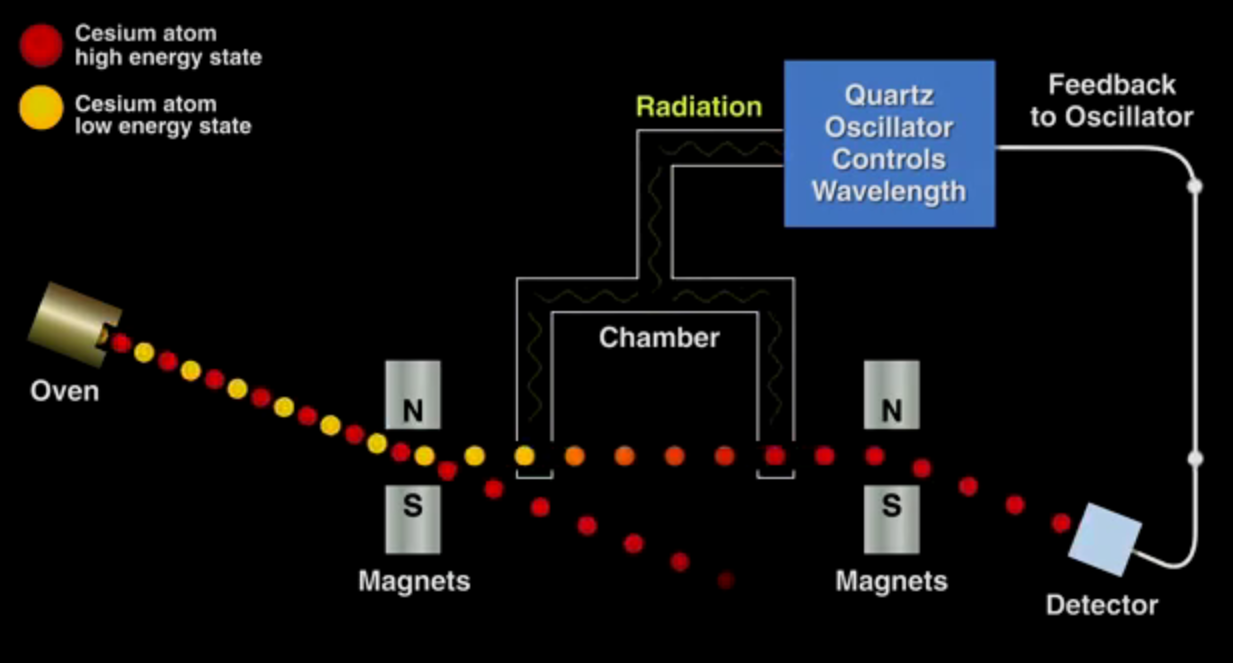
Bill Hammack has a great video describing the operation of a cesium beam oscillator. The fundamental process is shown in the image below. The crux is that cesium gas exists in two energy states, which can be separated under a magnetic field. The low energy atoms are exposed to a radiation source, the wavelength of which is determined by a crystal oscillator. Only a wavelength of exactly 9,192,631,770Hz will convert the low energy cesium atoms to the high energy form. The high energy atoms are directed toward a detector, the output of which is used to discipline the crystal oscillator, such that if the frequency of the oscillator drifts and the cesium atoms are no longer directed toward the detector its output is nudged toward the correct value. Thus a basic physical constant is used to calibrate the atomic clock.
The basic operating principle of a cesium atomic clock
While cesium standards are the most accurate oscillators known, Rubidium oscillators (another “atomic” clock) also provide an accurate and relatively cheap option for many timenuts. The price of these oscillators has been driven down due to volume production for the telecoms industry (they are key to GSM and other mobile radio systems) and they are now readily available on eBay.
With accurate time pieces in hand timenuts have performed a number of interesting experiments. To my mind the most interesting of these is measuring time differences due to relativistic effects. As is the case with one timenut who took his family and a car full of atomic clocks up Mt. Rainier for the weekend. When he returned he was able to measure a 20 nanosecond difference between the clocks he took on the trip and those he left at home. This time dilation effect was almost exactly as predicted by the theory of relativity. An impressive result and an amazing family outing!
It’s amazing to think that when Einstein proposed the theory of special relatively in 1905, even primitive crystal oscillators would not have been available. Spark gap, and Alexanderson alternators would still have been in everyday use. I doubt he could imagine that one day the fruits of his theory would be confirmed by one man, on a road trip with his kids as a weekend hobby project. Hackers of the world, rejoice.
You don’t get much more old school than a sundial, and more new school than 3D printing. So, it is nice to see these two combined in this impressive project: the 3D printed digital sundial. We have seen a few sundial projects before, ranging from LED variants to 3D printed ones, but this one from [Julldozer] takes it to a new level.
In the video, he carefully explains how he designed the sundial. Rather than simply create it as a static 3D model, he used OpenSCAD to build it algorithmically, using the program to create the matrix for each of the numbers he wanted the sundial to show, then to combine these at the appropriate angle into a single, 3D printable model. He has open-sourced the project, releasing the OpenSCAD script for anyone who wants to tinker or build their own. It is an extremely impressive project, and there is more to come: this is the first in a new podcast series called Mojoptix from [Julldozer] that will cover similar projects. We will definitely be keeping an eye on this series.
While real time-travel is obviously not happening anytime soon, with this Back to the Future themed alarm clock, you can go to the future in seven hour eight hour increments by going to sleep. Great Scott!
[CrossleyAcoustics] spent the past few months designing and building this movie-prop worthy alarm clock, and it certainly shows. After designing everything on breadboards, he had custom PCBs made, he modeled the whole thing in Sketchup (first time he’s used it!) and even tried his hand at the sheet metal fabrication after shops quoted him thousands for what he wanted.
The coolest part of the build is that [CrossleyAcoustics] had some detailed drawings that he had made himself… when he was 8 years old. Talk about a plan coming together!
You have to admit [Dylan Rush’s] clock is a real swinger. Literally. You’ve seen the desk novelties where an arm with leds mounted on it sweeps out a message? [Dylan] did the same thing to make a clock but instead of drawing numbers, he actually draws an analog clock face. Y’know one of those round things with arms?
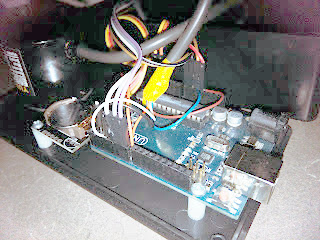
Behind the clock is an Arduino driving a MAX7219 LED controller. Using the MAX7219 was a challenge because it expects a grid of LEDs while the clock needs a linear array. [Dylan] used a line of individual LEDs wired to match what the controller wanted. A rotary encoder tells the processor the position of the arm so the Arduino sketch can determine which LEDs should be lit to show the time and clock face.
What’s even more amazing is [Dylan] created this before clocks became infamous.

 Behind the clock is an Arduino driving a MAX7219 LED controller. Using the MAX7219 was a challenge because it expects a grid of LEDs while the clock needs a linear array. [Dylan] used a line of individual LEDs wired to match what the controller wanted. A rotary encoder tells the processor the position of the arm so the Arduino sketch can determine which LEDs should be lit to show the time and clock face.


