Create And Conflagrate Giant Modeled Sculptures With Kinect And CNC

Summer has hit, and with it a bunch of crazy people going to crazy festivals and (often) burning crazy sculptures to crazy music! In that vein [Matthew Goodman] recently got involved in the burning flipside community down in Texas for his first big effigy build.  The project called for a gigantic archway flanked by two human shaped figures, since he had been working in Kinect [Matt] decided to try his hand at physically modeling the figures from Kinect mesh data.

After co-registering the depth and image cameras, setting up a capture routine to record, getting  .ply based meshes from the depth camera, and making a keypoint detector [Matt] was ready to start getting real world data from the Kinect. Armed with a ghetto steadycam built from his local Austin Hackerspace‘s spare parts bin, [Matt] proceeded to collect three 1.5 gigabyte scans of the charming [KT], who served as a model for the sculpture.

Once the meshes were imported to sketchup they could be merged and smoothed into a coherent form. The figure was split into CNC-able parts (known as the “lady bits” by [Matt] and his crew) and sent to local makers [Dave Umlas] and [Marrilee Ratcliff]’s ShopBot CNC mill. The 400 some odd bits of wood were then carted to flipside, methodically set up, and promptly set aflame the end of the event.

We have seen a couple of really interesting burning man projects, but this is possibly the shortest lived end result. Stay tuned this summer for more insane Black Rock City bound creations as well. Also don’t forget to check out [Matt]’s site for more details.

DIY Bolt Together CNC Router

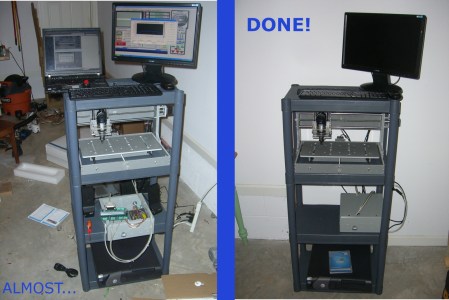
Before I decided to build my own CNC machine I had seen a few bolt together machines on the internet, usually constructed using 80/20 aluminum extrusion. My write up describes my attempt at a completely DIY bolt together machine made from 25mm aluminum SHS, 50mm shelving brackets and lots and lots of gutter bolts.

Building the machine involved drilling and tapping about 400 holes (if I can still count) and assembling the machine over a 3 month period. I designed it mostly on the fly which lead to a few headaches, but in the end a machine that works quite well (if slowly and noisily). I go through each major component of the machine and describe how and why I would have changed it if I had followed the normal plan-design-build methodology.

I have tried two versions of stepper motor drivers and you can find the schematics for the DIY version on my site. The entire thing runs from a Linux PC running EMC2, check out a video after the break to see it in action and here are some photos of a few of my machined items.

Continue reading “DIY Bolt Together CNC Router”

Snap-together PCB Mill

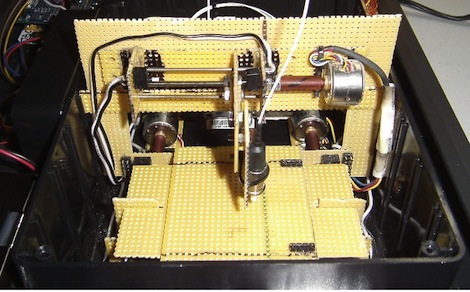
[Jonathan Ward] came up with the MTM Snap, a snap-together pcb mill as part of the Machines That Make group at MIT.

We covered [Jonathan]‘s previous work made out of half-inch plywood, but the new iteration of his PCB includes a clever snap-together mechanism instead of screws and bolts. Although the MTM Snap looks a lot like3d printers such as a reprap, the similarities end with the off-the-shelf stepper motors. Instead of using motor drivers and control electronics from a reprap, the project uses custom stepper drivers, controlled by a bare Arduino.

We’re really impressed with the results of the MTM Snap compared with what is possible on a reprap-derived milling machine like a makerbot or wolfstrap. We’re thinking that’s due to the mass of this project compared to the printed ABS parts of the ‘common’ 3d printers, but any MEs are more than happy to correct that notion.

Check out the video after the break to see the machine in action and a great view of the snap-fit mechanism.

Continue reading “Snap-together PCB Mill”

A Keygen For The Real World

key_generator

[Nirav] found that he rarely printed anything useful with his RepRap, so to shake things up, he decided he needed to work on a project that didn’t involve printing yet more RepRap parts.

The goal of his project was to create working replicas of house keys by simply using the code imprinted at the factory. He purchased a handful of used lock sets from eBay, then carefully measured the keys with a ruler and calipers to get the blank dimensions just right. After that was done, he looked around online and was eventually able to create an OpenSCAD model using a chart of pin depth specifications he located. By changing the last line in the model’s code he can print any coded key. For keys lacking a code, he can manually measure the height of each bit and print replicas that way as well. Once printed, he says that they keys are strong enough to turn most locks he has come across, including deadbolts.

This is undoubtedly a neat project in its own right, though we would be interested to see if someone could get it paired with a program like SNEAKEY to generate bit measurements by sight alone.

Wireless Controller Operates Your CNC Mill

[Darrell Taylor] wanted to add a CNC control pendant to his mill but didn’t want to foot the bill which can often run several hundred dollars. These pendants are basically a physical remote control that operates the CNC software that controls the machine. Since he was already using a Linux box running EMC2, it wasn’t too hard to figure out how to operate the mill with a PlayStation controller.

To get the controller talking to his Linux machine he uses a package called QtsixA. The package identifies and loads the control through Bluetooth pairing. From there it can be used to map the buttons and joysticks as keys on the keyboard or as a mouse. In the video after the break [Darrell] demonstrates how he has his shortcuts set up. He’s able to move the machine head, and even start or step through the programmed routine. As he mentions, this is pretty nice if you’ve got dirty hands; just throw the controller in a zipper bag and you’re set to go.

Continue reading “Wireless Controller Operates Your CNC Mill”

Why Build A CNC Mill When You Can Have A Chess Robot Instead?

[Patrick McCabe] enjoys the challenge of playing chess against the computer but he wasn’t satisfied with the flat experience of on-screen gaming. No problem, he just built his own gantry-style chess robot that he can play against. Don’t be confused, he still doesn’t have to touch the pieces, but instead uses the dedicated control board seen on the left of the image above. The robotic arm that is mounted on a gantry takes care of moves for both players.

It’s a pretty normal CNC build, using four stepper motors to slide the moving bits along precision rod. An Arduino Mega drives the system, with a PC doing the heavy lifting using a program called My Robot Lab.

We certainly like it that [Patrick] spent a little bit of time making the cabinet and visible parts look nice. Chess is a civilized game and unfinished parts would be out-of-place. We didn’t see it in his writeup, but the one feature we’re really hoping he has implemented is the ability to have the robot automatically reset the board at the beginning of a game.

As you might have guess, you’ll find embedded video after the break.

Continue reading “Why Build A CNC Mill When You Can Have A Chess Robot Instead?”

BAMF2011: Lasersaur Is One BIG Laser Cutter!

Psst…wanna buy a laser cutter, but not ready to sell your internal organs? Nortd Labs’ Lasersaur project aims to create an open source large-format laser cutter/engraver that undercuts (har har!) the cost of commercial models by an order of magnitude.

Continue reading “BAMF2011: Lasersaur Is One BIG Laser Cutter!”