[Owen] contacted us to show us his site dedicated to his CO2 laser cutter build. He spent about 2 years and roughly $15,000 putting it together, so this is not small build. The laser and optics alone were $9,000. This site isn’t necessarily meant to be a template to build your own, but he shares so much information that we would certainly suggest you read it before digging into a build. He does have some downloadables, like the tool paths and the emc2 configuration files as well as a copy of the entire website. Great job [Owen].
cnc hacks911 Articles
Laser Cutter Doubles As A 3D Printer
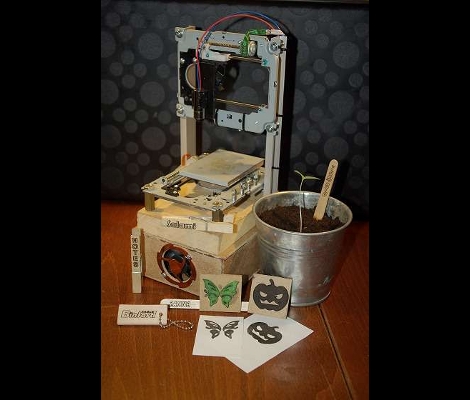
[Bart] figured out how to use his laser cutter as a 3D printer. We’ve checked in on his open source laser cutter in the past and we’re happy to see he’s now done with the build. But rather than stop there he took it a step further. For less than $200 he built an extruder head and added RepRap circuitry. You can see in the image above the laser tube is in the background and the extruder head with a line of black filament is mounted on the gantry. [Bart] has other plans for extensibility as well, including a knife cutter, a pen plotter, and a Dremel mount.
From RepStrap To RepRap; A 3D Printer Is Born
[Gavilan Steinman] just printed and assembled his own RepRap machine and filmed the process. This isn’t news but we found it very interesting to watch. He started with a RepStrap, a rapid-prototyping 3D printer that as built by hand instead of printed by a similar machine. This is the seminal step in the self-replicating process.
From there he prints an extruder head which improves the quality of the parts the RepStrap can produce. We then see time-lapse footage of the printing process for a Mendel unit, the second generation of RepRap machines. We’ve embedded the video after the break. It’s a great way to spend ten minutes on a Sunday afternoon.
Continue reading “From RepStrap To RepRap; A 3D Printer Is Born”
Recyclebot Digests Milk Jugs To Feed MakerBot
The old saying, “garbage in, garbage out” may need to be re-evaluated. Students at Victoria University of Wellington are developing a machine that recycles old milk jugs, extruding an HDPE plastic filament that can then be fed into a MakerBot for 3D printing.
The process involves grinding the plastic into small pieces, then pressing these through a heater and extruder plate to produce a continuous bead of the proper diameter for the MakerBot. Nichrome wire — the stuff of hair dryers and toasters — forms the heating element, and this must be regulated within a specific temperature range for different plastics. The initial grinder design is hand-cranked, but they are working toward a fully automated system. It appears that the machine could also recycle old MakerBot output, provided the grinder has sufficient torque.
All Metal Hot End For Makerbot
Imagine if you will for a moment, you’re printing along on your Makerbot clone and all of a sudden your PTFE hot end melts, what are you going to do now? One solution is to mill your own all metal end from a bolt with some careful drilling. Or you could follow [Peter Jansen] who has made his own all metal hot end using the existing extruder. All that’s required is some aluminum sheet and cutting down the nozzle and hat (and fans to help, but technicalities), and you’re in business with no more melted PTFE hot end.
CNC Hardware: Stream G-code To An Arduino
[Reza Naima] has been using an Arduino as the center of his CNC setup for quite some time now. It handles three stepper motors, limiting switches, e-stop, and spindle control. The sketch he’s using allows him to stream g-code to the popular prototyping platform, freeing him from needing a dedicated PC. It’s worked so well that he’s decided to clean up the code and develop a shield to help others get up and running. If you want to see his progress or lend a hand, check out the google group he started for the schematics, code, and forum discussions. There is already a CNC project for Arduino called Grbl but [Reza’s] approach uses the Arduino libraries in an effort to make the sketch more customizable for the average user.
CNC Build Ditches Rods For Hardboard
This is a redesigned x-axis for [Peter Jansen’s] selective laser sintering rig. We looked in on his SLS project last month and since then he’s been refining the design. The new component uses a rack and pinion system, relying on some Kapton tape to reduce friction for a nice smooth slide. One stepper motor powers the laser-cut gear box with four gears interfacing the sled to the frame for stable and accurate motion. Now he’s just got to work out the math/physics that go into finding the optimal gear ratios as this prototype is just a rough guess. If you’ve got the skills to work it out please lend [Peter] a hand as we’re quite excited with where this is going.