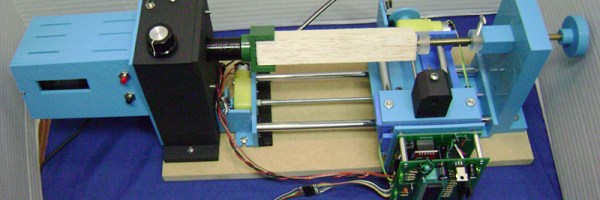
Last November, after [HomoFaciens]’ garbage-can CNC build, we laid down the gauntlet – build a working CNC from cardboard and paperclips. And now, not only does OP deliver with a working CNC plotter, he also plans to develop it into a self-replicating machine.
To be honest, we made the challenge with tongue firmly planted in cheek. After all, how could corrugated cardboard ever make a sufficiently stiff structure for the frame of a CNC machine? [HomoFaciens] worked around this by using the much less compliant chipboard – probably closest to what we’d call matboard here in the States. His templates for the machine are extremely well thought-out; the main frame is a torsion box design, and the ways and slides are intricate affairs. Non-cardboard parts include threaded rod for the lead screws, servos modified for continuous rotation, an Arduino, and the aforementioned paperclips, which find use in the user interface, limit switches, and in the extremely clever encoders for each axis. The video below shows highlights of the build and the results.
True, the machine can only move a pen about, and the precision is nothing to brag about. But it works, and it’s perfectly capable of teaching all the basics of CNC builds to a beginner, which is a key design goal. And it’s well-positioned to move to the next level and become a machine that can replicate itself. We’ll be watching this one very closely.
The Jargon File describes a wizard as someone who groks something to a very high degree, or the kind of person that builds a polymer concrete CNC machine with a pneumatic tool changing spindle that they designed by themselves. It makes you think that maybe Tony Stark COULD build it in a cave with scraps.
It’s a five part video series showing snippets of the build process. The last video gives an overview of the design of the machine. It is all very much in German, so if you speak German and we got anything wrong about the machine or missed anything cool, please fill us in down in the comments.
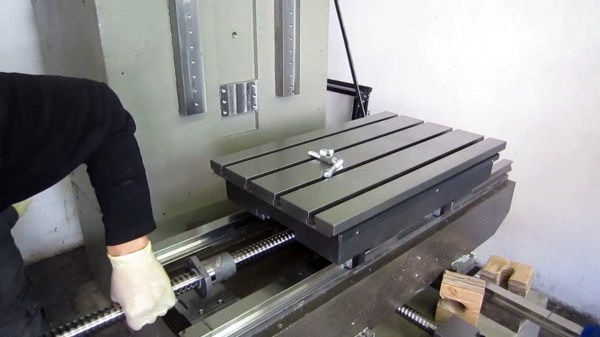
The machine starts with a 1500 kg polymer concrete pour with some steel stock embedded in it. It is then machined within an inch mm of its life as shown by practically zero deviation over its length when measured against a granite block. The wizard then goes on to make his own spindle, get castings made, and more. We liked his flowery kitchen hotplate, which he used to heat the bearings for an interference fit. It added a certain amount of style.
Unfortunately the videos don’t show the machine running, but we assume this sort of person is happily building arc reactors, power suits, and fighting crime. They probably don’t have time to film “CNC Bearbeitungszentrum im Eigenbau Teil 5”. Videos after the break.
Looking for a 360 degree hinge that had no slop was harder than [Mr. LeMieux] thought it would be. Add to the fact it had to be made completely out of metal with no plastic components — and basically fireproof. He was coming up blank.
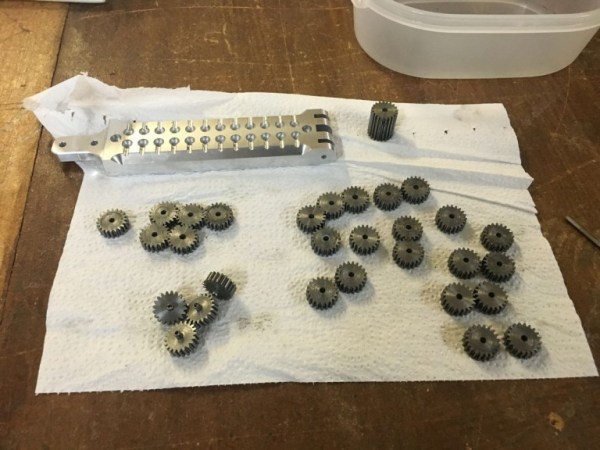
You see, [Mr. LeMieux] is casting metal components, and needed a hinge to close two halves of a mold. When he couldn’t find anything commercially available, he decided to design his own. Using aluminum, he machined the two halves with an interlocking mechanism between the two. Essentially, it’s a 3-bar linkage, but if he stopped there, it would have too much slop. So he actually designed in two fixed gears that roll over each other — this ensures the hinge stays perfectly smooth throughout its entire range of movement — it’s actually quite ingenious.
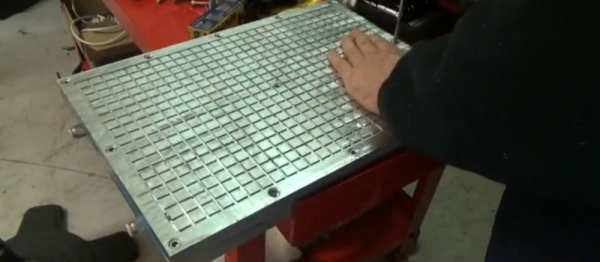
If you do a lot of one-off parts on your CNC machine you’ll know setup is the worst part of the process. Usually you’re using scrap material, you have to figure out how you’re going to clamp it, make sure the the piece is big enough to use, etc etc. Wouldn’t it be nice to just throw the material on the bed and start machining? Well, with a vacuum table as nice as this, you pretty much can!
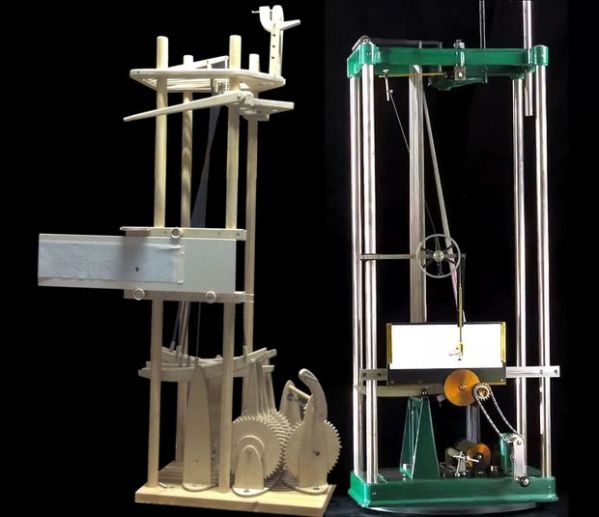
It’s funny how creation and understanding interact. Sometimes the urge to create something comes from a new-found deep understanding of a concept, and sometimes the act of creation leads to that understanding. And sometimes creation and understanding are linked together in such a way as to lead in an entirely new direction, which is the story behind this plywood recreation of the Michelson Fourier analysis machine.
For those not familiar with this piece of computing history, it’s worth watching the videos in our article covering [Bill “The Engineer Guy” Hammack]’s discussion of this amazing early 20th-century analog computer. Those videos were shown to [nopvelthuizen] in a math class he took at the outset of degree work in physics education. The beauty of the sinusoids being created by the cam-operated rocker arms and summed to display the output waveforms captured his imagination and lead to an eight-channel copy of the 20-channel original.
Working with plywood and a CNC router, [nopvelthuizen]’s creation is faithful to the original if a bit limited by the smaller number of sinusoids that can be summed. A laser cutter or 3D printer would have allowed for a longer gear train, but we think the replica is great the way it is. What’s more, the real winners are [nopvelthuizen]’s eventual physics students, who will probably look with some awe at their teacher’s skills and enthusiasm.
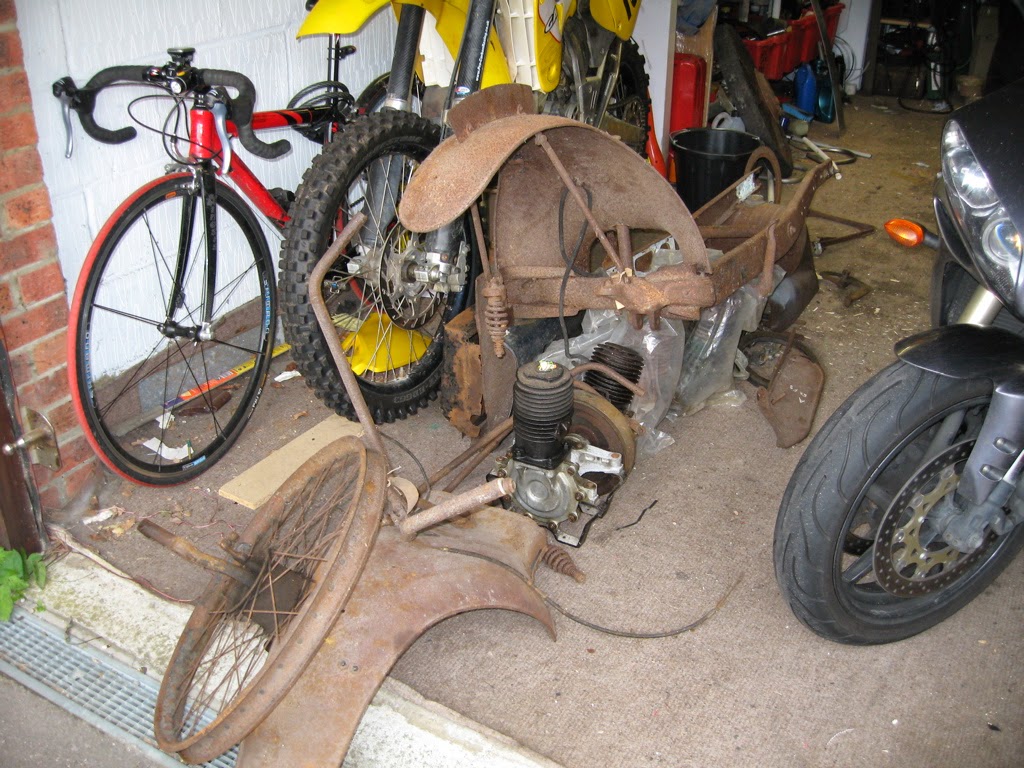
The Ner-a-Car. By Museumsfotografierer (Own work) [Public domain], via Wikimedia CommonsThe Ner-a-Car represents one of those eccentric dead-ends in automotive history. Designed in 1918 by an American, [Carl Neracher], its name is a play on both its designer and its construction and it is unique in that its design is closer to the cars of the era than that of a motorcycle. It has a car-style chassis, an in-line engine, and it was the first motorcycle to be produced with hub-centre steering. The rider sits on it rather than astride it, feet-forward, and the car-style chassis gives it a very low centre of gravity. They were manufactured in slightly different versions in both the USA and the UK, and [Andy]’s machine is an early example from the British production line. Not many Ner-a-Cars have survived and parts availability is non-existent, so his work has also had the unusual effect of satisfying a significant portion of world demand for the parts-bin of an entire marque.
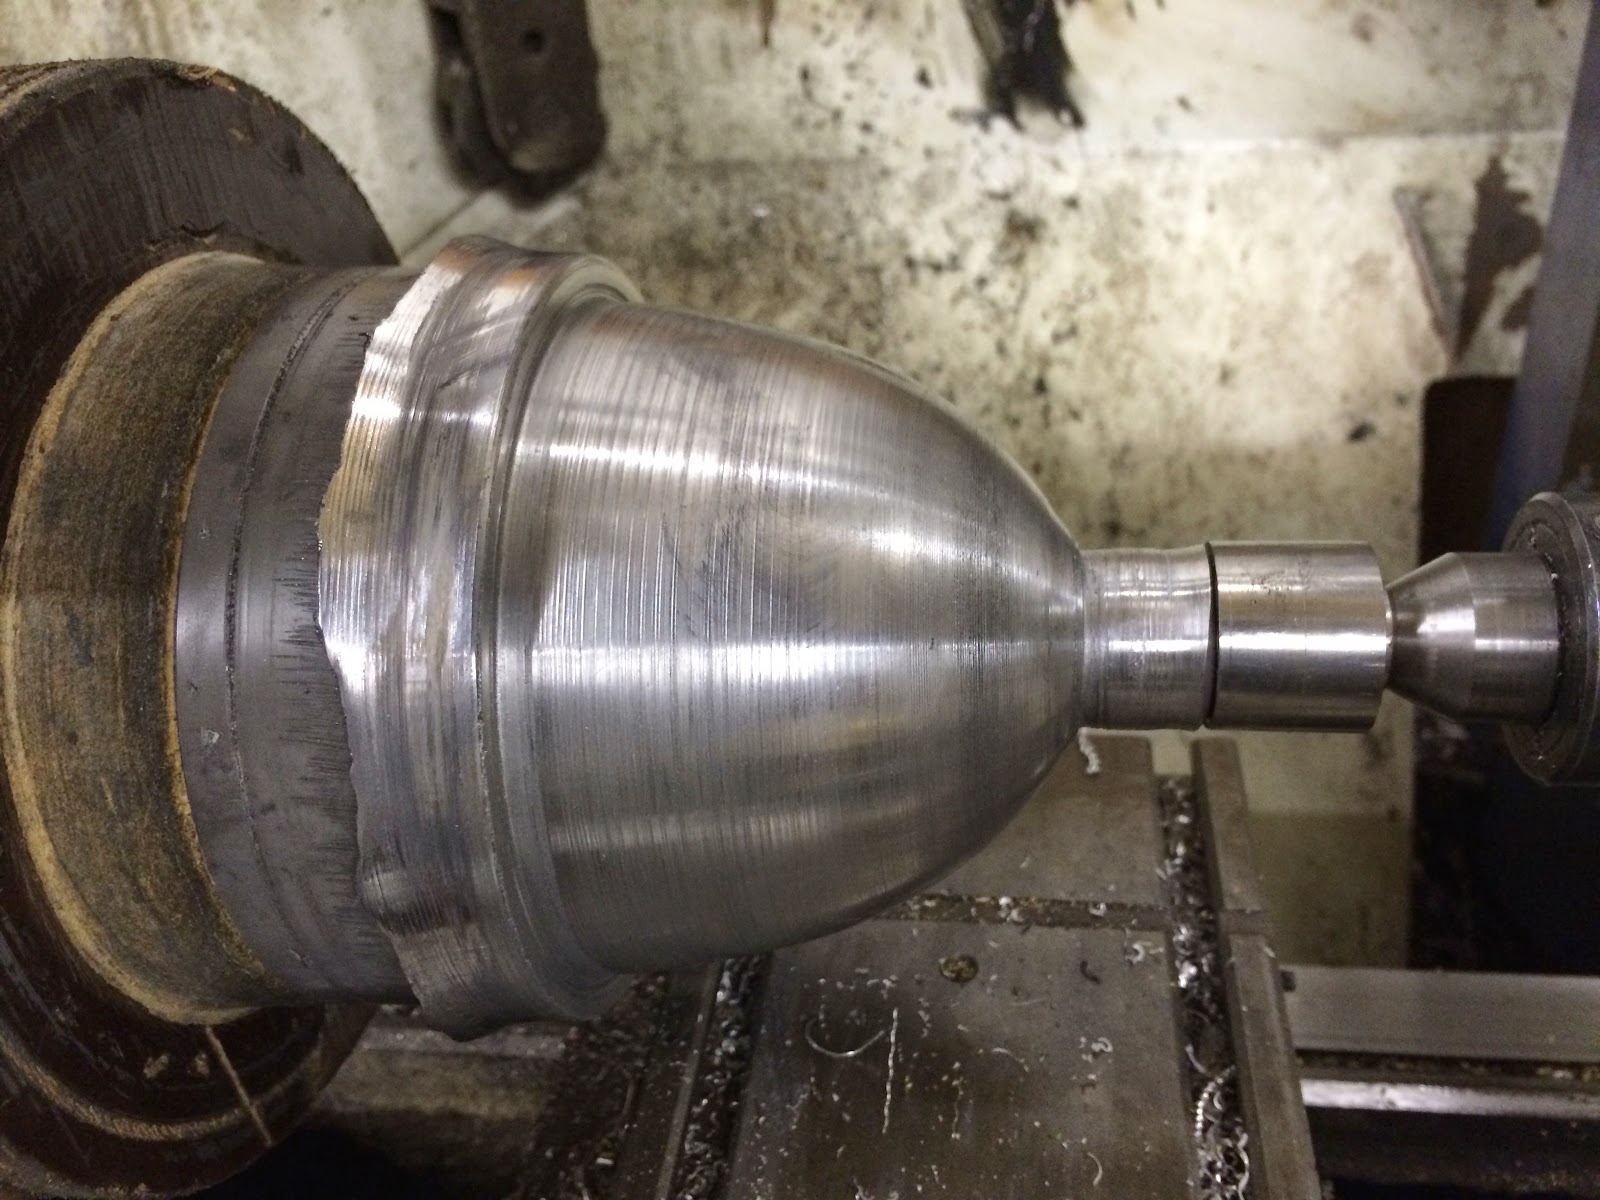
Spinning up a headlight shell
It’s usual for the first link in a Hackaday article to be to a page that encompasses the whole project. In this case when there is so much to see and the build is spread across twelve blog posts and nearly two years the link is to [Andy]’s first post in which he describes the project, sets to work on the chassis, and discovers the bent steering arm that probably caused the bike’s dismantling. He’s listed the posts in the column on the right-hand side of the blog, so you can follow his progress through the entire build. The work involved in remanufacturing the parts is to an extremely high standard, from machining press tools to reproduce 1920s footboard pressings through manufacturing authentic 1920s headlight switchgear and metal-spinning new aluminium headlight shells.
[Andy]’s most recent Ner-a-Car post details his trip to France on the completed bike, and tales of roadside repairs of a suddenly-not-working machine that should be familiar to any owner of a vintage internal combustion engine. But considering that the bike spent many decades as a pile of not much more than scrap metal the fact that it is now capable of a trip to France is nothing short of amazing.
This is the first rebuild of a vintage bike from a box of rusty parts we’ve featured here – indeed it could almost be a retrotechtacular piece in its detailed look at 1920s bike design. These pages have however seen many motorcycle related hacks over the years. We particularly like this from-scratch engine build and this gas-turbine bike, but it is the emergency motorcycle build in the desert from a Citroën 2CV car that has us most impressed. Please, ride safe, and keep them coming!
When the RepRap project was founded in 2005, it promised something spectacular: a machine that could build copies of itself. RepRaps were supposed to be somewhere between a grey goo and a device that could lift billions of people out of poverty by giving them self-sufficiency and the tools to make their lives better.
While the RepRap project was hugely successful in creating an open source ecosystem around 3D printers, a decade of development hasn’t produced a machine that can truly build itself. Either way, it’s usually easier and cheaper to buy a 3D printer than to build your own.
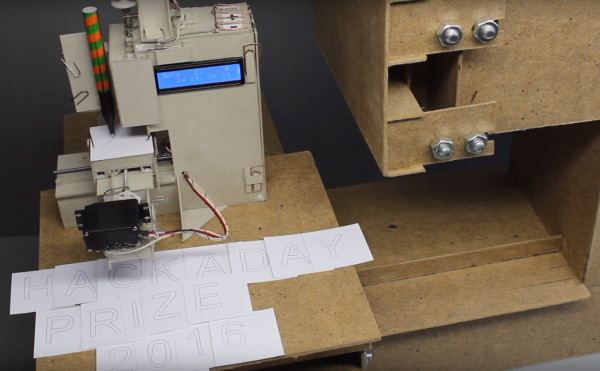
[castvee8]’s entry into the 2016 Hackaday Prize does just what the RepRap project promised ten years ago. It’s all about building machines with the ability to reproduce, creating an ecosystem of machines to build household goods. The best part? You can 3D print most of the machines. It’s the RepRap project, but for mills, lathes, microscopes, and routers. It’s an entire shop produced entirely in a 3D printer.
The idea of creating a machine shop from the most basic building materials has been around for a while. At the turn of the last century, concrete lathes and mills bootstrapped industrial economies. Decades later, [David J. Gingery] created a series of books on building a machine shop starting with a charcoal foundry. The idea of building a shop using scrap and the most minimal tools is very old, but this idea hasn’t been updated to the era where anyone can buy a 3D printer for a few hundred dollars.
So far, [castvee8] has a few homemade machine tools on the workbench, including a lathe, a tiny mill easily capable of fabricating a few circuit boards, and a little drill press. They’re all machines that can be used to make other useful items, and all allow anyone to create the devices they need.
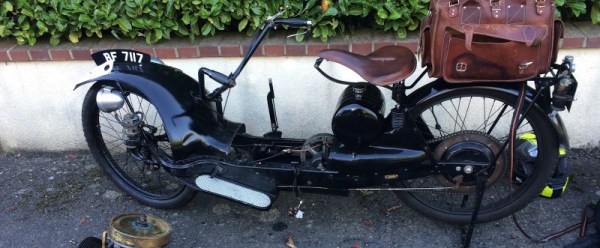
![The Ner-a-Car. By Museumsfotografierer (Own work) [Public domain], via Wikimedia Commons](https://hackaday.com/wp-content/uploads/2016/04/640px-ner-a-car_1924_01.jpg)