Building A Magnetic Rotary Encoder

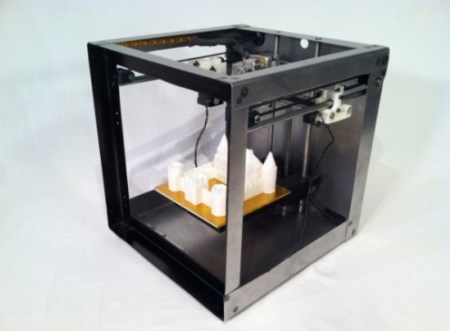
[Long Haired Hacker] has undertaken a high-resolution 3D printer build. He got his hands on some motors to drive the build platform but it doesn’t have a built-in encoder. He knows that optical encoder wheels can have problems due to dirt and grim as well as ambient light so he set out to find a better way of providing feedback to the controller. He ended up building his own magnetic rotary encoder which is shown above.

At the heart of the system is an AS5043 magnetic rotary sensor. The chip, which runs from $6.50-$11, can detect and report the rotation of a magnetic field with great precision. The rotation data can be read out in degrees using SPI, but it sounds like there’s also grey code output on a few pins if that suits your needs a bit better. The magnet which the chip measures is mounted in a sleeve milled to seat inside of a bearing ring.

The 3D printing method [Long Haired Hacker] has chosen uses a projector and light-cured resin to achieve the kind of results seen in this other hi-res printer.

New Extruder 3D Prints Tasty Treats Using Chocolate

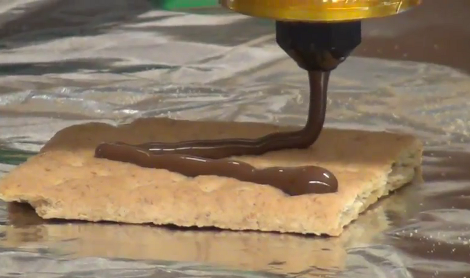
If you’ve never felt at home with a piping bag in your hands this chocolate extruder will come to your rescue. It can replace the plastic extruder head on your 3D printer (RepRap, Makerbot, most 3-axis CNC machines, etc.), letting you turn your digital creations into decadent reality.

The head uses a progressive cavity pump to feed the chocolate from a reservoir through the printing nozzle. It’s important to keep the chocolate warm or it will set up so when [Tomi Salo] designed the print head he included a heat shroud through which warm air can be circulated. He uses a shoe dryer to source the hot hair which is patched into the heat shroud with a length of tubing.

This extruder can be 3D printed but be careful what material you use. [Tomi] mentions that PLA is ‘sort of food-safe’ but ABS is not. We wonder if the design could be altered for milling out of aluminum or stainless? At any rate, if you’re going to give it a try you might find [Tomi’s] advice on working with chocolate useful.

[via @clothbot]

Light Painting With A String Plotter

[Matt Bell] sends a shout-out to Hackaday by creating a light-painting of our logo with his string plotter. He starts off by setting up a pair of stepper motors which each have a spool to wind and unwind a string. The plotter is made by suspending a stylus between these two strings. In this case, he’s using a wireless LED board (seen above) built from the remote control receiver/transmitter from a toy car. The link above is part of a Flickr set from which you can get the whole story by reading the captions of each image.

After the break we’ve embedded a clip of an in-progress light painting. You can see there’s some oscillation of the LED unit that makes it a bit less precise than the CNC light painter we saw a couple of weeks ago. It seems like string plotters usually don’t have this issue if the stylus has something to help stabilize it. We wonder if a piece of acrylic would help get rid of the shakes? Continue reading “Light Painting With A String Plotter”

3D Printed Lugs For Your Custom Bike

We haven’t heard much about 3D printing using stainless steel as the medium, but that’s exactly what’s going on with the lugs used to assemble this bicycle frame. They’re manufactured using LaserCusing, which is a brand name for parts produced using Selective Laser Melting. The video after the break gives you an overview of what it takes to clean up each of these parts.

The laser melts metal power to solidify areas needed in the final part. Just like the hobby printing we’ve seen on the RepRap or Makerbot there are structural supports necessary to complete the print job, and these need to be removed after the laser has done its work. This is where the majority of the labor comes in. You’ll see a ton of waste material pulled out of the cage-like lug, and we’re sure there’s no shortage of filing and polishing to finish up. But wow, what an interesting result. We just need to figure out if anyone has found a cost-effective way to hack together one of these metal-powder printers.

Continue reading “3D Printed Lugs For Your Custom Bike”

Multicolor RepRap Prints The Really, Really Hard Way

[Adrian Bowyer] just posted his progress with multicolored printing to the RepRap blog.

The new developments are a continuation of [Adrian]’s experiments with a mixer extruder that squirts four different colored filaments out of the same nozzle. [Myles Corbett] took this idea and ran with it producing the two-color print seen above. To squirt two different colored filaments out of the nozzle, [Myles] used two Bowden extruders mounted near the apex of the RepRap with tubes leading to the nozzle. Right now, the color of a print is controlled by loosening the grip screws of the extruder, but there are plans for moving that task over to electronic control of the extruders.

While it may be only black and white now, it’ll be a very interesting development once five extruders are loaded up with cyan, magenta, yellow, black, and white filament. Yes, it is now theoretically possible to print full-color 3D objects on a RepRap. While we’re not looking forward towards having to upgrade our one-motor extruder to a four- or five-motor model, the possibilities for desktop fabrication are becoming amazing.

CNC Milled Bicycle Frame Jig

This bicycle frame jig is cut from MDF. It’s the latest in a growing trend that we love to see: the increasing availability of manufacturing techniques for the common hacker. This is a Kickstarter project, and alas it appears the designs are not available for you to cut your own. But we love the potential this shows, and maybe you can use the concept the next time you’re welding together a frame for something.

We really never look at building traditional frames at home. Mostly it’s the oddities that catch our eye. But if you’re into cycling and want to get your own custom-fit frame this has got to be the lowest-cost option available. In fact, you can get the jig and a tube set for under $600. The frame can be fit with just a few hand tools (a hack saw and a file). It uses lugs so the joints will be strong as long as you get the pipes fitting well enough for a quality welded joint.

Handheld CNC Fabrication

While loading a 3D model into a CNC program and letting a machine go to town on a piece of stock is awesome, there’s a lot to be said about the artistry, craftsmanship and tactile feedback of carving a project by hand. [Amit Zoran] and [Joe Paradiso] created a nice bridge between these two approaches with their hand-held, but still digitally controlled milling device they call The Free D.

The Free D looks like your run-of-the-mill handheld Dremel tool with an engraving attachment and a few extra servos attached for good measure. These extra parts serve a purpose: the tool actually keeps track of its own orientation in 3D space. With the help of a few magnets underneath the work piece, the Free D sends its orientation back to a computer running a CNC program. When the computer detects the engraving attachment is getting too close to the desired shape, the Free D automatically retracts its own tool head.

Given the insanity or expense in building our buying a mill with six degrees of freedom, the Free D looks like it could be a useful tool in a few model maker’s toolboxes. Check out the demo video of the Free D after the break.

Continue reading “Handheld CNC Fabrication”