Solder Reflow Toaster Oven

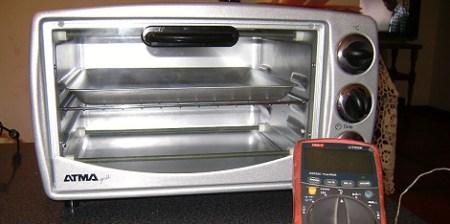
[Sebastian] needed a small solder oven so he bought himself a small toaster oven (Spanish, Google Translate). It’s not the kind of thing we’d make our breakfast in now, but for soldering it’s a very nice oven.

After a little bit of research on Google, [Sebastian] discovered that the best technique when dealing with reflow ovens and solder paste is following a specific temperature curve. Ideally, Tin/Lead solder needs to preheat from room temperature to 150 degrees C, then level off so the flux can activate. After that, a quick jaunt above 183 degrees C makes the solder flow. To get his toaster working optimally, [Sebastian] stuck a thermistor in the toaster and measured the temperature profiles of different ‘modes.’

The correct temperature curve was calculated using different heater elements and [Sebastian] was off to the races. He did have a few problems on his first few boards – solder bridging, mostly – but that’s not the fault of the oven. An LCD display (translate) was added recently so accurate real-time temperature monitoring is available.

Kitchen Hacks: [Dino’s] Egg Tricks

[Dino’s] latest weekly hack plays right into our Kitchen Hacks theme. He’s sharing some obscure tips and tricks involving eggs.

It should come as no surprise that he knows a thing or two about using eggs. After all, he keeps chickens and you’ve can’t just let good eggs go to waste. Which is where his first tip comes in. Eggs will keep for weeks, but if you don’t know if they’re still good you can put them in a bowl of water before cracking them. Eggs that float are on the way out!

Need some scrambled eggs but don’t have a pan to cook them in? His next feat is to cook up a breakfast of steamed eggs using the steamer nozzle on his espresso machine. It’s messy (egg seems to be flying everywhere) but the final product does look appetizing.

The rest of the video (embedded after the break) shows his methods of making Hollandaise sauce for Eggs Benedict, and how to blow the innards out of an egg-shell.

Now we have a picture in our minds that [Dino’s] daily routine is surrounded by eggs… like the egg farmers in Napoleon Dynamite.

Continue reading “Kitchen Hacks: [Dino’s] Egg Tricks”

Sous Vide With Racing Stripes

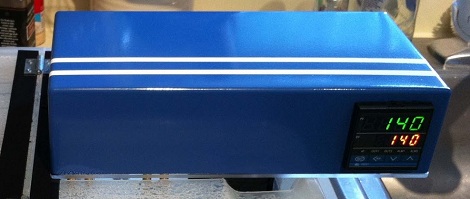
We’re not going to question the logic that went into putting racing stripes on a slow cooker, but [Evan]’s sous vide machine is the most professional one we’ve seen.

After [Evan] found a cooking book that went into the physics and chemistry of making a meal, he wanted to make some really good meals. Sous vide spoke out to him and [Evan] committed himself to building an immersion cooker.

After trolling around on the Internet, [Evan] came across a little gem on Make. The Make build was cheap – it was built around an off-the-shelf PID controller and thermocouples. [Evan] though about building his own PID controller, but time is money and he couldn’t beat the commercial version in features.

The enclosure was the most time-consuming part of [Evan]’s build. It’s a 1/8″ sheet of aluminum cut and bent to the correct size. The sharp edges were filed down and joined with epoxy; definitely not the ‘normal’ way of building an enclosure. The color scheme is borrowed from this Renault – French cooking inspired by a French car.

As for [Evan]’s results, he cooked a 5oz filet marinated in garlic, thyme, olive oil, salt and pepper. This dish was flanked with some roasted Yukon Gold potatoes and sautéed broccoli. Our mouth is watering just looking at the picture, so we’re betting [Evan] did an excellent job.

Hacking A VS200 Food Sealer

This food sealer just wasn’t cutting it for [Tinkering Engineer], so he decided to do something about it. The issue with this sealer was that it didn’t have a mode where it could simply seal bags without pulling a vacuum on it. Going through the whole process takes a reported 40 seconds in order to evacuate the air and then seal the bag. Without pulling a vacuum, the sealing process took only 9.

After taking everything apart and looking around, a PIC microcontroller, and vacuum switch were found as well as other assorted electronics. Although the first thought was to replace the onboard PIC with an Arduino, a much simpler solution was arrived at. Two switches were added, one to disable the vacuum pump and the other to manually turn on the heater. This would allow the machine to function as originally intended or simply let bags be sealed without the vacuum function.

This hack may not be the most advanced one that we’ve ever seen, but it’s a good reminder that some projects can be done very simply if you’re willing to look around!

Kitchen Hacks: What Would You Cook If You Had A Sous-Vide This Large?

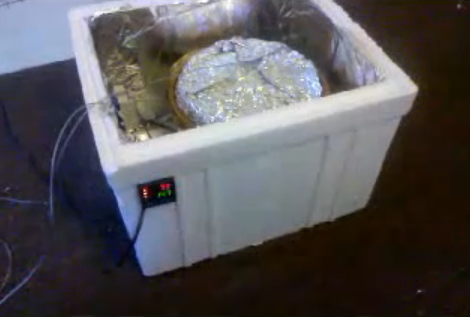
We’ve seen no shortage of temperature controlled immersion cooking devices, called Sous-Vide, around here. But this one probably has the capacity of all of them combined! Flickr user [RogueGormet] isn’t writing about the build, but his Large Form Water Oven build photo set speaks for itself.

We’d wager that the donor vessel is a 16-gallon chest cooler. He cut the lid into two sections, sealing off the insulated cavity with High Density Polyethylene (the stuff those white cutting boards are made out of). This gives him a place to mount the heating element, with a box for the PID controller riding on top. A submersible pump keeps the liquid moving to help regulate the cooking temperature throughout.

What do you put in one of these? Right off the top of our heads we’d think he had something like a pig roast planned. But it could just as easily be a Turkey, or other large hunk of meat. What would you use it for?

If you don’t need quite as much capacity you might make some alterations to your slow cooker for your own immersion cooking.

[George Foreman] Seedling Starter For Kitchen Herbs

Sometimes the best kitchen hacks aren’t about the best barbecue, the rarest steak, or the baconiest bacon. Sometimes you need a little color on your plate, son, so why not grow your own herbs in a [George Foreman] rotisserie greenhouse?

[Sam] first saw his barely used rotisserie as his friend was throwing it out. Like any good maker, he quickly snatched it up and began work on some modifications. After removing the fun bits like the motor, heating element, and timer, [Sam] installed two compact fluorescent light bulbs to start a few herbs off right.

Kitchen herb gardens are surprising common, so much so that entire forums are dedicated to the practice. [Sam] doesn’t have any soil in his seedling starter yet but when he does, we expect he’ll be harvesting a nice crop of basil, oregano or cilantro in the spring.

Of course, [Sam] could use his seed starter to grow more “unconventional” plants, but some of us have been kicked out of a dorm for growing a pomegranate seedling, so we’ll leave it at that.

Candied LEDs Are A Light, Tasty Treat

rock_candy_diffused_leds

[Emily Daniels] recently snagged a free iPad in the Instructables “Play with your food challenge” with an interesting way to work with LEDs. Growing up, most kids attempted to make, or at least have seen rock candy be produced. [Emily] thought it would be interesting to mix LEDs with the stuff to see what she could come up with, and her candied LEDs are the result.

The process is pretty straightforward, and involves mixing up a batch of supersaturated sugar syrup in which LEDs are suspended. The LEDs act as a nucleation point for the crystal formation, growing a nice solid coating of sugar after a couple weeks’ time. After some cleaning up, the LEDs can be connected to a coin cell battery or similar, as you would normally do. The sugar acts as a diffusing medium for the LEDs, giving them a nice soft beam pattern.

Obviously you likely wouldn’t want to use these for any long-term electronics project, but it’s a fun activity for the kids, and it could be a good way to incorporate electronics into baked goods.