An All-Billet, Single-Piece, Flexure-Based Nutcracker

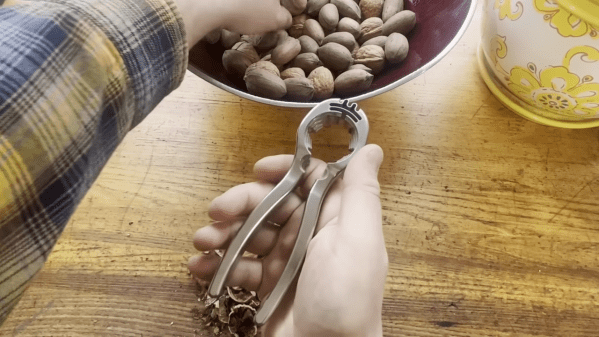
Typical nutcrackers rely on simple pin hinges to join two handles for the cracking task. However, [adam the machinist] has demonstrated that a single-piece nutcracker is possible by using the flexural properties of the right grade of steel.

The nutcracker is manufactured out of 17-4 PH stainless steel, heat treated to the H900 condition. A flexural spring section at the top of the nutcracker takes the place of the usual hinge, allowing the handles to be squeezed together and the teeth of the cracker to open the nut. Machining the flexural section is first achieved with a series of CNC drill operations on the billet stock, before regular milling is used to shape the rest of the spring section and tool. The video dives deep into the finer points of the CNC operations that produce such a great finish on the final part. It even covers the use of a tiny scissor jack to help hold the handles still during machining.

The result is a highly attractive and desirable nutcracker that looks far more special than the regular fare you might pick up at Walgreens. The all-billet tool is a nutcracker very much fit for a sci-fi set. We’ve seen some other kitchen tools around here before, too, albeit of more questionable utility.

Continue reading “An All-Billet, Single-Piece, Flexure-Based Nutcracker”

Nvidia Teaching Robots To Master IKEA Kitchens

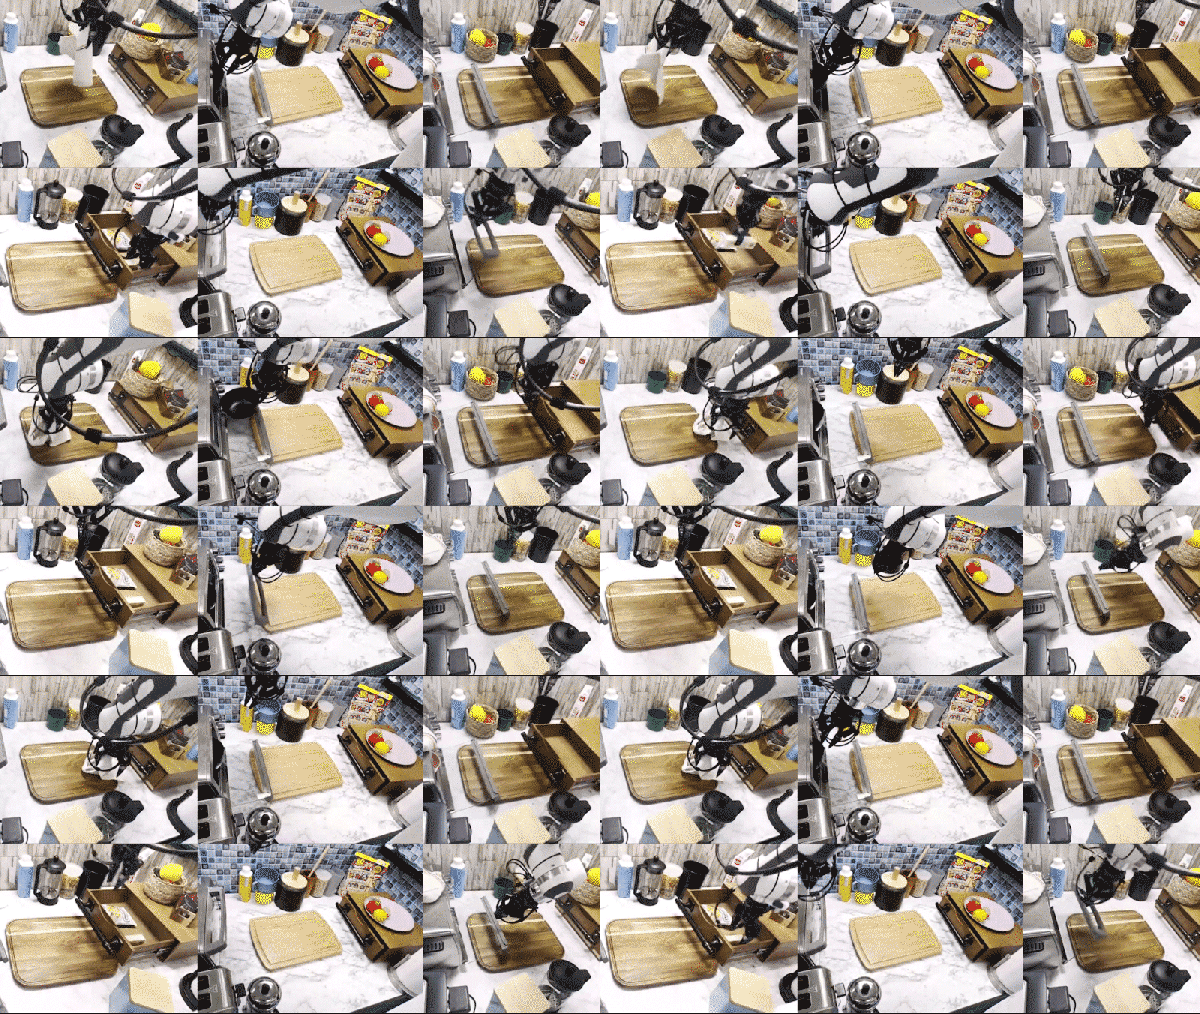
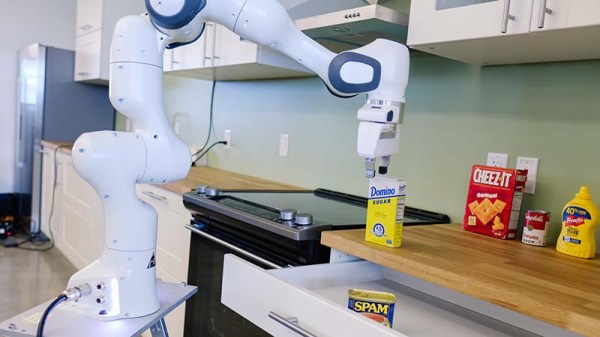
The current wave of excitement around machine learning kicked off when graphics processors were repurposed to make training deep neural networks practical. Nvidia found themselves the engine of a new revolution and seized their opportunity to help push frontiers of research. Their research lab in Seattle will focus on one such field: making robots smart enough to work alongside humans in an IKEA kitchen.

Today’s robots are mostly industrial machines that require workspaces designed for robots. They run day and night, performing repetitive tasks, usually inside cages to keep squishy humans out of harm’s way. Robots will need to be a lot smarter about their surroundings before we could safely dismantle those cages. While there are some industrial robots making a start in this arena, they have a hard time justifying their price premium. (Example: financial difficulty of Rethink Robotics, who made the Baxter and Sawyer robots.)

So there’s a lot of room for improvement in this field, and this evolution will need a training environment offering tasks of varying difficulty levels for robots. Anywhere from the rigorous structured environment where robots work well today, to a dynamic unstructured environment where robots are hopelessly lost. Lab lead Dr. Dieter Fox explained how a kitchen is ideal. A meticulously cleaned and organized kitchen is very similar to an industrial setting. From there, we can gradually make a kitchen more challenging for a robot. For example: today’s robots can easily pick up a can with its rigid regular shape, but what about a half-full bag of flour? And from there, learn to pick up a piece of fresh fruit without bruising it. These tasks share challenges with many other tasks outside of a kitchen.

This isn’t about building a must-have home cooking robot, it’s about working through the range of challenges shared with common kitchen tasks. The lab has a lot of neat hardware, but its success will be measured by the software, and like all research, published results should be reproducible by other labs. You don’t have a high-end robotics lab in your house, but you do have a kitchen. That’s why it’s not just any kitchen, but an IKEA kitchen, to take advantage of the fact they are standardized, affordable, and available around the world for other robot researchers to benchmark against.

Most of us can experiment in a kitchen, IKEA or not. We have access to all the other tools we need: affordable AI hardware from Google, from Beaglebone, and from Nvidia. And we certainly have no shortage of robot arms and manipulators on these pages, ranging from a small laser-cut MeArm to our 2018 Hackaday Prize winner Dexter.

3D Printed Cookie Molds For The Best Speculoos

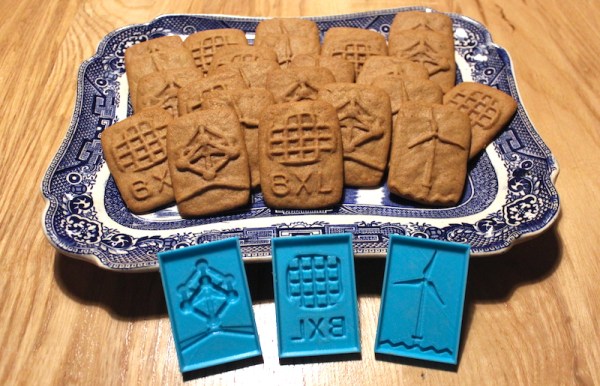
Experiencing nostalgia for the outstanding Belgian cuisine [Adam], currently stuck in Ohio, found himself in craving some home-made speculoos. For the uninitiated, speculoos is what those brown cookies usually served with coffee on planes dream of becoming one day.

To add some extra regional flavour, [Adam] decided to print his own molds featuring motifs from Brussels. The risks of 3D prints in the kitchen are the subject of a lively discussion. They are addressed in this project by recommending the use of food safe filament and sealant for the molds. The fact that the dough will be removed from the molds almost instantly and that the molds don’t go into the oven puts the risks in the vicinity of using plastic cutting boards in your kitchen.

[Adam]’s write up features solid, well illustrated baking instructions that should enable any of you to replicate this delicacy. Some links to additional references and two recipes are thrown in for good measure. The article finishes with detailed instructions for designing your own molds that take the properties of the medium into account, to ensure your custom motif will still be recognizable after baking. Line art with a stroke width of around 2-3 mm seems to work best. It is that time of year and we hope to see a lot more tricks to take your cookie and edible house designs to the next level so don’t forget to send in a tip.

With 3D printed molds having been used to shape resin, silicone and even metal, we are at a point where cookie dough looks like a natural progression.

Hackaday Links: December 3, 2011

Honey, would you like some cheese? WHIRRRRRRRRR

[The Timmy] broke his manual cheese grater. It would be a waste to throw away a perfectly functional tool that’s only missing a handle, so he kicked it up a notch with a cordless drill. Now [Tim], “can grate with incredible speed and power for even the toughest of cheeses.” Anyone have a broken pepper mill?

The most adorable oscilloscope

We’re not much for plugging products, but this scope is really cool. It’s designed to fit on a breadboard and is smaller than some ICs we’ve seen (68000, so yes, it is). We’re wondering why there hasn’t been a homebrew version of this yet.

Now do an R/C castle

Here’s a minifig-sized R/C LEGO car made by [brickmodder]. It has a custom drive train and steering mechanism that uses the smallest servos [brickmodder] could find. How about an R/C pirate ship next?

It’s probably an ad for something

Here’s some sort of code thing that asks the question, “Can you crack it?” Apparently, it’s for UK cryptanalyst recruiting. You won’t get a 00-designation, but woo Bletchley Park.

Inverting an inverter

[Manfred] is putting an alternative energy setup on his land. Of course he needed an inverter to charge his batteries, so he went with a highly regarded (high price) box. What he got was anything but. You’re going to need at least ten minutes to go through this hilariously sad teardown of a high quality Taiwanese inverter. Oh, [Manfred] is awesome. Just look at his microhydro plant.

Kitchen Hacks: Improving An Espresso Machine

The heat sensor in [Cameron]’s espresso machine doesn’t work very well. He sees some pretty crazy variations in temperature when pulling an espresso shot, and when the boiler is just sitting there the heater element will heat the water full-bore then shut off for a while. Since this is a pretty low bar from a control theory standpoint, [Cameron] decided on a PID makeover on his espresso machine.

Instead of going with a commercial PID controller like we’ve seen on a few kitchen hacks, [Cameron] decided to roll his own Arduino derivative based on an ATMega328 microcontroller. The newly designed board reads the state of the ‘Steam’ button, a few relays for controlling the heater and the pump, and of course an LCD display.

[Cameron] still has to do a little tweaking to get his PID algorithm down, but already the new control board keeps a much more stable temperature than the old thermostat. The fancy new bezel and LCD display adds a lot of techy class to his espresso machine, to boot.

Kitchen Hacks: Home Made Meat Smoker


[Matt] noticed an overabundance of sous vide builds in the past week, so he decided to throw his Home made meat smoker into the ring. There’s not many things more delicious than a nice cut of smoked meat, and the fact that it’s very similar to the sous vide hacks we’ve seen is an added bonus.

[Matt] decided to build a ceramic smoker like a Big Green Egg. He took a cue from [Alton Brown] and used two terracotta planters and a hot plate for the smoker. For controlling the hot plate, the cheap $35 PID controller we’ve seen in a few sous vide builds was used. The PID can’t control the 7 amps of AC that the hot plate needs, so [Matt] used a solid-state relay he had lying around.

A stainless steel mixing bowl was placed on the hot plate for wood chips. So far, [Matt] has run his smoker for more than 12 consecutive hours, and the results are really promising – there wasn’t much change in temperature between the chill of the morning and the heat of afternoon. [Matt]’s build is great and perfect for venison jerky now that deer season is coming up.

Ice On Your Turkey Makes It Tender, Apparently

Turkey day is fast approaching and for those of us not cool enough to be rocking the deep-fried turkey this year we’ll have to suffer though a potentially dry oven-roasted bird. Chef [Justin] came up with a great way to prevent dried out white meat on a turkey using ice of all things.

The enemy of moist and tender breast meat is heat. Cooking meat for too long will dry it out. There’s a problem, though: the breast is the thickest part of the bird which means it will take longer than the legs or thighs to reach the necessary 160 degrees. [Justin] figured that if he could cool down the breast with ice, it will take longer to cook and both the white and dark meat will come out perfectly.

[Justin] set up a test with two 15-pound birds. Both turkeys were allowed to come up to room temperature, then ice packs were put on the breast of one bird for 15 minutes. This lowered the temperature of the experimental breast by a few degrees. Both birds were then thrown into the oven.

After coming out of the oven, both birds looked great. The bird treated with ice packs appeared to be more tender and moist. Sounds like the perfect thing to pull out of our bag of tricks next week.