Never Pay More Than $10 For A Projector Mount

[Lou] needed to mount his projector to finish up his home theater. But he was rather put off by the cost of commercial solutions. He ended up building his own projector mount for about ten bucks. The technique reuses some scrap metal and sources connectors from the hardware store. If your projector will be mounted flat to the ceiling we think this will work just as well for you as it did for him.

To the left we get a good look at the two parts which make up the mounting bracket. [Lou] is reusing a metal warning sign. One large piece is attached to the back portion of the projector and hangs over the end about a half-inch. On the front there is a tab with a slot in it made out the same sign. The slot accepts the head of a three-inch drywall screw. There are two holes in the rear piece which also receive screws. Once the projector is in place the screws can be adjusted to achieve the proper projection angle. [Lou] does a full walk through of the project in the video after the break.

This goes perfectly with the $50 projection screen that he built.

Continue reading “Never Pay More Than $10 For A Projector Mount”

Garage Door Opener Used To Automatically Lower A Game Table Top

[Lou] is at it again, and this time he wrote in to let us know about his automated ping pong table topper. With no good spot to stash an entire extra table [Lou] decided to take a two in one game table approach and fit the top of the ping pong table to his pool table. A ping pong table top is no small thing though and it turns out the best (or maybe coolest) place to store it is above the ceiling! At the flip of a switch a garage door opener pulls away a section of ceiling tiles and a winch motor lowers the table top into place with two cables.

The system works very smoothly using some pretty easy to find parts. [Lou’s] instructional video (embedded after the break) shows the system in action and explains the concepts behind the automation. We aren’t sure how the winch stops lowering the table, but the ceiling section uses a light switch and spring combo as its limit switch. The only thing really missing is the flashing red light, industrial klaxon, and fog machine needed to compliment the screeching nightmare-howl of that winch motor.

Continue reading “Garage Door Opener Used To Automatically Lower A Game Table Top”

Building A Passive 3D Projection System In Your Attic

While the whole 3d movie/game craze seems to be ramping up, it really isn’t a new thing. We all recall those fancy red-blue glasses that were popular in theaters for a while, but I’m not talking about that. Passive 3d projection (using polarized glasses) has been around for a while too. Many people have figured out cheap ways to build these systems in their homes, but only recently have we seen media created for them in quantity.  Now that you can buy 3D games and movies at your local box store, the temptation to have a 3d system in your home is much higher.

Here’s a great read on how to put together a fairly simple projection system that uses two identical projectors with polarizing filters. Basically, all you need are two projectors, two filters, a screen, and the glasses. There are plenty of tips for mounting and setup in the thread to help alleviate any headaches you might encounter.

This system is primarily used with a PC, because it requires two video feeds to function. A cost breakdown might make you wonder why you wouldn’t just jump on amazon and get a 32″ 3d tv for under $400, but sitting in front of that giant screen might make you understand.

A Fifty-dollar Projection Screen You Can Be Proud Of

[Lou] wrote in to share the fifty-dollar projection screen he built in his home. We’ve seen several of these projects lately. Unlike the one used at a lake cabin, or the other that fills an awkward alcove, this version doesn’t use fabric for the screen. He actually painted it right on the wall.

The key to achieving a great end product is to make sure your wall is flat. [Lou’s] instructional video (embedded after the break) shows how to patch holes in the wall, and repair high spots. Before beginning the process he uses his projector’s grid feature to map out the portion of the wall that will be used as a viewing area (that’s the grid seen on the screen above). Once the area has been marked with masking tape and carefully repaired he paints it with bright white or silver paint. You might also consider a paint additive for better results. We’ve seen sand blasting beads used for this purpose.

A frame is added to the area to make it look like a proper screen. This is nothing more than molding covered in black fabric. [Lou] stretches the fabric around the molding, using duct tape to hold it in place until it can be stapled down.

Continue reading “A Fifty-dollar Projection Screen You Can Be Proud Of”

Wireless Stereo Add-on Turns On Receiver And Pipes In Some Music

[PC486] wanted to add Bluetooth to a simple shelf stereo system. But if you’re going to go wireless, why not develop an all-in-one solution. His adapter turns on the stereo and feeds it audio all from a smart phone.

This is his roommate’s hardware so cracking it open and grabbing an iron wasn’t really an option. He needed a way to control the system without any permanent alterations. Since the unit has IR remote control capabilities that’s the most obvious way to go. But the original remote is long gone so he had to hit the Internet. Luckily the remote control codes are in the LIRC repository. He grabbed a small microcontroller, an ATtiny25, and wired up an IR led to send commands to the unit.

Next he examined the Bluetooth audio receiver board he planned to used in the project. It’s got an LED that lights up when connected to another Bluetooth device. The microcontroller knows when to turn the stereo on and when to shut it off again by monitoring that LED with a pin interrupt. Check out the final results in the clip after the break.

Continue reading “Wireless Stereo Add-on Turns On Receiver And Pipes In Some Music”

Movie Night At The Lake Cabin

[Andrew’s] family has a rustic lake cabin. There is a lot to do during the day, but since there’s no electricity your options are limited when the sun goes down. Sure there’s the traditional campfire, but lately they’ve been spicing things up with an outdoor movie viewing.

To get this up and running they needed to build a projection screen. He’s going for a 2.35:1 aspect ration, but the technique will work for any aspect if you do your own math. They had a couple of extruded aluminum channels from an old chalk board which work perfectly as the top and bottom rails of the frame. With the width set at fourteen feet he just needed to mount the cross pieces on uprights at 5.95 feet apart. This provides a 183″ viewing surface.

White bed sheets serve as the screen material. After it’s stretched into place they line the rails with binder clips to hold it in place. The projector is powered from two 12V batteries via an 800W inverter. During the day the batteries get topped off by a solar panel system.

128-inch Silver Screen For Your Viewing Room

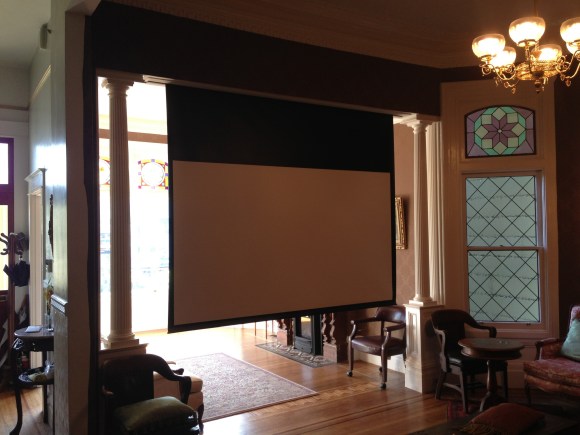
This huge projection screen fills an odd alcove in [Dodge Boy’s] screening room. He built it himself for under $200. The materials, tools, and techniques make this a possibility for anyone who wants their own projection setup.

The frame is made of pine 1×3 dimensional lumber. To keep the fabric from touching the supports in the center of the frame he added quarter-round trim to around the perimeter. From there he painted it black and went for a test-fit. The bad news is that the drywall is neither perfectly flat, nor parallel/square. He ended up taking the trim off and ripping down one side of the frame. That did the trick and he went on to stretch spandex over the whole thing. The frame hangs from a french cleat on either side of the opening. From what we can tell, the surface is just fabric and not painted as we usually see with these setups.

[Dodge Boy’s] utility room shares the back wall of the screening room. That’s where he stores the HTPC which feeds he project, with an RF remote to control it through the wall.

[via Reddit]