Ceiling clocks were a bit of a thing back in the days when clock radios were a fixture of nightstands. The idea was to project the time onto the ceiling so you’d only have to roll over onto your back and open your eyes to check the time, instead of potentially disturbing your slumber by craning your neck around to see the front of the clock.
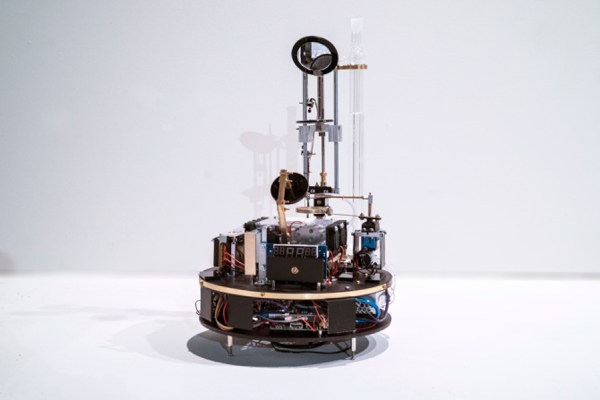
As we recall, what sounded like a good idea was iffy in practice, with low-end optics and either weak incandescent bulbs or blazing LEDs. This nifty VFD projection clock by [Thomas Shupfs] seeks to fix those problems, and from the look of it does a pretty good job. It takes advantage of something else that fell out of favor with consumers — analog photography — by tapping into the ready supply of unwanted lenses. He paired that up with an IVL2-7/5 vacuum fluorescent display inside a 3D printed case with a cone-shaped extension to hold the lens at the right distance above the display. [Thomas] says that the STM32 software only supports JSON-RPC over USB at this time, and includes a couple of Python programs with examples of how to set the time and check the accuracy of the clock.
[Thomas] compares the clock head-to-head against his old LED projection clock, as seen in the featured image above; we flipped it for a better idea of what it would look like from bed. We’ve got to say the soft blue glow of the VFD would be a lot more pleasant to wake up to than the bright red LED projection. But this soft white projection clock is nice too.
Thanks to [skymab] for the tip.