Wireless Thermostat

thermostat0104

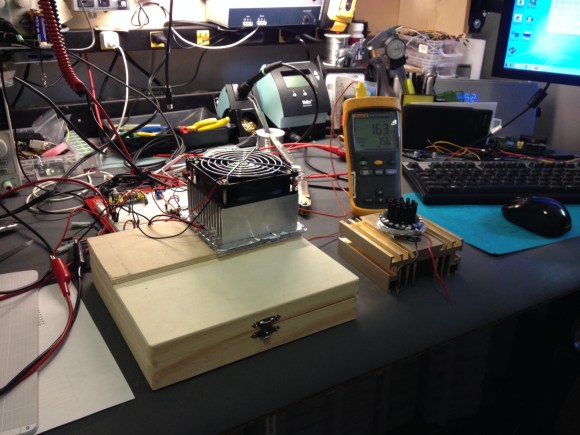
The thermostat in [Tom’s] 100-year-old house is two floors up from where the furnace is located, so a broken wire in the wall was just the catalyst needed to design a wireless thermostat.

The system is based on a customized PCB [Tom] designed called the Magic Mote. The board contains an MSP430 microcontroller, a low power NRF24l01+ wireless transceiver, and various sensor interfaces. The wireless thermostat project uses two of these boards; one monitors the temperature on the second floor and the other controls the furnace in the basement.

The temperature sensing is done using a DHT22/AM2303 temperature and humidity sensor, which is a convenient choice, since the part is calibrated and handles the analog digital conversion; you just need one digital pin to retrieve the temp/humidity data. To control the furnace, [Tom] used the local 24VAC and a latching relay to drive the heater signal. The 24VAC also powers the board, so a door-bell transformer steps the voltage down to something more usable; about 11VAC or so, which is then rectified, filtered, and regulated down to what the control electronics like to see (3.3V/5V).

This project is actually still in the early stages of what [Tom] has planned; a network of sensors and appliances with a beagle bone base station. We can’t wait to see what’s next for this project; maybe we’ll even see some voice control, like in this epic Siri controlled home automation project.

[via Dangerous Prototypes]

Recliner Sofa Given The Power Of The Pi

pi-sofa

If you go to buy a sofa these days you’ll not only be greeted with the option of one or more reclining positions, but a fully modern unit comes with motorized reclining. That simply wasn’t convenient enough for [Nicki] and [Kevin] who wanted to control the feature from a smartphone rather than a physical interface (buttons) on the side of the furniture. What resulted is the PiSofa, a Raspberry Pi connected to the furniture’s electronics with the help of a relay board.

This is most certainly a hack, but no doubt one with a lot of finesse. Check out that white PCB. That’s right, it’s a factory spun board to keep things nice and neat. They went with one of our favorite tricks by housing everything inside of a food storage container. After some Ruby coding the Pi now has complete control of the sofa. We’re not overstating this. It literally is the only way to control it because the original buttons no longer work. But that’s okay, turns out not only does it work with their smartphones, but with a [Kevin’s] Pebble watch as well.

We can’t think of any past hacks that specifically targeted the couch. But here’s a hammock that you can drive down the street.

Hacking A Heating Pad

HeatingPadBreadboardS

[Bob] and his wife use a bed heating pad. In the winter, they typically turn it on about an hour before bedtime so the bed is nice and warm. The problem is, if they accidentally leave it on, they’ll wake up a few hours later: overheated. What they needed was an advanced timer system.

A normal outlet timer wouldn’t fit his needs: most of the year the pad should shut off after a slight delay, but in the winter they prefer to leave the heating pad on at a much lower temperature. [Bob] decided to create a custom timer with a microcontroller to provide adjustable duration and heating levels.

The circuit is simple. It consists of a microcontroller, a 2-digit LED display, two buttons, and two wires that connect to the heating pad’s original controller. The final build allows you to set the time the pad turns on, turns off, and/or down a few levels. It’s a fantastic hack, and you can see how the interface works in the video following the break.

Continue reading “Hacking A Heating Pad”

A New Way To Heat People

[Leigh Christie] is a researcher at MIT, and he’s developed an interesting solution to heating people, not buildings.

His TEDx talk, “Heating Buildings is Stupid,” demonstrates the MIT SENSEable City Laboratory’s efforts to tackle energy issues. Their research focuses on finding an alternative to the staggering waste of energy used to heat large spaces. Although TED talk articles are a rarity at Hackaday, we think this idea is both simple and useful. Also, [Leigh] is the same guy who brought us the Mondo Spider a few years ago for the Burning Man exhibition. He’s a hacker.

Anyway, what is it? The system he’s devised is so simple that it’s brilliant: a person-tracking infrared heat spotlight. Using a Microsoft Kinect, the lamp follows you around and keeps the individual warm rather than the entire space. [Leigh] has grand plans for implementing what he calls “Local Heating” in large buildings to save on energy consumption, but smaller-scale implementations could prove equally beneficial for a big garage or a workshop. How much does your workspace cost to heat during the winter? Hackerspaces seem like the perfect test environment for a cobbled-together “Local Heating” system. If anyone builds one, we want to hear about it.

Check out the full TEDx talk after the break.

Continue reading “A New Way To Heat People”

Raspberry Pi Wall Calendar

Do you let Google know every aspect of your personal and social life? Do you have a spare LCD monitor kicking around? Why not make your own Raspberry Pi Wall Calendar?

[Alex] recently bought his first home (congratulations!), which happened to have a TV wall mount in the kitchen. Personally, we don’t think TVs belong in the kitchen, and neither did [Alex]. Not wanting to tear the mount out of the wall (and thus require home renovations too soon), he devised a clever solution: why not make a digital calendar?

[Alex] connected a Raspberry Pi model B to the LCD monitor, which provides convenient access to his Google Calendar. His Instructable is both meticulous and approachable, so novice hackers should have no trouble replicating this build. The only improvement we can think to suggest is substituting a touchscreen LCD, which would allow him to interact with the schedule.

Whether you “let” Google know about your life— or it just knows—this is certainly a handy hack for the 21st century home!

Digital Electric Meter Monitor Goes Old School

powerMeter

[Sal] sent us his digital electric meter monitor, which immediately made us nostalgic for some of Forrest Mims’ books. Sal’s schematic and circuit description are similar to Forrest’s style, and we mean that as a compliment. Even in today’s world of CAD and EDS packages, sketching out a circuit by hand is sometimes both easier and faster. The schematic isn’t the only classic aspect of [Sal’s] design. He’s collecting data using a parallel port on an unused PC: in this case, a Toshiba Libretto running Windows 95. Before cheap flash-based microcontrollers and dev boards were available, the PC parallel port was the go-to hardware hacking interface for many of us. Plenty of the software running those old hacks was written in basic, and [Sal’s] meter is no exception. His software runs on Microsoft QBasic, which shipped with Windows 95.

The circuit takes advantage of the digital meter’s output: a 10 ms pulse for every 1 Wh of energy used. An IR photo detector from RadioShack detects the meter pulses, which are amplified by an LM324 Op Amp. An NPN transistor then shifts the output to send it to two 74LS73 JK flip flops. The first flip flop uses a transistor to drive an LED for visual output. The second JK flip flop sends the data to the PC. The flip flop has the effect of dividing the number of meter pulses by two, creating a much longer toggled signal that a PC can better detect.

Although using an AVR or PIC would consume less power, [Sal’s] setup has already more than paid for its power usage. By monitoring and adapting his electrical usage, [Sal] is saving $20 a month on his electric bill. We’ve included [Sal’s] circuit diagram and source code after the break (apologies to our readers on RSS).

Continue reading “Digital Electric Meter Monitor Goes Old School”

Real Life Sonic Screwdriver For Home Automation

sonic

Any Doctor Who fans out there? [Pat] just sent us his project on home automation… using a Sonic Screwdriver!

Ever since he pre-ordered his Raspberry Pi at the beginning of February 2012, he knew he wanted to try his hand at home automation. The easy way was to use X10 outlets, but at $20+ an outlet, it’s not that affordable. Instead, he managed to find a rather cheap system on Amazon — RF controlled outlets. They only cost about $35 for a 5-pack!

It’s a very basic system: five outlets with five buttons on the remote. All he had to do was wire up the Raspberry Pi to simulate the button presses by setting the GPIO pins high, and presto, a simple but effective home automation setup.

This is where it starts to get fun. Unfortunately, unlike a real Time Lord, [Pat] didn’t build his sonic from scratch. Instead, he found a universal remote control — styled after [Smith]’s sonic. Add another RF receiver to the Pi, a web-based interface to extend the range, and bam, you’ve got one geeky, but awesome, home automation setup.

Stick around after the break to see it in action!

Continue reading “Real Life Sonic Screwdriver For Home Automation”