laptop_screen_polarized_art_fixture

Polarized Art Fixture Made From A Busted Laptop Screen

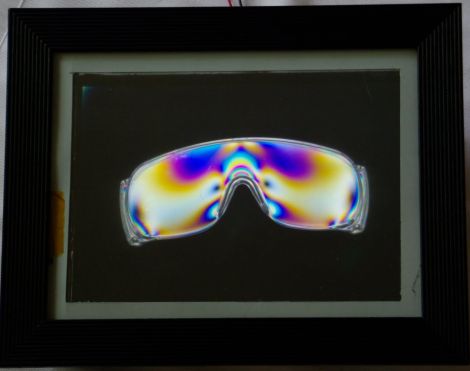
[Pedro] had a busted laptop LCD screen on his hands, but rather than throw it out, he brainstormed what he could possibly do with what would typically be considered a worthless item. He decided to make a simple art installation using the scrapped part, so he gathered a few other supplies and got to work.

The first thing he did was pull the LCD screen from the laptop, separating the front panel from the backlight panel. He drained the liquid crystal fluid from the display, and set it inside a picture frame in place of the glass. He added spacers around the edge of the frame so that the backlight could be mounted several inches behind the LCD panel.

[Pedro] then found a few polystyrene and polycarbonate plastic items from around the house, and placed them inside the frame. As you can see in the picture above, the polarizing filter built into the LCD screen makes for some pretty cool effects.

While you could debate for hours over exactly what is art, there’s no denying that his PolFrame looks cool and is a great way to save electronics from the scrap heap. We just want to know what he did with the LC fluid he drained from the screen!

Installing Linux On Old PC’s Part 2

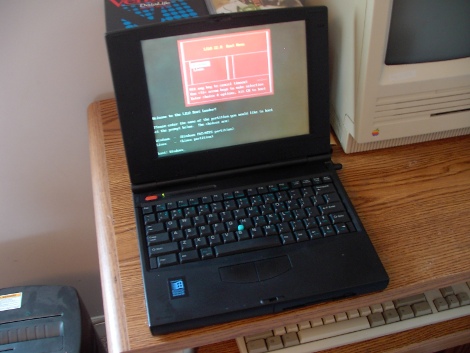
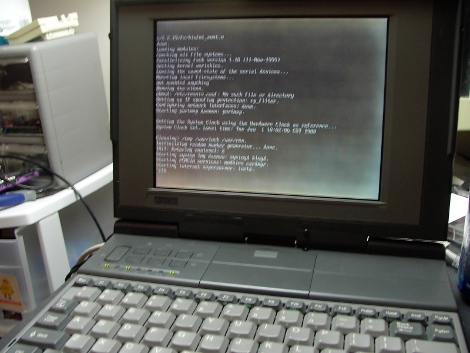
In part one I showed you that you could install a linux distro on a new computer and transplant it into a 386 computer in a short amount of time and with little effort. Now it is time to move on to bigger and beefier machines like 486’s, Pentiums and better.

I am going to break this quick tutorial down into sections based on installed RAM. While this won’t be a “how to” for all old PCs in the world I hope to at least send you in the right direction. I will mention a few distributions mainly for the super low ram machines. Its not my intent to start a distrubution war, and I have not personally sat down with every single one to make a educated assessment. However, you’re more than welcome to chime in.

Join us after the break and see what options you have for that old “boat anchor” sitting in the closet!

Continue reading “Installing Linux On Old PC’s Part 2”

Installing Linux On A 386 Laptop

The “cheap” and “easy” way in about an hour! A question that pop’s up from time to time is “I somehow ended up with an archaic old laptop / computer, can it run Linux?” Well of course it can, but that totally depends! On what? Well machine CPU, CPU speed, hard disk space, RAM and most importantly what you are expecting it to do.

Okay, why a Intel 386? Well number one I own a 386, but more importantly its the absolute bottom Intel CPU you can run Linux on. While it wont be able to do much, it will give you a basic system to kick around and “get to know” the insides of Linux without a million things installed and the worry of breaking it.

Unfortunately a 386 requires some special moves as the actual chip was dropped from almost all distributions long ago. All of the modern distributions I have looked at require at least a 486 CPU. This tutorial will be strictly for installing a basic bare bones Linux on a 386. Have a 486? Pentium? Faster? Never fear I will be covering that in a part II later this week.

Linux on a 386 in about an hour? Madness you might think, it probably takes Linux longer to boot on a 386 (and in some cases you are correct)! Want to know the trick? Simple, cheat!

Join me after the break for the parts and steps needed to get you started.

Continue reading “Installing Linux On A 386 Laptop”

Converting A Laptop Computer Into A Desktop Machine

[Michael Chen] found himself in possession of a thoroughly broken laptop. The hinges connecting the screen to the body of the computer were shot, and the battery was non-functional. After a bit of thinking he decided that it wouldn’t take much to resurrect the hardware by turning it into a desktop machine.

At the core of this hack is the hardware that you must keep for the computer to function. That is, the LCD screen, the motherboard, hard drive, and the AC/DC brick that powers it. [Michael] ditched everything else; the case, keyboard, trackpad, webcam, etc. Next he started building his own enclsure out of acrylic. First he sandwiched the LCD screen between a full sheet of acrylic and a bezel that was one inch wide on each side. Next, another full sheet was used to mount the motherboard and hard drive. You can see how the three sheets are connected by nuts and bolts in the image above. It looks like the only other alteration he made was to relocate the power button to a more convenient spot.

Once a USB keyboard and mouse are added he’s back up and running. We’ve got our eye on an old XP laptop that might end up seeing this conversion to become a dedicated shop computer. We just need to build in some more dust protection.

Laptop Touchpad-based LED Lighting Control

touchpad_lighting

[Dave] needed some extra light above his desk/workbench area and decided to wire up some RGB LED light strips to brighten the place up a bit. He wasn’t content with using a standard switch to toggle them on and off, and after some brainstorming, he decided to build a capacitive touch circuit using a pair of copper tubes mounted in a project box. Just as he was putting the finishing touches on his switch, he saw a project online where a Synaptics touchpad was used in conjunction with an Arduino for lighting control. The copper tube switch was pitched, and he got busy working with his Arduino.

When connected to an Arduino, the touchpads can be used in two modes – relative and absolute. Relative mode is familiar to most people because it is used to guide the mouse cursor around on a laptop’s screen. Absolute mode however, relays coordinate information back to the Arduino, allowing the user to map specific areas of the pad to specific functions. [Dave] enabled his touchpad to use absolute mode, and mapped a handful of different functions on the Arduino. He can now fade his lights on and off or light the room on a timer, as well as use a sliding function to tweak the LEDs’ brightness.

It’s a neat, yet simple hack and a great way to repurpose old laptop touchpads.

Continue reading for a quick demo video he put together, and swing by his site if you want to take a look at the source code he used to get this working.

Continue reading “Laptop Touchpad-based LED Lighting Control”

EeePC Touchscreen Retrofit

Adding touch screen capabilities to your computer is really not very expensive, but it’s a huge amount of work to get everything looking the way that it should. [Deadbird] wrote up a step-by-step guide that will help you install touch screen hardware and get your netbook put back together just like new.

The hardware comes in two parts. There’s the transparent film that covers the screen and the driver board that reads the inputs. The film itself has an adhesive layer on the back that sticks to the LCD panel. But to install it you first must remove the panel from the bezel. You’re also going to need a place to house the driver board. [Deadbird] somehow found enough room inside the case for the controller, but he had to remove the keyboard and motherboard to set it in place. This translates to a complete disassembly of your eeePC. But if you’re used to touch-sensitive devices, and have ever found yourself touching an LCD monitor and wondering why the computer is not following the link, this may be worth it to you. You can see the final product in a clip after the break.

Continue reading “EeePC Touchscreen Retrofit”

Laptop BIOS Password Recovery Using A Simple Dongle

laptop_bios_reset

In his line of work, Instructables user [Harrymatic] sees a lot of Toshiba laptops come across his desk, some of which are protected with a BIOS password. Typically, in order to make it past the BIOS lockout and get access to the computer,  he would have to open the laptop case and short the CMOS reset pins or pull the CMOS battery. The process is quite tedious, so he prefers to use a simpler method, a parallel loopback plug.

The plug itself is pretty easy to build. After soldering a handful of wires to the back of a standard male D-sub 25 connector in the arrangement shown in his tutorial, he was good to go. When a laptop is powered on with the plug inserted, the BIOS password is cleared, and the computer can be used as normal.

It should be said that he is only positive that this works with the specific Toshiba laptop models he lists in his writeup. It would be interesting to see this tried with other laptop brands to see if they respond in the same way.
Since no laptops are manufactured with parallel ports these days, do you have some tips or tricks for recovering laptop BIOS passwords? Be sure to share them with us in the comments.