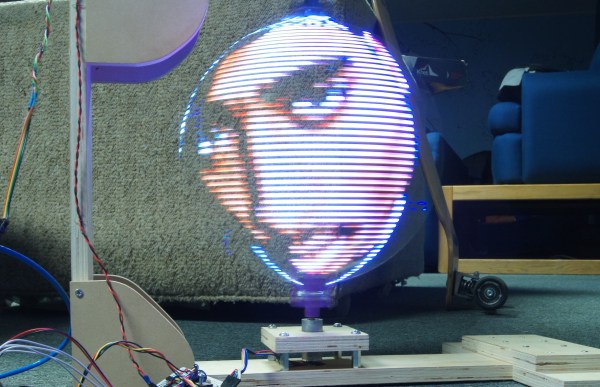
Persistence of vision projects were once all the rage, judging by a quick review of the literature here on Hackaday. They’ve tapered off a bit lately, but this impressive full-color globe display might just kick-start some new POV projects.
Built as a final project for an EE course, [Evan] and [Kyle]’s project is more about the control electronics and programming than the mechanical end of the build. Still, spinning a 12″ ring of 1/4″ thick acrylic with a strip of APA102 LEDs glued to the edge takes some thoughtful engineering. While the build appears sturdy, [Evan] does admit to a bit of wobble under full steam, which was addressed by adding some weight to the rig. We wonder if mounting half the LEDs on each side of the ring to balance the forces wouldn’t have worked better. True, it would have complicated the coding for the display, but maybe that would have been good for extra points. In any case, the display turned out well and the quality of the images is great. And as an aside: how awesome is it that we live at a time when you can order a six-circuit slip-ring for a project like this for less than $20?
It’s the end of the semester and we love seeing the final projects that have just made it across the finish line. This globe is one, yesterday we saw a voice-controlled digital eye exam, and if you have or know of a final project, don’t forget send us the link!
If POV globes are your thing, be sure to set the Hackaday WABAC machine a few years and check out this Death Star design from 2012 or this globe from 2010.
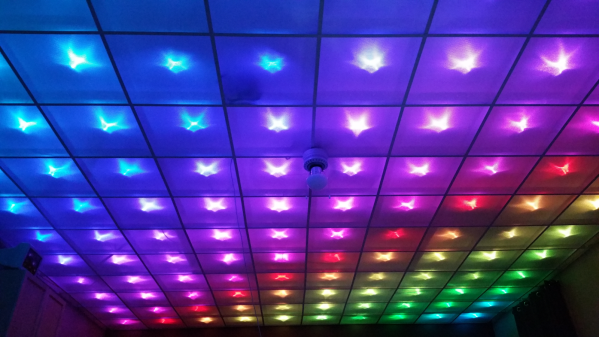
 Disco Floor’s are passé. [dennis1a4] turned them upside down and built an awesome
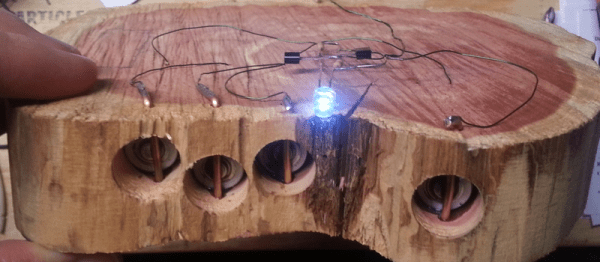
  The hard part was wiring up all of the 160 LED pixels. Instead of mounting the 5050 SMD LED’s on PCBs, [dennis1a4] wired them all up “dead bug” style. Each pixel has one LED, a 100nF decoupling capacitor, and 91 ohm resistors in series with the Data In and Data Out pins – these apparently help prevent ‘ringing’ on the data bus. Check the video for his radical soldering method. Each SMD LED was clamped in a machine shop vice, and the other three parts with their leads preformed were soldered directly to the LED pins.