Scratch-built Bottle Cap Coffee Table Pulses To The Music

scratch-build-bottlecap-coffe-table

This isn’t a thrift-store coffee table modified as a craft project. [Dandujmich] built it from the ground-up using framing lumber, bottle caps, plastic resin, and some electronics for bling.

The first step was to see if he had enough caps on hand for the project. It’s hard to grasp how many were used just by looking at it, but the gallery description tells us there’s about 1700 which went into the design! From there he grabbed some 2x4s and began construction. The table legs started with two end assemblies built by doweling the legs to the end cross pieces. From there he cut a rabbit on the side rails and screwed them to the leg assemblies from the inside.

The tabletop includes a frame with a recessed area deep enough to keep the caps below the surface. After spending about ten hours super gluing all of the caps in place he mixed and poured two gallons of the resin to arrive at a glass-like finish. The final touch is some custom hardware which pulses two rows of embedded LEDs to music being played in the room. The video after the break isn’t fantastic, but it gives you some idea of how that light rig works.

Continue reading “Scratch-built Bottle Cap Coffee Table Pulses To The Music”

Building Huge Displays With LED Strips

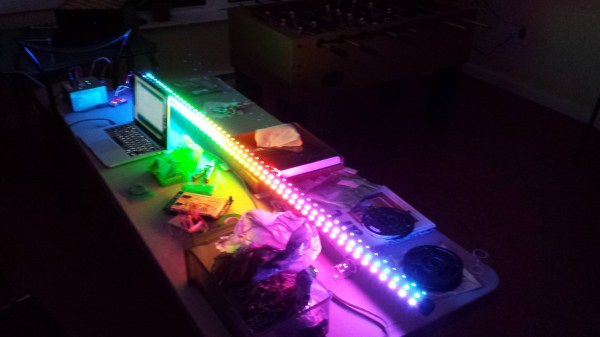
Building RGB LED displays is one of the most interesting programming and engineering challenges we see here on Hackaday. Not only do the creators of large displays and LED cubes have to deal with the power requirements of driving a whole bunch of LEDs, but there’s also the issue of getting the frame rate high enough to display video. It’s a non-trivial task, but [Paul Stoffregen] has an interesting solution. He wrote an LED strip library that can control eight meter-long LED strips that can also be used on daisy chained Teensy 3.0 microcontrollers for really large displays.

[Paul]’s LED library works with LED strips based on the WS2811 LED controller IC. These chips are the most common controller chips for the individually controllable LED strips you can find at Adafruit or hundreds of Chinese resellers. The library requires DMA transfer to display images, so if you’re looking to build a ginormous RGB LED display, you might want to pick up a few of [Paul]’s Teensy 3.0 boards

[Paul] also created a Processing app that takes a video file and turns it into serial data for his LED strip library. You can check out a video of this app, library, and a 60×32 RGB LED display after the break.

Continue reading “Building Huge Displays With LED Strips”

LED Marquee Uses Discrete Through-hole Lights

through-hole-led-marquee

[Michael] built his own LED marquee using individual diodes. Despite his choice to forego the 8×8 or 5×7 modules we often see in these projects, his decision to spin a dedicated PCB saved him a lot of trouble during assembly. Sure, he still had to solder 180 leads on the 9×18 grid of lights, but at least he didn’t have to deal with wiring up the complex display layout.

The chip driving the display is an ATtiny24. You can see that it’s an SMD package and spans one row of the through hole LED footprint. There are way too few pins to drive a multiplexed display of this size. Instead of adding a separate driver IC he decided to design the display to use Charlieplexing. We didn’t see a schematic for the project, but judging from the board images all of the I/O pins are used by either the display itself, or the serial connection provided by that right angle pin header.

Diamond Ore Wall Lamp Brings Minecraft Into Your Home

diamond-ore-lamp

We were surprised to see all of the Christmas gifts that revolved around Minecraft. Seems like there’s a lot of stuff for sale, but we still like the DIY spirit that comes with making your own. [Thacrudd] recently finished this project. It’s a wall lamp that looks like Minecraft’s diamond ore.

The enclosure is a wood box that used to contain chocolates. After studying the pixel art texture for the game’s diamond ore blocks he marked out the pattern and headed over to the scroll to rough them out before finishing with files and a rasp. Next came paint, which was sourced as a sample from the home store. This left him with one shade of gray, but the variations were easy to add by mixing it with white or black.

A strip of white LEDs gives the lamp its inner glow. The openings have been covered with blue acrylic which keep the dust out while providing the appropriate hue.

[via Reddit]

A Beautiful Game Of Lights Out

lightsout

About a year ago, [Anthony] decided to embark on his biggest project to date. He wanted something with a ton of LEDs, so when the idea of recreating the classic electronic Lights Out game came to mind, he knew he had the makings of a killer project. The finished Lights Out arcade box is a wonderful piece of work with sixteen 17-segment displays and just as many LED illuminated arcade buttons.

By far the most impressive feature of [Anthony]’s project are the two rows of 17-segment displays. These are controlled by two MAX6954 LED display drivers on a beautiful wire wrapped board. The 16 buttons for the game are translucent arcade buttons that compliment the RGB LED strip very nicely.

A great display and a whole bunch of LEDs don’t make a game, though. [Anthony] came across this article on JSTOR that told him how to create new 4×4 games of Lights Out and solve them algorithmically to get the total number of moves required to solve the puzzle. As you can see in this video, it’s a little hard to solve the puzzle in the minimum amount of moves. Still, we have to commend [Anthony] for a great project.

Making A QR Clock Bigger, Cheaper, And Better

With the massive response and blog cred from his QR Code clock, [ch00f] felt it was time to step up his game and update his design to a proper commercial product. His new QR clock is bigger, brighter, cheaper, and in every way better than the old version, but these improvements came at a cost.

The LED matrices [ch00f] used in his earlier, smaller version weren’t very aesthetically pleasing. He wanted the lights to shine a brilliant white, and also be somewhat attractive when not illuminated. The 8×8 LED arrays [ch00f] picked up from Futurlec had a disgusting yellow coating on each LED that turned light emitted by the blue LEDs inside to a brilliant white. This simply wouldn’t do for a commercial product with [ch00f]’s name on it, so he turned to the one place in the universe where everything was for sale: alibaba.com.

After some trials and tribulations with component manufacturers in China, [ch00f] had the perfect LED matrix; not too expensive, very good quality control, and something that looked really good when both unpowered and illuminated.

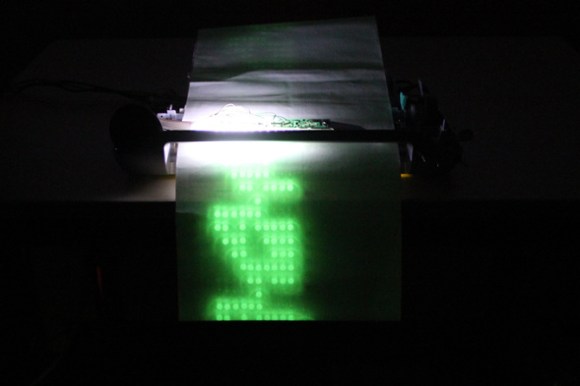
Now that his boards are being spun up, [ch00f] hopes to sell his QR clock on Tindie. Each 24×24 LED matrix should cost less than $100, a pretty good deal if you ask us. He’d like to know if anyone out there has any feature requests, to which we can only say he should get rid of the PCB border. Tiling a few of these displays and controlling them via serial would be much cooler than a QR Code clock.

Wall-wart Retrofitted With A High-power LED Supply Circuit

high-power-LED-wall-wart-supply

This custom circuit board picks up some of the pieces from a wall wart to drive a high-power LED.  The basic concept is to keep the high-voltage components and swap out the low voltage ones for parts that will be able to drive the 10W load.

The PCB is custom designed, but you can see that it was shaped to match the wall wort’s original board. To the right is the original 500mA transformer. The low-voltage side uses an LM393 because of its dual-comparators. This provides feedback for both current and voltage and is a perfect compliment for the TOP242. We haven’t seen that part before, but [Mincior] says that it’s nice for this application as it has safety features that lock down the chip if power or temperature are above spec. Once the replacement is nestled inside of the plastic case it looks stock and makes sure that your custom LED fixtures will stand the test of time safely.