RGB “Tilty Cube”

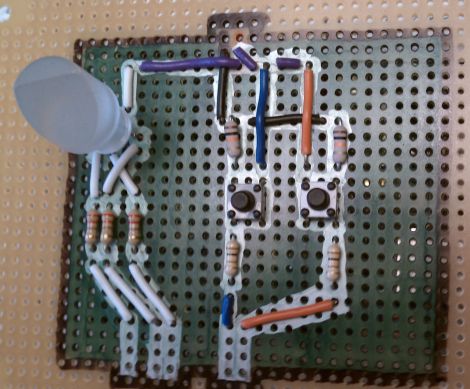
[Ben’s] introduction to microcontrollers was this fun little gift he calls the “tilty cube”. It is an acrylic box with 3 LEDs mounted inside that changes color based off of how you tilt it. Sounds like a fun toy, and a good project to learn with. [Ben] chose the PIC12F615 as the brains and laid it all out on a perfboard.  Since this was his first microcontroller experience he had to learn how to blink the LEDs, then figure out PWM etc. Though there is no video of the project in its finished state, since it was given away as a gift, we assume he figured it out pretty well.  He does state that the LEDs are dimmer than he had hoped and offers some thoughts on how he would do the entire project better next time.

Backlit Buttons And Panels

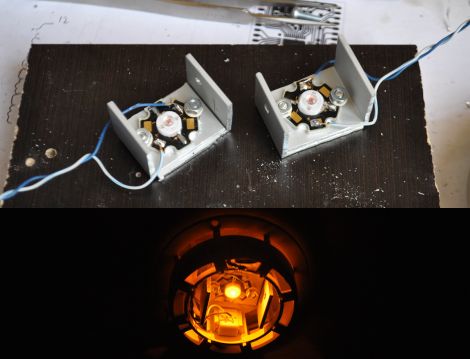
“Kick the tyres & light the fires” is a blog by [Ruscool Electronics] that is focused on building a cockpit simulator from scratch, and while the blog is loaded with all sorts of nifty information, reader [Brian] pointed out one entry which explains how to make back-lit control panels out of acrylic sheet, and a CNC machine.

The parts start off as clear acrylic, and cut to shape and size. Next up is a thick, but uniform coat of paint so the panels are opaque , then its back off into the CNC machine for engraving. What is engraved is now a frosty white, ready for leds behind.

The end result looks fantastic and professional, though, we are left thinking of how to pull off the same look, sans CNC.

Ideas?

Daft Punk Module – Just Add Table

This is just an 8×8 LED matrix, but the size and execution make it look marvelous. [Michu] built this module using foam board dividers to separate the cells, a foam board back to host the 64 RGB LEDs, and a sheet of heavy frost diffusion gel that is a stage lighting product. The display is driven by a Rainbowduino with input from a processing sketch. The effects seen in the video after the break are quite pleasing, and are just begging to be installed in your next coffee table project.

Continue reading “Daft Punk Module – Just Add Table”

Pong Clocks Using LED Matrix Modules

We love Pong clocks because they’re showpieces. This particular offering, called the Wise Clock, is the third hardware revision of the project. The LED display is dead simple since they’re using a 32×16 bi-color module from Sure Electronics. If you don’t want to design and build your own multiplexing display this is a somewhat inexpensive and high-performance alternative.

After the break you can see that the paddle movements look very realistic. They move like a human player might, which is quite often not the case with these clocks. If you want to see how that’s done, check out the code which was originally developed by [123led] for a different project.

Continue reading “Pong Clocks Using LED Matrix Modules”

Animating An LED Matrix Without A Microcontroller

[Konstantin] had some extra 27C256 EPROMS lying around and decided to use them to animate an 8×8 LED matrix. He’s not only using them to store data, but driving the display with them as well. The chip holds 32 kilobytes of data which equates to 4096 frames of animation. A 32 kHz clock circuit works with some ripple counters to scroll through each byte of stored data, turning on the columns while sinking the proper row. Of course current protection is a must so there is a ULN2308A darlington driver and some 2N2907 transistors at work, but you won’t find a programmable microcontroller. Neat!

Yep, you read that right. The picture above shows an EPROM chip that requires a UV light source to erase the data.

[Thanks Kopfkopfkopfaffe]

Upvote/Downvote Cards

Next time you throw together a talent show consider using these cards for up and down voting. [Frits Rincker] came up with the idea over the weekend based on the like and dislike buttons of Facebook. They consist of some foam board with LEDs in the outline of a hand. He built a switch which completes he blue circuit for the thumb’s up and a red circuit for thumb’s down by using a weight that slides freely in a channel, with a reed switch at either end. We’ve embedded the video after the break for you enjoyment.

Oh, and in case you were wondering; Hackaday likes this.

Continue reading “Upvote/Downvote Cards”

Chroma – Mesmerizing LED Driven Fractal Display

chroma in action

A big fan of generative art, [Andrew Magill] wanted to build an LED display for his wall that constantly displayed images from the Electric Sheep project.  After discounting the possibility of generating these fractals on the fly, he settled on using prerecorded video clips gathered over a year’s time by Electric Sheep users.  With thousands of video clips in hand, he wrote some custom software that enabled him to sequence these 5-second video clips into just over 6 hours of video, which he later downsampled to fit his 24×16 pixel display.

Now that he had some impressive video put together, [Andrew] began designing the LED panels he would use to show off his creation.  After choosing TI TLC5947 drivers to control the LED arrays, he got to work on designing the PCBs, soldering in all of the components, and testing the displays.  Initial testing completed, he wrote some more custom software to direct the individual LED boards from a master controller, and mounted everything in a frosted-glass adorned picture frame.

Be sure to check out mesmerizing video of Chroma in action after the break.

Continue reading “Chroma – Mesmerizing LED Driven Fractal Display”