Sometimes art pushes boundaries. We’ve covered a lot of tech art that blurs the lines between the craft of engineering and high-concept art theory. Praydio, by [Niklas Roy] and [Kati Hyyppä] leans easy on the tech, but pushes against viewers’ religious sensibilities.
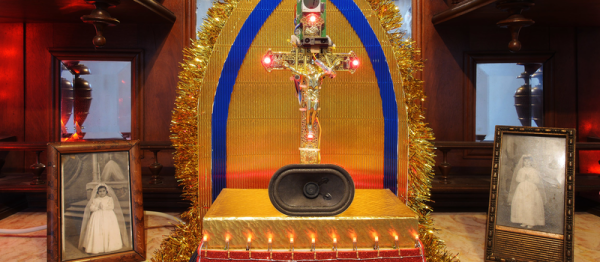
Playing with the idea of talking directly to God, and with the use of altars as a focal point to do so, [Niklas] and [Kati] took the extremely literal route: embedding a CB radio into a dollar-store shrine. The result? If you’re lucky, someone will answer your prayers, although we’re not too hopeful that the intervention will be divine.
The art critic in us would say that this is a radical democratization of religious authority in that anyone who is tuned in can play the role of Jesus. Or maybe we’d say something about the perception of religious significance in the seemingly random events of our everyday life — maybe it’s not just chance that someone is tuning in at the time you’re asking for help?
Honestly, though, we think they’re just having a bit of fun. The video (below the break) shows someone asking Jesus for a coffee, and the artist on the other end laughs and fetches him one. It’s not high-tech, and it’s not even amateur radio the way we usually think of it, but something about the piece made us laugh, and then to think for a bit. Even if this art isn’t your style, check out [Niklas’] website — he’s got tons of fun projects written up, a few of which we’ve covered here before.