After reading about an initiative between NASA and Boeing to develop lights for the International Space Station [Rasathus] decided to give it a go at building his own. The project uses RGB pixels to build a circadian rhythm light installation. Without the normal rise and fall of the sun the sleep wake schedule for the astronauts can be pretty rough. This uses color and intensity of light in a well-defined schedule to help alleviate that. [Rasathus] is trying to bring his project in well under the $11.1 million mark which was established for the ISS.
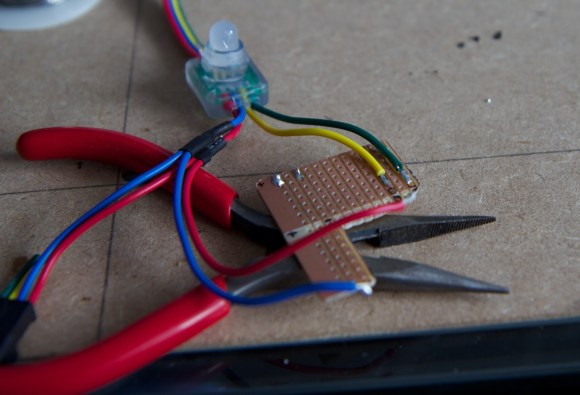
The light modules he’s using are from a strand of LEDs from Adafruit. Each is driven by a WS2801 controller, a common driver used for easy and complicated projects like this huge ball of light which our own [Jesse Congdon] tackled. The board above is the start of an adapter board for interfacing with the Raspberry Pi GPIO header. [Rasathus] wanted to make certain he didn’t fry the control electronics so he built some protection into this adapter. The control software is covered in the second portion of the write up. We’ve embedded the video from that post after the break.